“People always talk about the look of a film, they don’t talk so much about the sound of a film. But it’s equally important. Sometimes more important.” This is a quote from the late David Lynch from the 2019 documentary Making Waves, and its message often falls on deaf ears (pun intended) with new filmmakers. But audio can truly make or break a video. Harsh or inaudible audio creates cognitive distance, which makes viewers swipe away or stop watching.
In this article, we’ll break down 5 key audio editing techniques to help you achieve clean, professional sound and keep your viewers engaged. I’ll also walk you through an audio workflow that every editor should follow at a minimum, and my recommendations for audio editing software.
5 audio editing tips
1. Know how and when to use room tone
Every space, every room, and exterior locations have a unique ambient sound. This ambient sound is determined by the location’s dimensions, the objects inside it, electrical interference, wind, building materials, and much more.
Take a moment and close your eyes. If you listen to the silence around you, you’ll notice it isn’t truly silent. There are still small ambient noises, even if barely audible, that make up the present moment. Maybe there’s a fan or AC unit running in the background, or you hear the humming of a fridge.
That ambient noise is called room tone. Oftentimes, when your audio sounds slightly off, room tone is the secret missing ingredient from your edits.
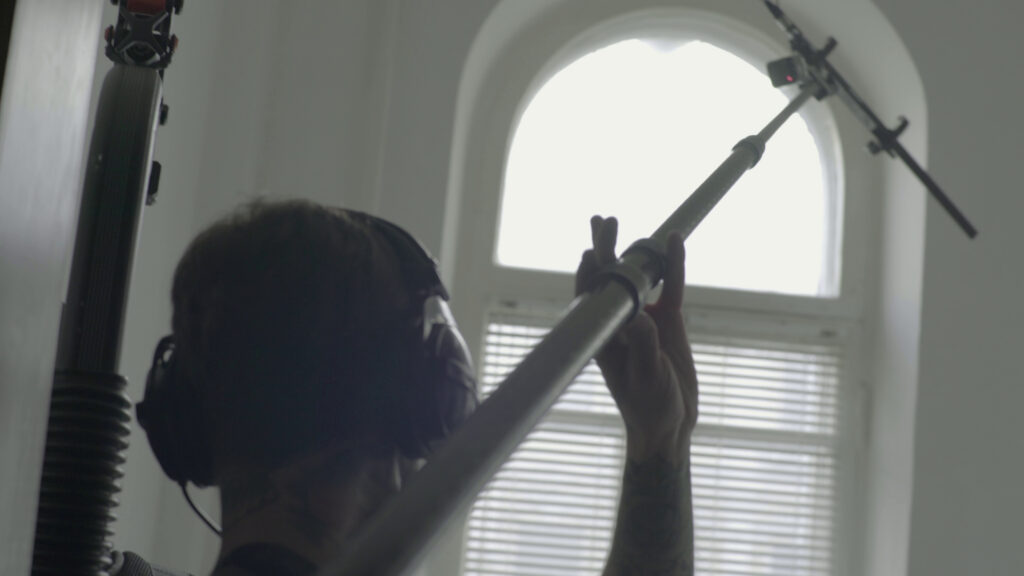
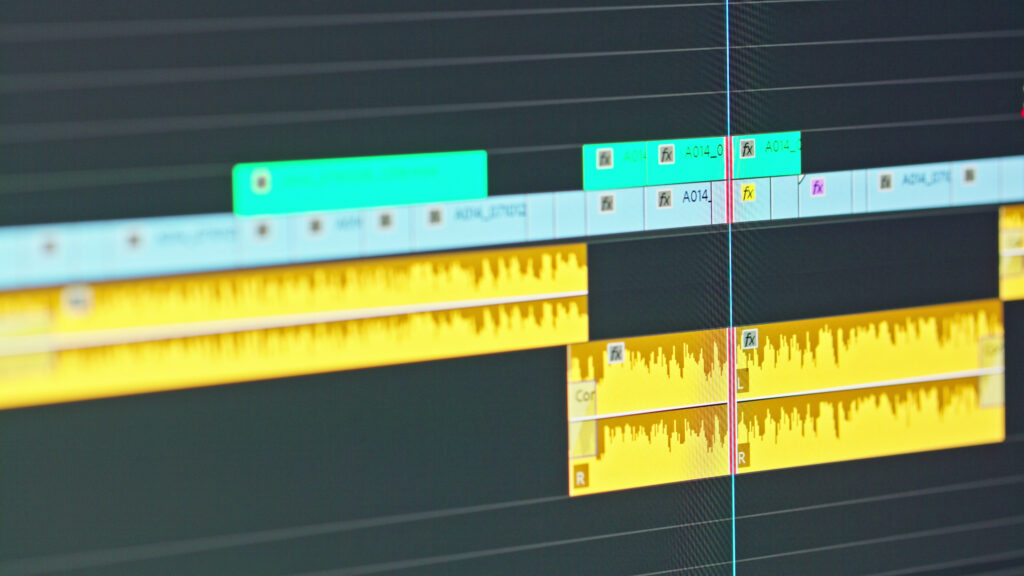
If you’ve been recording audio and there are pauses between two actors, you don’t want complete silence on your editing timeline. That will sound unnatural, as it’s rare you’re ever in an environment with genuine silence. Instead, this is the perfect spot to add in room tone.
Beyond its use in dialogue, room tone proves valuable in recording sound effects and Foley. Room tone can serve as a noise profile, helping eliminate unwanted background noise during editing. Noise profiles operate as a reference for the editing software to identify and remove undesirable elements such as traffic or electrical humming.
It’s a best practice for filmmakers to capture some room tone before moving on to a different setup or sequence. Then, in post, you can use a designated room tone audio track to fill the gap between quieter moments. However, ensure your room tone recording isn’t too loud, as noise will creep into your edit; more on that shortly.
2. Set proper audio levels
If you film a clip of a tennis player with their back to the sun, and you don’t have a neutral density filter, there’s a good chance that there’s going to be a good number of blown highlights. And no amount of post-production color grading is going to fix that.
The same goes for audio levels; while there is a set dB you want to use for different audio tracks, you also want to ensure that it’s captured correctly.
- On-set dialogue: Record between –16dB and –12dB, with peaks ideally below –6dB (have actors deliver their loudest lines to check levels).
- ADR: Keep between –16dB and –12dB, peaking around –6dB.
- Foley: Record between –12dB and –6dB; aim closer to –6dB in controlled spaces, or –12dB to –10dB if heavy editing is planned.
- Ambience (quiet environments): Natural level may sit between –50dB and –20dB; avoid boosting to –12dB to –10dB as this can introduce mic self-noise.
- Ambience (noisy environments): Peaks can reach –6dB, but monitor carefully for unexpected loud sounds.
The general rule of thumb is that audio signals should sit between -24 dB and -12 dB. This provides ample headroom for post-production editing and sudden peaks. While we often think of 0 as a baseline value, 0 dB is actually where you don’t want your audio to be, because it can run the risk of becoming distorted.
Recommended audio dB levels
Below are some recommended levels to aim for when recording audio, setting a solid baseline for editing. Then, during the mix, after setting up your designated tracks, you should aim for these recommended levels for where your audio sits. This ensures that throughout your edit, the dialogue is clear, the music isn’t too loud, and the sound effects support the overall mix.
- Overall: -10 dB to -14 dB
- Dialogue: -12 dB to -15 dB
- Music: -18 dB to -22 dB
- Sound effects and foley: -10 dB to -20 dB
This allows you to boost levels, compress, or EQ the audio while avoiding clipping. So setting the right levels is key. It’s often suggested to be slightly quieter at first than too loud, because once you add in your sound effects and everything else, you can adjust accordingly. If you’re already exceeding -6 dB, it can make the process more difficult, as you won’t have much headroom to work with.
So it’s generally best to stick between -12 and -6, if not quieter, although it ultimately depends on the type of project you’re working on.
3. Use EQ to create space in your mix
Equalization, also displayed as EQ, is somewhat similar to colour grading with editing. It’s an enhancement and shaping process that refines the base media – in this case, the audio.
It’s a process that will allow you to manipulate frequencies to shape sound signals. Its usefulness lies in its ability to specifically address low-end rumble and harsh frequencies in your dialogue audio. Again, like being able to manipulate the shadows and highlights in your picture. You can also use EQ to control sibilance, helping the voice sound clearer and more natural overall.
Typically, the regions are categorized as low-end, low-mids, mids, high-mids, and high-end. EQs have specific filters that can either decrease or boost frequency regions. For example, applying a High Pass Filter around 80Hz can effectively handle low-end rumble, and a Low Pass Filter around 12kHz can tame harsh, unnecessary high-end frequencies.
The EQ frequency spectrum
Generally, the EQ frequency spectrum will show several filter dots, each placed in a different frequency region. These include the following:
- Low-End (20Hz – 250Hz)
- Low-Mids (250Hz – 500Hz)
- Mids (500Hz – 2kHz)
- High-Mids (2kHz – 4kHz)
- High-End (4kHz and beyond)
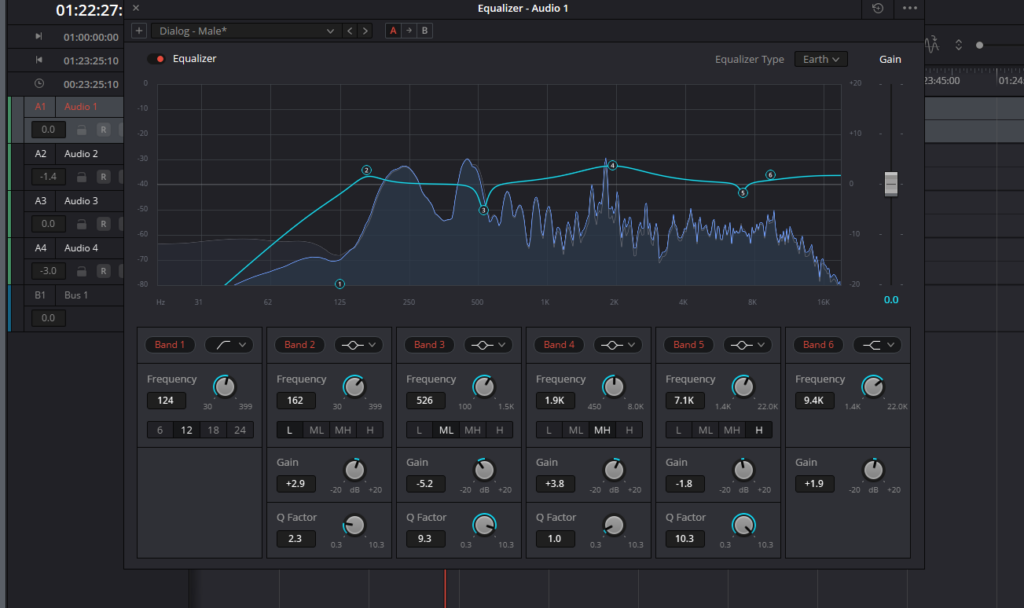
Like applying too much color grading, it’s crucial not to overdo EQ, as it can alter the voice’s natural tone. Trusting your ears and avoiding excessive reliance on visual graphs is key. While EQ improves dialogue, recording in a controlled environment is essential, as excessive noise reduction can alter the natural tone of the voice.
Though if you find that your dialogue is beyond saving, using a tool like Storyblocks AI Voiceover can help in a pinch. With the clone my voice feature, you can upload a snippet of dialogue and the tool will re-create the voice. Then from there, you can type in the line of dialogue you need and generate a new, clean audio in the same voice.
Audio mixing is a specialized creative role across both video and music, and it requires a great deal of skill to master. Reading a few paragraphs on the basics is like reading the introduction manual to riding a motorbike. Therefore, follow a few breakdown videos from audio experts on YouTube.
Below is a nine hour long (yes, nine hours) YouTube course from Mastering.com on the entire EQ process. That gives you a good idea of how intensive (and important) getting EQ right is.
4. Isolate and remove noise
Let’s run back to tip one, where we talked about room tone. Too much room tone in your dialogue recording turns into noise, which is a detrimental element in audio recording.
You can often get away with a visual slip-up. After all, how often do we notice the cameraman standing in view of a shot until it’s pointed out in a comment? But when it comes to sound, you can’t really afford slip-ups.
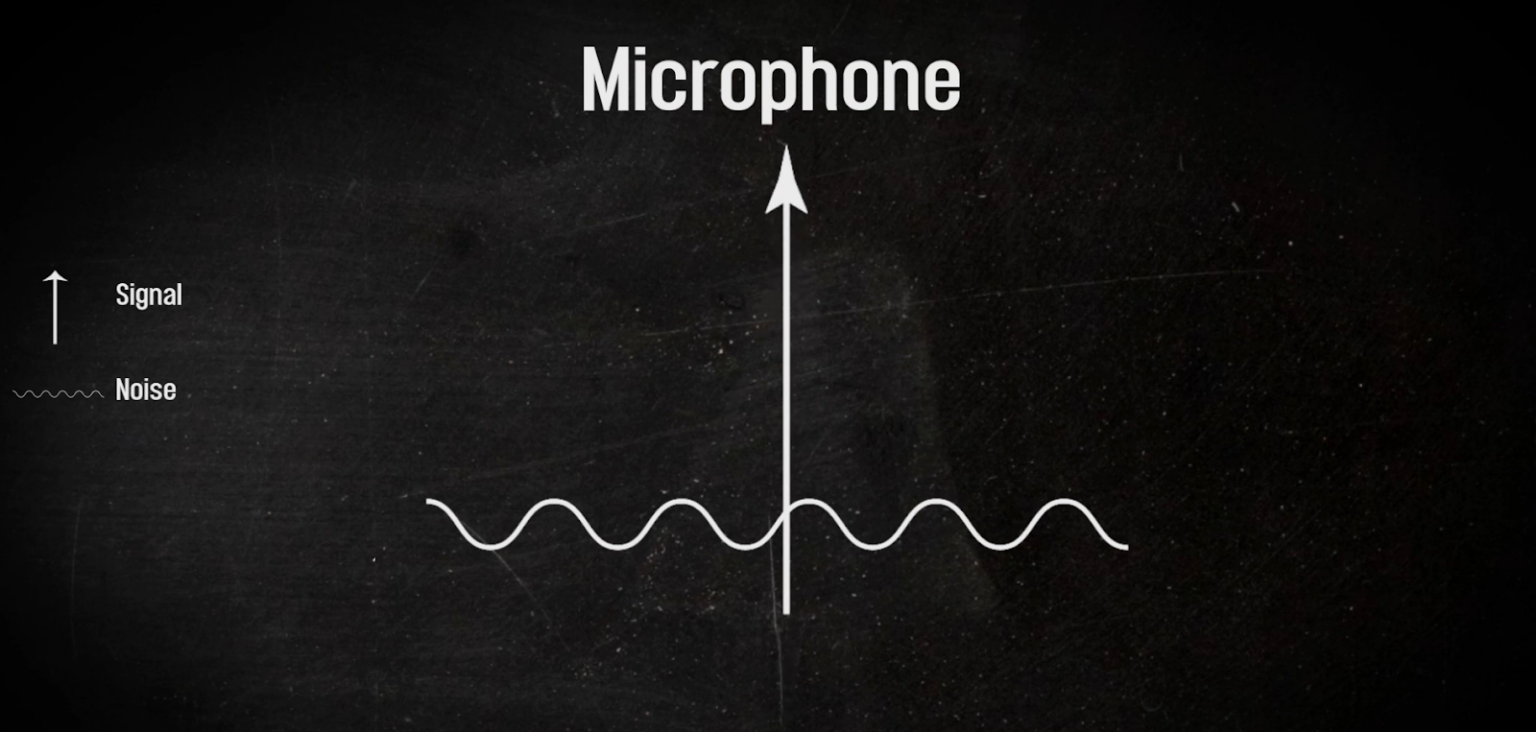
Noise is introduced when the signal-to-noise ratio isn’t strong. That essentially means the signal, or the dialogue in this case, is being overpowered by ambient noise, which can simply be excessive room tone.
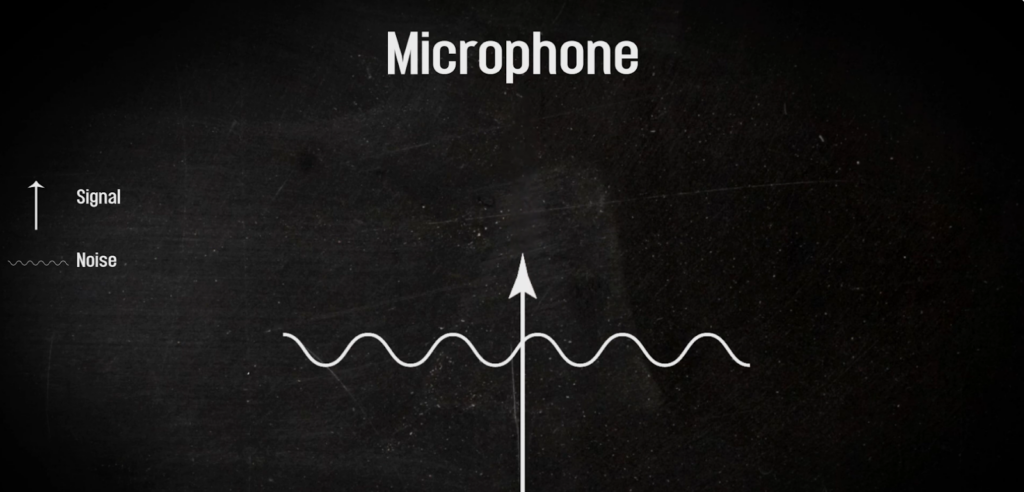
Most of the time, this issue is due to mic position. Which is why it’s essential to get the mic as close as possible to the sound source. When the mic is closer, the signal is stronger, which reduces the noise floor.
It can also be down to the recording device not having a strong preamp, which would otherwise help push the noise floor down and increase the signal range. Sometimes, though, it can’t be helped, and you end up with a noisy audio take.
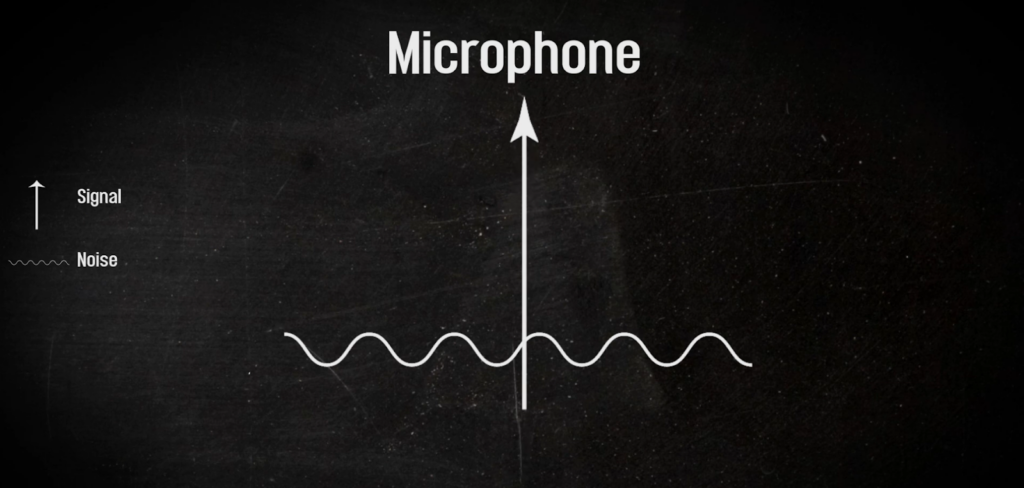
Noise can also come to light in post-production processing. Editing tools such as EQ and Compression are necessary to sculpt, add clarity, and body to the sound. When using them, you may need to increase gain with frequency boosts or add make-up gain in the compressor, which can increase noise in your recordings. If you do need to boost specific areas in the frequency range, ensure you don’t boost too much to avoid introducing noise.
Sometimes, it’s inevitable that you pull noise into your audio. Thankfully, there are plenty of tools available to eliminate noise today. One of the most effective is DaVinci Resolve’s AI Voice Isolator. This isolates the voice in a given audio clip, leaving the main signal intact. However, it can come at the cost of losing some crispness if the noise is too severe.
In the video below, I outline just how much the tool can be pushed.
5. Leave breathing room
An attribute of audio editing that many people don’t consider is that the breathing room of the audio needs to be audible to the viewer. What do I mean by that? Well, in terms of mixing and audio, there are only so many frequencies that can fit in a given space before the sound becomes mushy.
When you hear audio critics talk about an album, they might reference the lack of clarity between instruments and vocals. What they’re really talking about is how dense the frequencies are, which doesn’t allow for each instrument to breathe. The same can apply to audio in video editing.
And it’s not necessarily just frequency layers we’re talking about, but layers of the audio tracks themselves.
If you watch this action sequence from Star Wars, you’ll notice that on screen, we don’t actually hear everything you would expect. In this instance, at 30 seconds, there are at least 7-8 ships in the scene, but how many can you hear? Only one or two. You would expect to hear more of the destruction in the background, a barrage of lasers, the ships flying past, the thrusters, and so forth.
But instead, we have a highlighted group of audio elements that are used because the rest take up too much audible space. Keep this in mind when you’re editing your audio!
Essential audio editing workflow for video editors
So what steps would we take when first bringing your audio into your NLE? While every editor has their own way of tackling the audio workflow, I’ve outlined 7 essential steps to follow below.
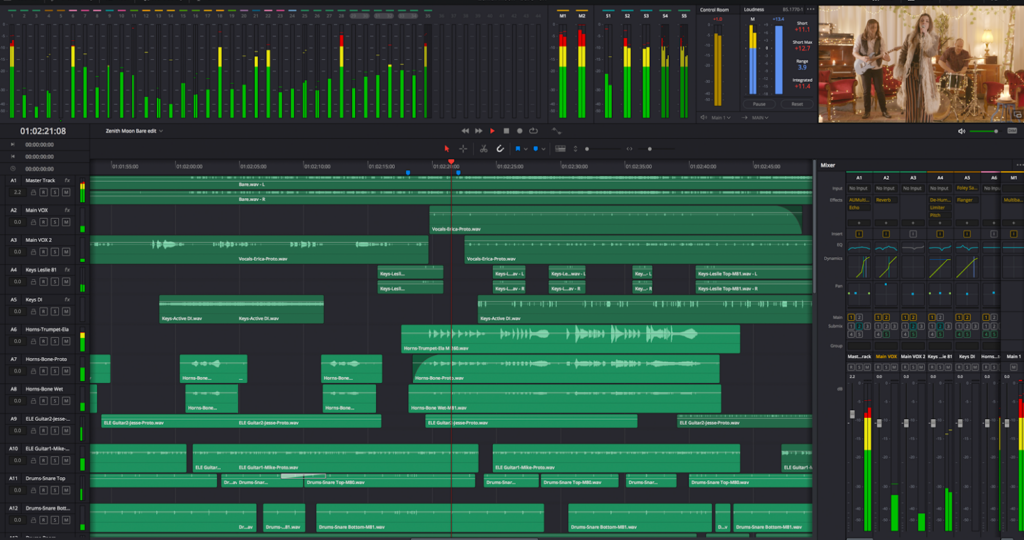
Image via Blackmagic Design
1. Organize and label tracks
Organize your sound library with dedicated folders for dialogue, sound effects, and background music. Ensure they are in the right place and visible in your software’s sidebar to make the editing process smoother and files easier to locate.
2. Clean dialogue
Next, trim or crop out any outtakes to create one clean pass of the dialogue. This provides the final dialogue you need before adding audio effects. If you’re using AI tools to clean sound, be cautious of doing too heavy an application to avoid distorting the audio quality.
3. Add sound design
Now, let’s talk about sound design. This is where you can add sound effects, such as opening doors or rustling leaves, to fill out the soundscape. Use the stereo image by panning sounds; for example, automate a car’s sound to move from the left to the right channel to match the visual.
4. Add music
Next up is adding music. While music isn’t always needed, it can enhance the visuals of your project and create an atmosphere. Choose music that matches the mood and fills dead air without being too distracting. Listen to tracks in full to determine where they sit best in the timeline.
You can also consider different tracks by their tempo or BPM. Higher BPM songs are energetic and exciting, while lower BPM songs are better for emotional scenes that might be sad or romantic. You can filter all of the royalty-free songs in Storyblocks’ library by mood, BPM, and more to find the perfect fit for your project.
5. Set levels
Once you’ve cleaned your dialogue, added your sound design, and incorporated your music, it’s time to set your levels. Ensure the levels do not exceed 0 dB to avoid clipping. Sticking between -12 dB and -6 dB provides necessary headroom to boost levels, compress, or EQ later. It’s better to be slightly quieter at first, as you can adjust once sound effects and music are added.
5. EQ and compress
We’re almost done – now it’s time to run through the EQ process and add compression.
- EQ: Use a low-cut filter (usually around 120 Hz) to remove low-end rumble and high-cut filters for hiss. Address muddiness in the 120 Hz+ range or “boxy” sounds between 200–400 Hz. Use specific plug-ins for sibilance (“S” sounds) and plosives (“P” and “B” sounds).
- Compression: Use a compressor to reduce the dynamic range and tame peaks. Apply a threshold to the signal, compressing anything exceeding it. Start with dialogue presets in your DAW or NLE and adjust the threshold and ratio as needed.
7. Final mix check
Perform at least one full pass to ensure levels are appropriate and nothing exceeds 0 dB. Add a limiter to the master channel to act as a “brick wall” against clipping. You may also apply light compression to the master channel to ensure the audio remains clear and undistorted.
What’s the best software for audio editing with video?
While 20 years ago you would have been looking at using dedicated audio mixing software to bring into your NLE, times have changed a lot since then. And most modern video editing software will have more than sufficient audio editing controls to do a great audio mix, even at an amateur level.
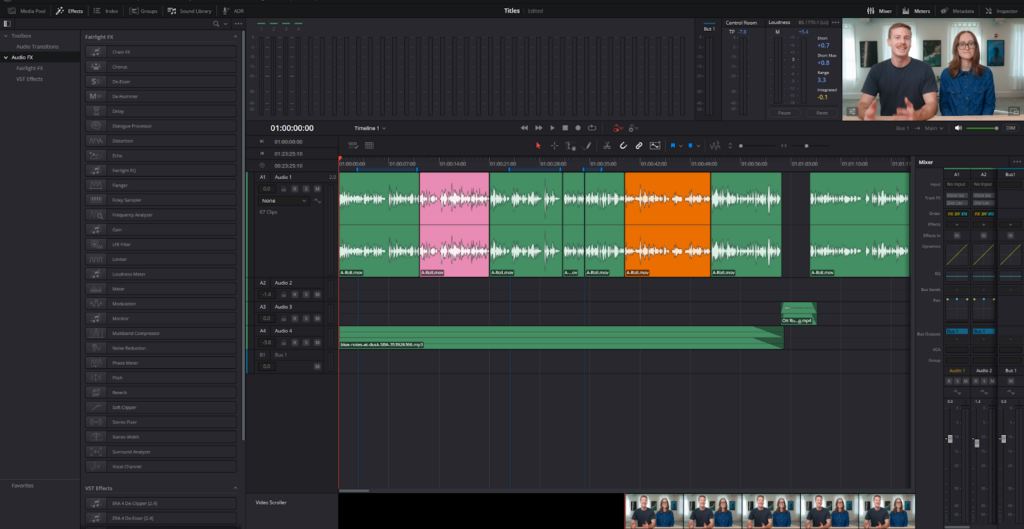
As a DaVinci Resolve user for over 10 years now, I have to give credit to Blackmagic for integrating the Fairlight audio page into DaVinci Resolve itself.
While you can easily edit audio from the main edit page, which includes a wide variety of audio effects and audio editing tools, you can also bring your audio into the Fairlight page. This offers more professional mixing tools, greater parameters to refine the audio, and even an ADR session panel.
Elevate your audio with high-quality sound effects and music
Recording your audio and then editing it is only one part of the battle when it comes to audio editing. As mentioned throughout this article, Foley and music play a large part in bringing your videos to life.
While it may be accessible to record two actors talking to each other, acquiring and recording sound effects for spaceship doors closing, a lion roaring, or finding the perfect classical music piece might not be feasible. This is where the Storyblocks library can aid you in the process.
With thousands upon thousands of sound effects to choose from and an almost endless library of music to select, you can always find the right audio for your projects.
Editor’s note: This post has been updated with additional information. It was originally published on August 5, 2015.


