
Too much noise can make your shots unusable. Low-light shooting, high ISO settings, and older cameras all contribute to grainy footage that makes your videos look amateurish. But with the right denoising techniques, you can clean up the grain and deliver polished results.
In this guide, you’ll learn how to denoise video in Premiere Pro. We’ll cover Premiere’s built-in effects and third-party plugins that’ll save you time on future projects.
Table of contents
What causes video noise?
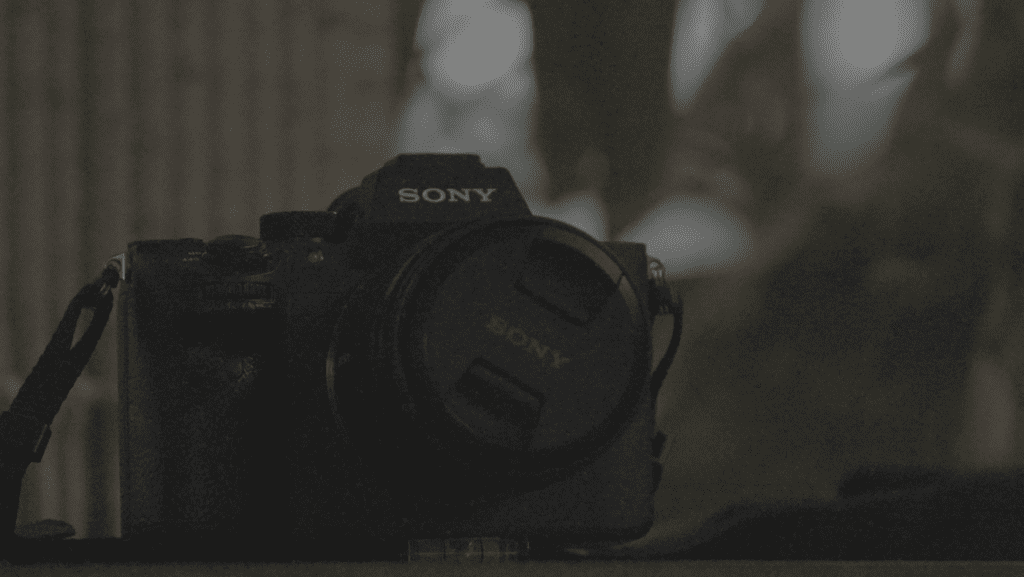
Digital video noise is a distracting spread of pixels that flicker across your footage. This type of noise is caused by random electrical interference from your camera’s sensor. When the sensor doesn’t get enough light, it amplifies the signal, which also amplifies the noise.
Take a look at this capture from a video shot at ISO 40,000 in low light:
Compare the shot above with the natural grain in this still from The Lighthouse (2019), which was shot on film:
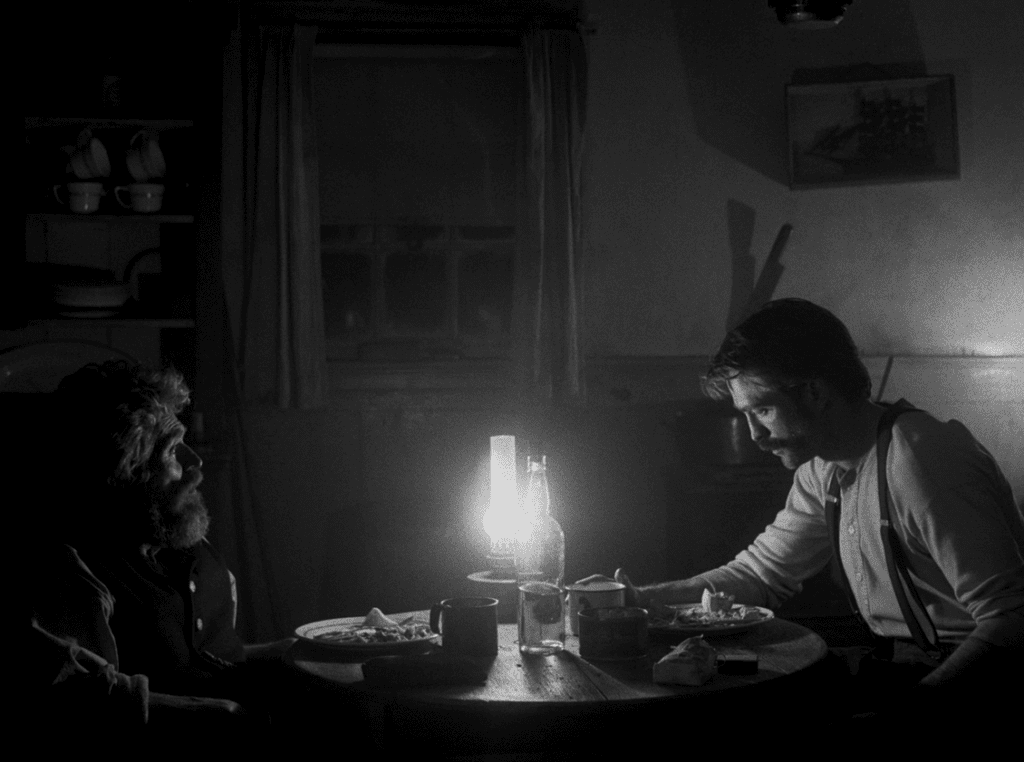
You’ll notice the first has a lot of distracting noise and random colored pixels speckled throughout the shot. Whereas the second shot has an artistic quality that doesn’t take away from the shot itself.
The difference is that film grain is a natural effect of silver halide crystals in the film stock, and it has an organic pattern. While digital noise is unattractive, film grain adds texture and character.
The most common causes of noisy footage are high ISO settings and older camera sensors (especially above ISO 800). You’ll also see more noise in heavily compressed footage or underexposed clips that you’ve brightened in post.
To avoid noise, shoot with as much light as possible and keep your ISO as low as you can manage. If you must shoot in low light, we’ll show you how to denoise a video in Premiere Pro.
How to denoise a video in Premiere Pro
Here’s the reality: Premiere Pro’s built-in denoising tools aren’t that great. Many editors used to rely on the Median effect for basic noise reduction, but that’s no longer available in current versions of Premiere (though it’s still present in After Effects).
Now, the only real noise reduction tool available is the VR De-Noise effect, and on its own, it leaves a lot to be desired.
But before you reach for an expensive plugin, there’s a clever workaround. With a simple trick involving luma masking, you can make VR De-Noise work much more effectively. After testing different approaches, this method is the best way I’ve found to denoise video in Premiere Pro.
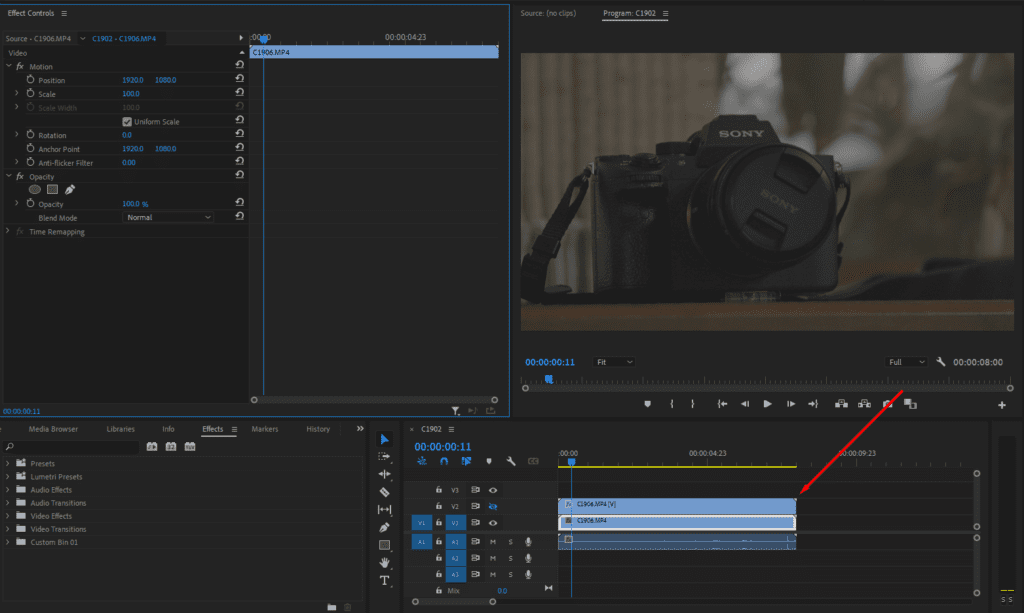
1. Duplicate your noisy clip
Start by duplicating your clip. Right-click your clip and select Copy, then paste it directly above on a new video track (V2).
You now have two identical layers of the same footage. The bottom layer (V1) will be your denoised version, while the top layer will stay untouched as your detail source.
2. Apply VR De-Noise to the top layer
VR De-Noise is Premiere’s most useful digital denoising tool. Go to Effects > Video Effects > Immersive Video and drag VR De-Noise onto your V1 clip.
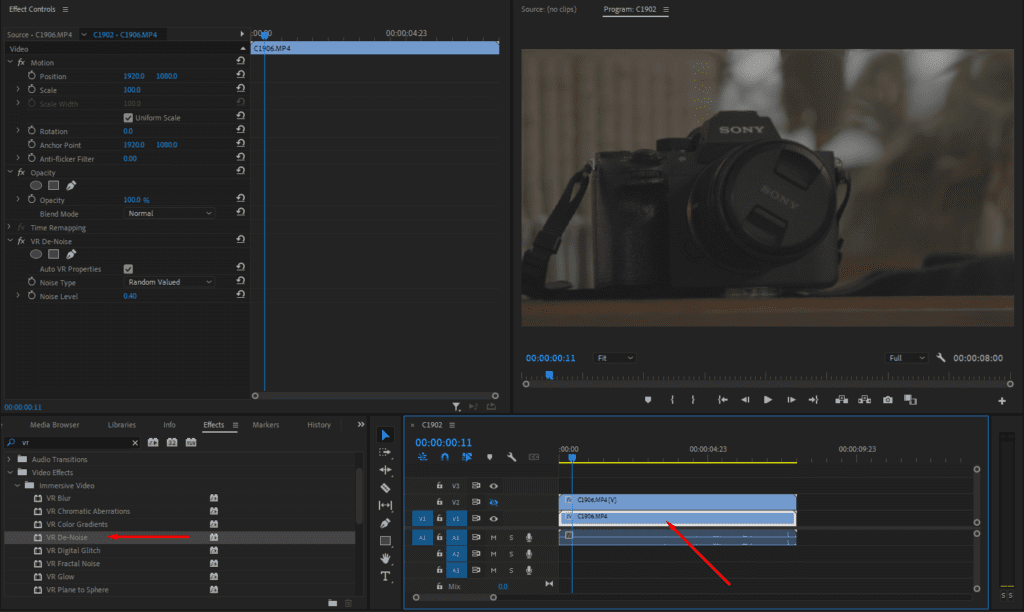
You’ll notice that your footage will look overly smooth. To fix this, head into the Effect Controls panel and reduce the Noise Level until the grain mostly disappears from dark areas.
I find that it’s better to start as low as possible and gradually increase the effect. That way, you won’t add artifacts or make your footage look like it’s a bad animation. But don’t worry about it looking a bit soft, that’s what the layering effect should fix.
3. Create a shadow mask with Luma Key
Next, we want to selectively transfer the details from your original clip onto the denoised clip, so that you get a denoised image that isn’t overly smoothed out. We’ll do this by creating a mask with Luma Key.
In the V2 layer, add a Luma Key effect from Video Effects > Keying.
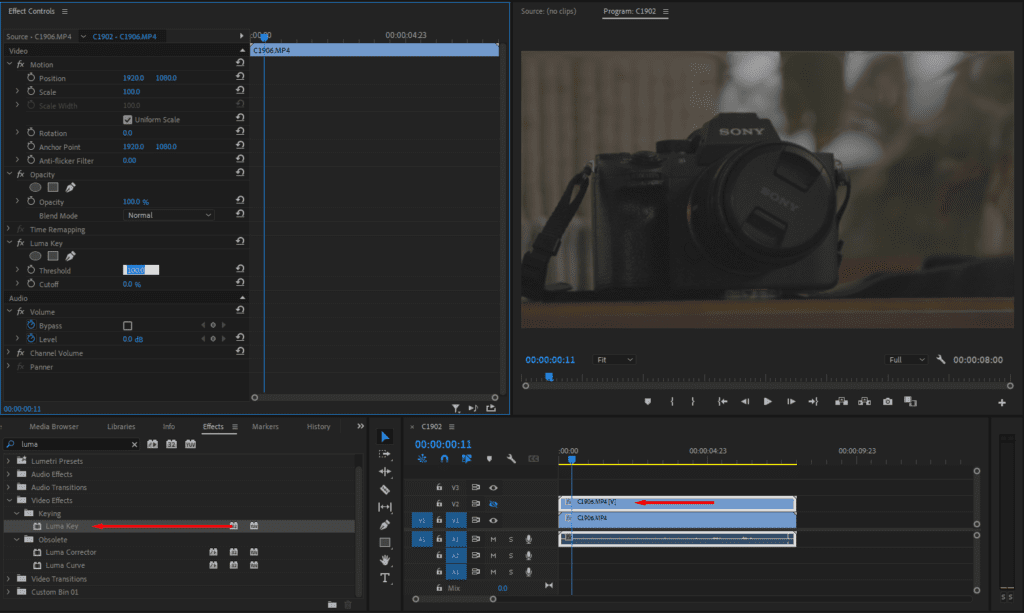
Next, go to Effects > Video Effects > Color Correction and drag Tint onto the V1 clip (the denoised layer). This will help you see which areas in the above section are becoming transparent, revealing the sharp original footage beneath.

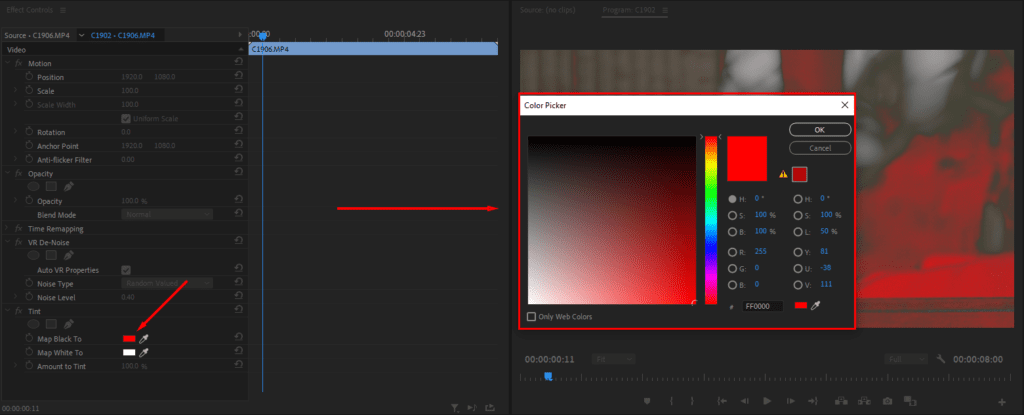
Set the tint to Red in the Effect Controls panel so that you can see exactly which shadow areas the Luma Key is affecting. You can remove this tint after you’ve dialed in your settings.
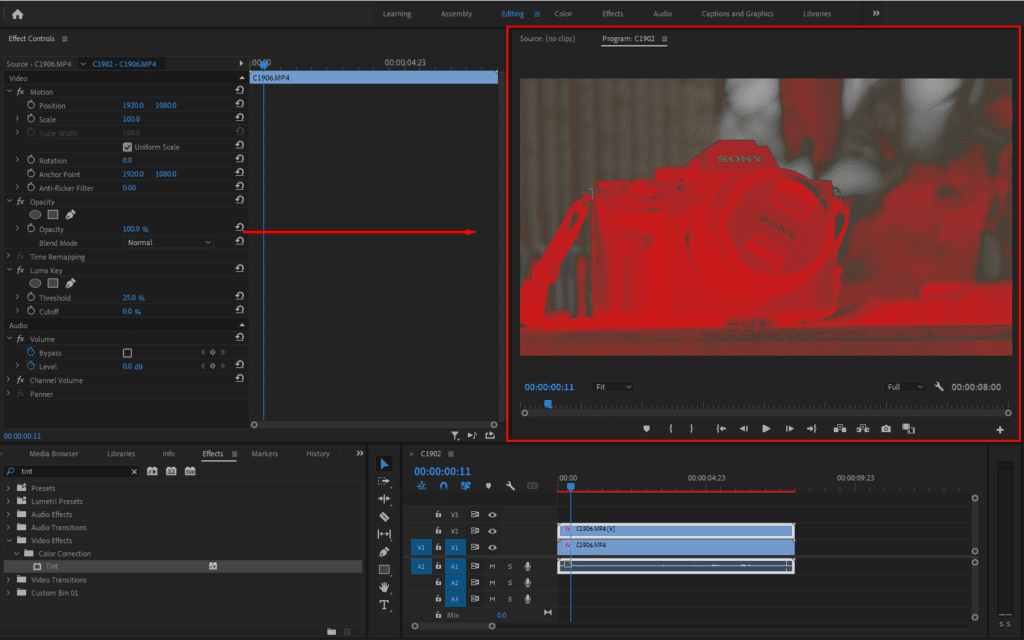
In the Luma Key settings, adjust the Threshold until the subject (the part you want to be sharper) is mostly highlighted. In our case, 25% is a good Threshold.
Finally, disable the tint, then preview your results by toggling the V1 layer on and off. Keep adjusting the Luma Key Threshold and VR De-Noise amount until you’re happy.
Here’s what our example looked like before denoising:

And here’s what it looked like after:
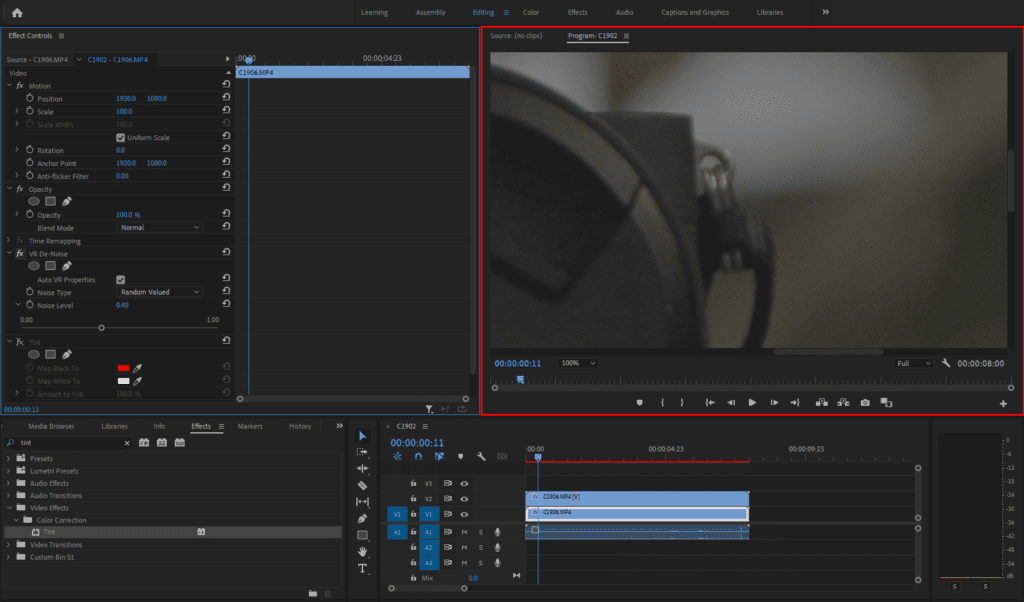
The change isn’t dramatic, but it’s enough to make your footage look a little better before publishing. If this isn’t powerful enough for your project, we’ll explain what other tools you can use in the next section.
Plugins and alternatives for better denoising
Premiere Pro’s native denoising tools hit their limits pretty quickly. For basic web content or situations where perfect image quality isn’t critical, the native tools can get you there.
For anything beyond light cleanup, like severe low-light noise or professional work where detail preservation is crucial, you’ll need dedicated denoising software.
Here are two of the most popular plugins for Premiere Pro noise reduction:
- Neat Video: The gold standard for video denoising. It analyzes your footage to create custom noise profiles, then removes noise and preserves genuine detail. The results are noticeably cleaner than Premiere’s built-in options, and it works as a direct plugin within Premiere Pro.
- Red Giant Denoiser III: A good middle ground with simpler controls than Neat Video but better results than Adobe’s Premiere Pro. It’s easy to use, runs quickly, and works just as well as Neat Video for light-to-moderate noise.
Start with Premiere’s built-in tools and invest in proper denoising software if you regularly deal with challenging footage.
When to embrace the grain
Not all noise is the enemy. Sometimes, that gritty texture is exactly what your project needs to feel authentic or have a specific aesthetic. For example, documentary filmmakers often keep natural grain because it shows viewers it’s real footage, not just polished studio content.
Similarly, vintage-style projects benefit from grain because it makes digital footage look more like authentic film. The key is making sure it’s intentional grain, not distracting digital noise.
For projects where you want to add grain, check out our guide on creating authentic retro looks. Surprisingly, the best approach is often to denoise first, then add back cinematic grain or texture that matches the look you’re going for.
Troubleshooting: Why does your video still look noisy?
Unfortunately, denoising can create new problems in your footage. Here’s how to spot and fix the most common issues that pop up:
- Your video looks too soft and plastic: You’ve over-processed the footage. Aggressive denoising removes a ton of detail along with noise, leaving you with a kind of “wax figure” look. To fix this, reduce your noise reduction settings. You could also try lowering the opacity of your denoised layer to let more original sharpness back through.
- Strange artifacts appear: Sometimes denoising creates blocky patterns, weird textures, or bands in your footage. This happens when the algorithm struggles to identify noise. Again, the fix is to reduce your noise reduction settings. This is especially true if you’re editing already-compressed video, as it often makes these artifacts more obvious.
- Noise persists in deep shadows: Flat areas like walls or dark shadows hold onto noise stubbornly. If particular areas of your footage are still noisy, use the Luma Key effect or manually mask those parts to target them, instead of blasting the entire image with heavy denoising.
The trick is to find the sweet spot between clean and natural. If your denoised footage doesn’t look like something you’d like to watch, you’ve overdone it.
Also, if you plan to sharpen your footage, always apply noise reduction first. Sharpening after denoising can help return some detail, but sharpening a noisy clip will only exaggerate the noise and make it worse.
Learn how to do even more in Premiere Pro
Removing noise is one of those crucial skills that can help you save key shots when things go wrong during filming. Try out the technique we shared in Premiere Pro first. If it isn’t powerful enough to recover your footage, consider purchasing a purpose-built tool like Neat Video.
Now you know how to remove grain in Premiere Pro, but denoising isn’t the only useful recovery skill you can learn. Find out how to stabilize shaky video, correct the colors in your footage, and grade your footage to achieve any look.
But of course, if you start out with high-quality footage, you won’t have to do any repairs in post. With a Storyblocks subscription, you get unlimited access to optimized 4K clips and Premiere Pro templates. No grain, no cleanup required, just ready-to-use footage that looks great.
And, the Storyblocks plugin brings our entire library right into Premiere Pro, so you can find the perfect shot without interrupting your flow.


