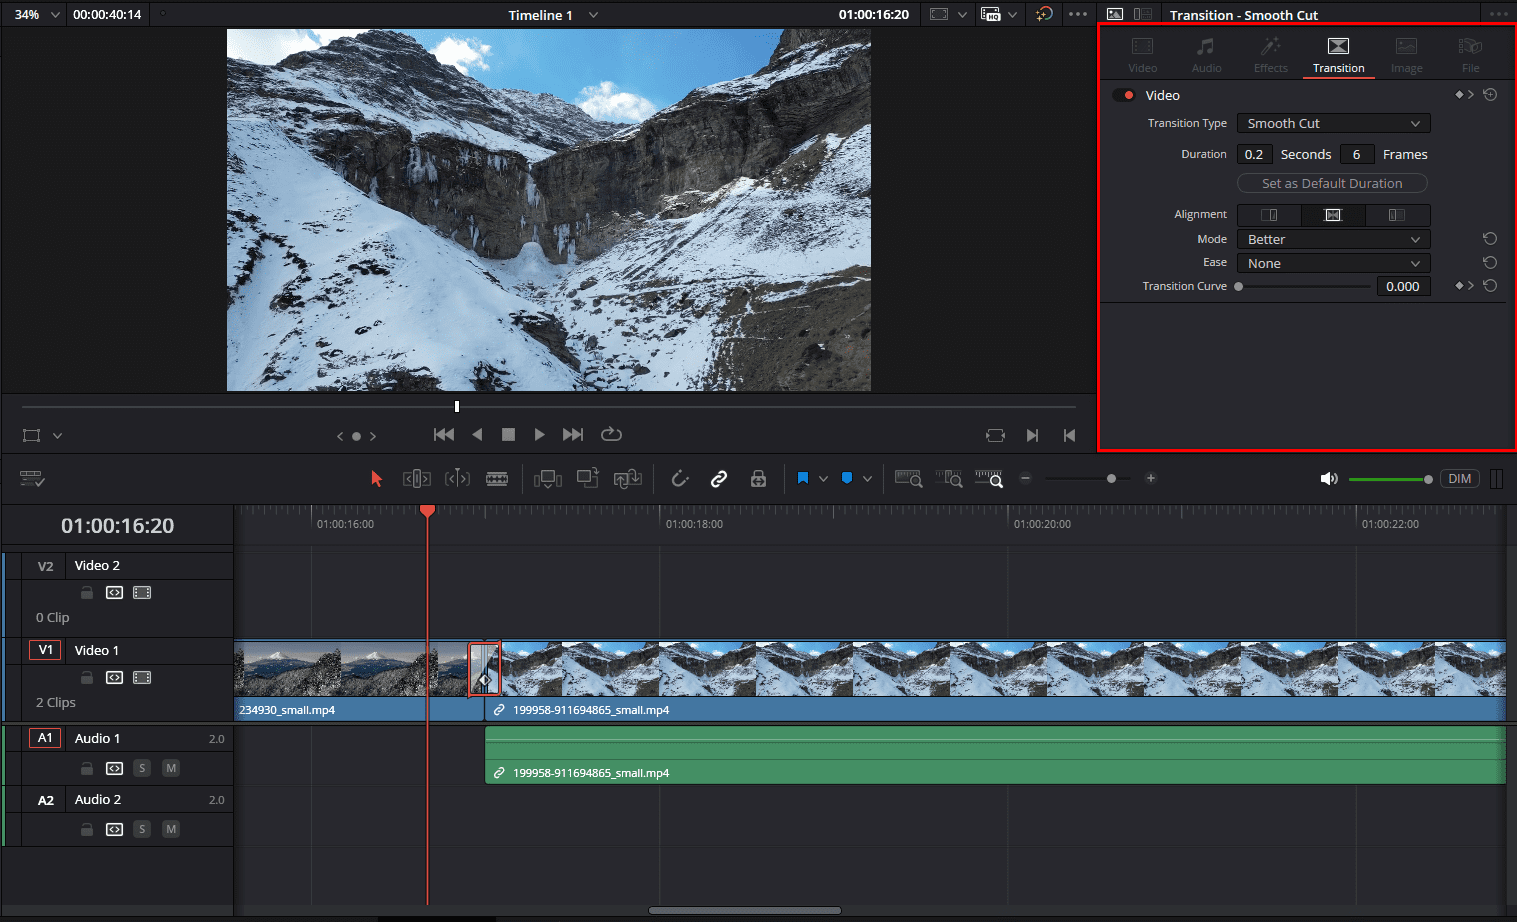
Does your video editing feel like it’s disjointed or lacking flow? The secret ingredient might lie in how you handle DaVinci Resolve’s transitions. These can breathe life into your videos, bridging scenes smoothly and keeping your viewers interested.
In this guide, you’ll learn how to add transitions in DaVinci Resolve and create captivating narratives that hold your viewer’s attention from start to finish.
How to add a video transition
When learning the basics of how to use DaVinci Resolve, transitions are one of the first things that come up. They connect one shot or scene to the next in a way that’s often more appealing than a straight cut. They can be as simple as a fade or more complex, with dynamic animations and effects. Either way, they help guide your viewers and emphasize changes in time, place, or perspective.
Here’s how to add a transition in DaVinci Resolve:
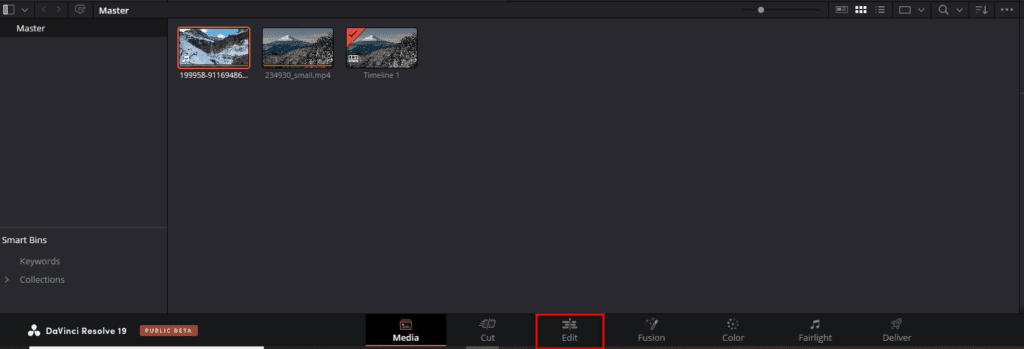
1. Open your project and navigate to the Edit page
First, launch DaVinci Resolve and open your project or start a new one. At the bottom of the interface, select the Edit tab to open the Timeline where you’ll work on your video. To open the Edit page using a keyboard shortcut, press Shift + 4.
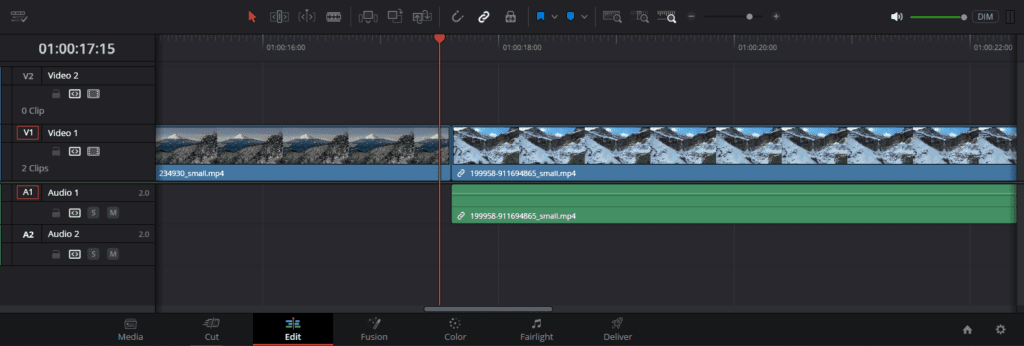
2. Place your clips on the Timeline
Next, drag and drop the video clips you want to work with onto the Timeline.
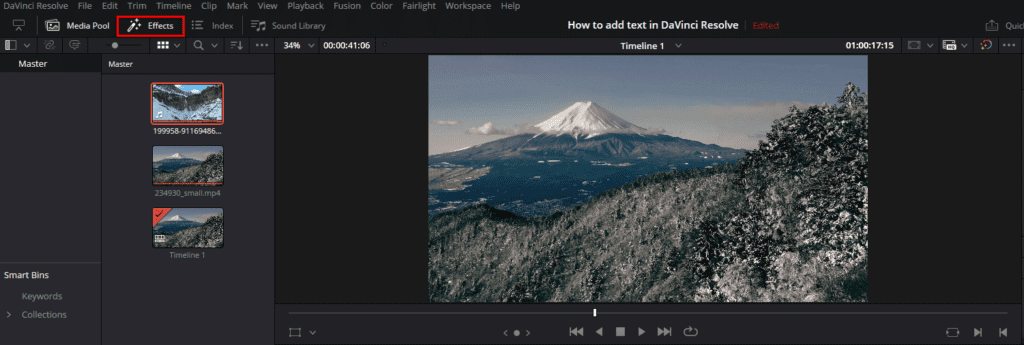
3. Open the Effects library and choose a transition
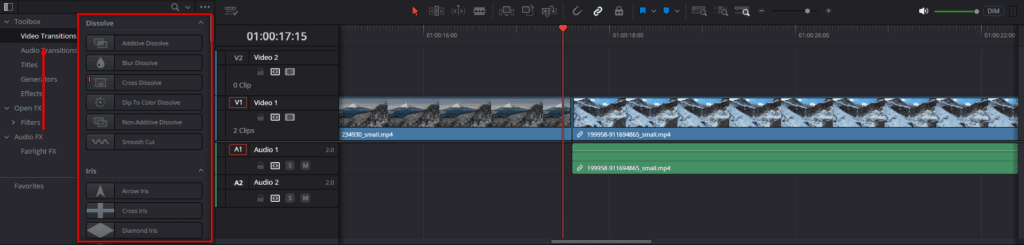
At the top left of your screen, select Effects. This will open a panel where you can find different effects and transitions.
In the Effects panel, navigate to Video Transitions. Browse through the available transitions to find one that suits your needs. To preview the transition, hover your mouse over it. You can also find a list of the types of transitions included in DaVinci Resolve in the section below.
4. Drag and drop the transition
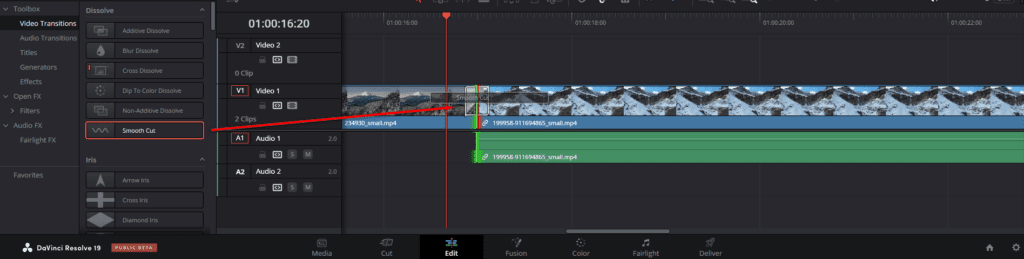
Once you’ve chosen one, click and drag the transition onto the cut between the two clips on your Timeline. You can also drop the transition at the beginning or end of a clip.
5. Tweak your video transition
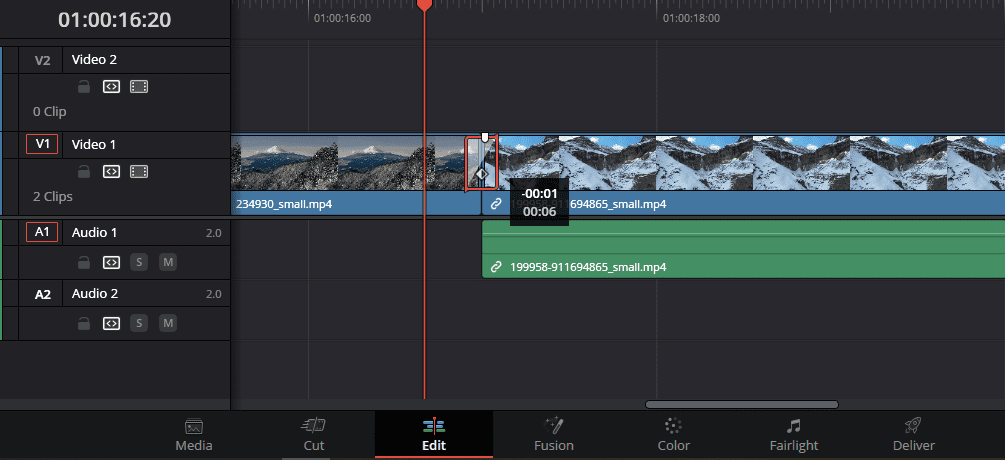
With your transition in place and ready to go, you can perfect its timing and other settings. Start by adjusting its duration—hover over the edge of the transition until you see a double-sided arrow. Then, click and drag to extend or shorten it.
Next select the Inspector button in the top-right corner of the interface. Here you can find additional transition settings including alignment, ease in/out properties, and other parameters. Play around with these settings until you’re happy with your transition’s look.
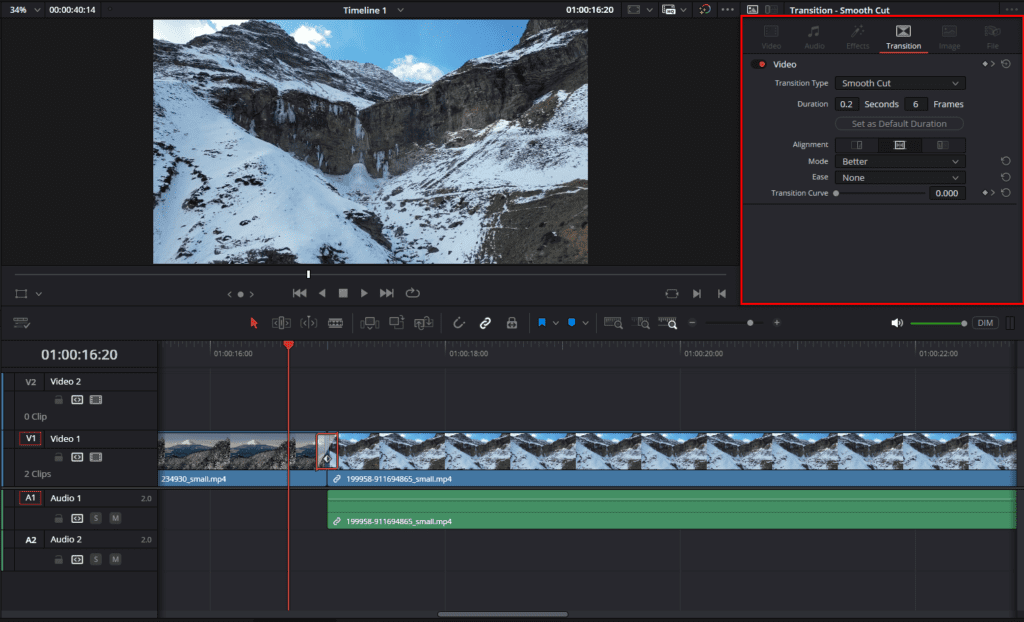
Finally, preview your transition to see how it looks with your video. Make more adjustments as needed so that it matches perfectly.
Types of DaVinci Resolve video transitions
DaVinci Resolve features a stack of built-in transitions ranging from simple to complex. Here’s how each of DaVinci’s transitions works:
- Cross dissolve: Gradually fades out the first clip while fading in the second clip, creating a smooth blend.
- Dip to color dissolve: Fades out the first clip to a solid color (often black or white) before fading the second clip in.
- Fade to black/white: A simple transition that fades the footage to black or white at the end of a scene.
- Blur dissolve: Applies a blur effect to the first clip as it fades out, then reduces the blur as the second clip fades in.
- Additive dissolve: Combines the color and brightness of two clips as they transition, creating a more vivid effect than a standard cross dissolve.
- Non-additive dissolve: Similar to a cross dissolve but transitions luminance rather than colors, producing a more muted effect.
- Wipe: A line or shape slides across the screen, revealing the second clip underneath.
- Film roll: Simulates the effect of a film reel rolling with some added film scratches and grain effects.
- Push: Moves the first clip off-screen while bringing the second clip on-screen in the same direction.
- Slide: Similar to push, but the clips slide over one another rather than moving entirely off and on screen.
- Zoom: Both clips zoom in or out into the other, creating a feeling of depth.
- Page peel: Mimics the effect of a turning page, with the first clip curling away to reveal the second clip beneath.
- Ripple dissolve: Applies a ripple effect over the transition, suggesting movement or water effects.
Tips for using transitions in video
Using video transitions is a powerful way to make your projects more engaging, fun, or narrative-driven. Here are some tips to get the most out of them:
- Keep it simple. Subtle transitions can be better than flashy effects—unless that’s what you’re going for. Try to use transitions to guide viewers from one scene to another, rather than distracting them.
- Match the mood. Choose transitions that fit with the mood and pace of your video. For a romantic or emotional scene, a soft fade might work well. While a fast cut or wipe might be better for action scenes.
- Be consistent. Using the same type of transition throughout your project keeps it consistent. Randomly switching between styles can be jarring, taking viewers out of the moment.
- Mind the duration. Pay attention to the length of your transitions. Too fast and they can become unnoticeable, but too slow, and they might drag down the pacing of your video.
- Highlight key narrative moments. Use more eye-catching transitions to emphasize significant parts in your video, like shifts in time or place. This can help bring attention to key moments, helping the viewer understand what’s happening.
Transition templates for DaVinci Resolve
Storyblocks’ pre-made templates for Resolve make editing faster and easier, helping you create professional-looking and unique transitions without the hard work. Here are three of Storyblocks’ transition templates to check out:
Flash FX Transitions
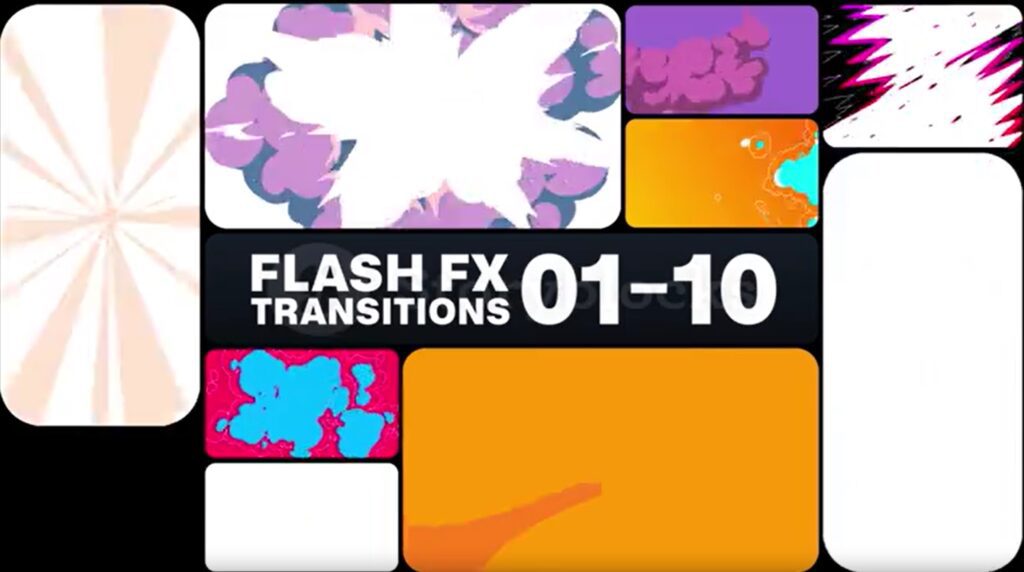
Give your videos a burst of energy using the Flash FX Transitions templates. This vibrant collection of animations features dynamic flash effects with built-in media placeholders, making it an effortless way to upgrade your edits.
Simply drop a transition between your clips, and watch your dance videos, sports highlights, or social media content transform with lively flashes and effects. The pack’s ten cartoon-like transitions include bright explosions, colorful smoke clouds, expanding bubbles, waves of color, dynamic flashes, tentacles, and lightning strikes that add an interesting flair to your transitions.
Split Screens

The Splitscreens 8 Frames Transitions template includes eight seamless split-screen transitions, each with easy-to-use placeholders for photos and videos. Customize the colors to suit your style and easily create visually engaging effects.
This transition template includes eight similar yet unique transitions that take you from one image to another through a montage of other animated image placeholders. It’s perfect for videos like advertisements, product showcases, and holiday destination timelapses.
Colorful Transitions
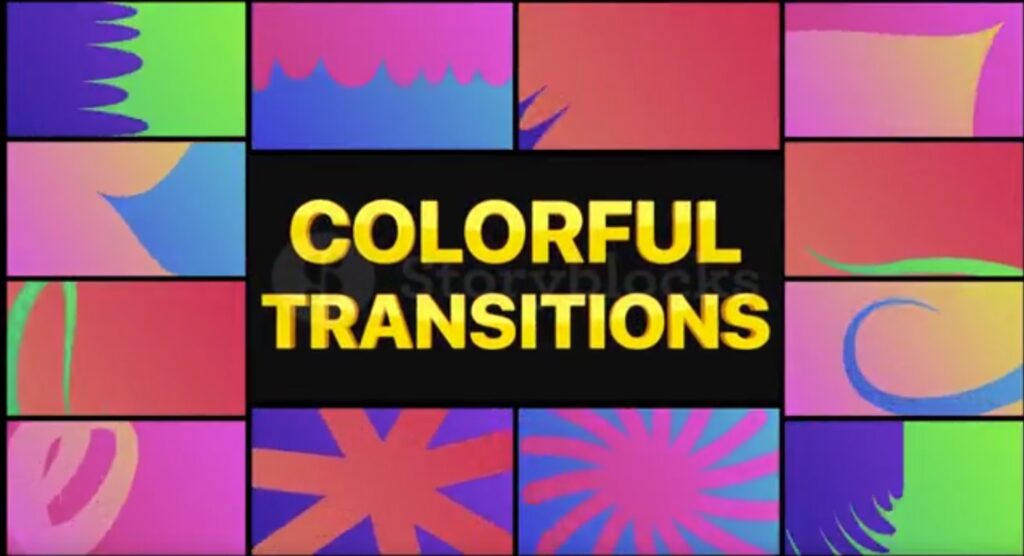
The Colorful Transitions template pack is the perfect blend of fun and simplicity. It features a ton of engaging, fast-paced, and vibrant transitions with a range of effects you can easily add (like glow or pixelation) to give your animations even more pizzazz.
This pack is perfect for social media, music videos, promotional content, and fashion videos. Play around with the vibrant colors and combine effects to create the ideal transitions for any project.
Learn how to do even more in Resolve
Using creative and engaging DaVinci Resolve transitions is a powerful way to connect scenes, show mood changes, and keep your viewers engaged. As you learn how to add video transitions in DaVinci Resolve, explore our other useful tutorials like how to add text and the different file types you can use when creating videos.
And while you’re at it, explore more templates for DaVinci Resolve and find all the royalty-free stock assets and plugins you need for your projects in the Storyblocks library. Sign up today to start downloading!


