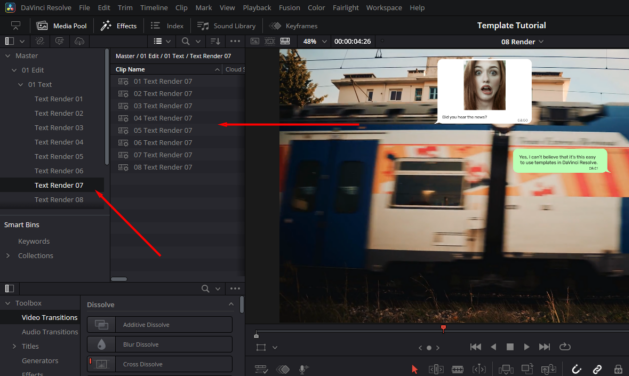
Building a title sequence from scratch in Resolve can eat up an afternoon. That’s why many editors use a template, customize it, and move on with the edit.
If you’ve never used a template in DaVinci Resolve before, there are a few things worth knowing upfront. The install process is different for each file type, and finding your template afterwards isn’t always obvious.
You’ll learn all of that below, along with how to use DaVinci Resolve templates to swap in your own content and adjust the timing once it’s on your timeline.
Using templates inside DaVinci Resolve
You can find DaVinci Resolve templates in many places, like motion graphics marketplaces, creator communities, or stock libraries.
For instance, Storyblocks has an extensive library of DaVinci Resolve templates, including title sequences, lower thirds, transitions, and more.
For this tutorial, we’ll be using the Social Media Posts template from the Storyblocks library.
1. How to install templates in DaVinci Resolve
Most templates you download will come as either a .drfx or a .settings file, and the install process is slightly different for each.
For .drfx (and .drp) files, double-click the file while Resolve is open to install it.
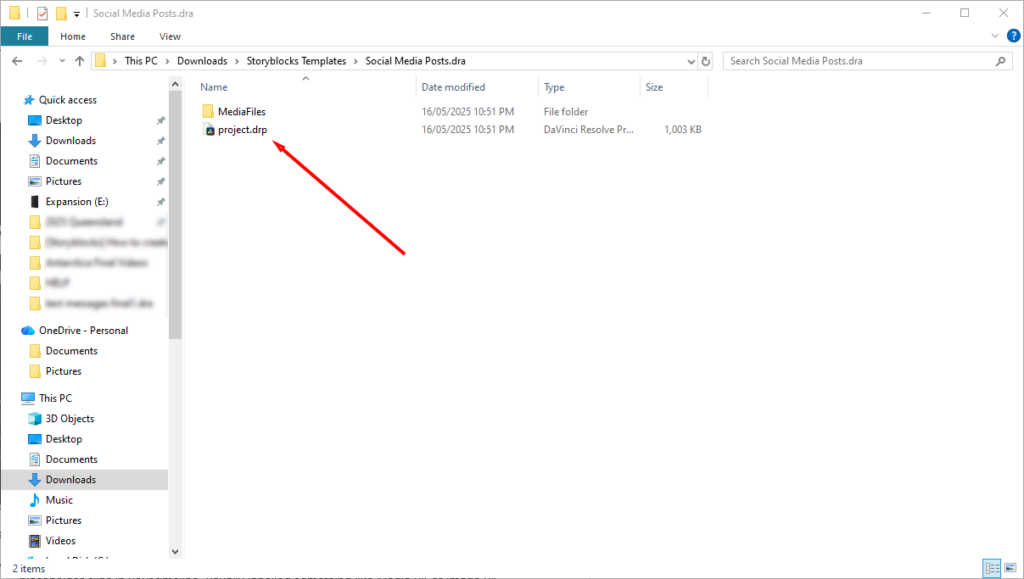
If you are working with a .settings file, switch to the Fusion tab and drag the file into the Effects panel. If you come up against any issues installing your templates, check out our in-depth guide on DaVinci Resolve file types.
Keep in mind that LUTs use .cube files. These require a different installation path through the Project Settings, which you can find in our dedicated LUTs article.
2. Where to find your templates
Once installed, your templates appear in Resolve. Most titles, transitions, and generators live in the Effects Library on the Edit page. If the template is a Fusion-specific tool, you’ll find it in the Templates folder inside the Fusion page’s Effects panel.
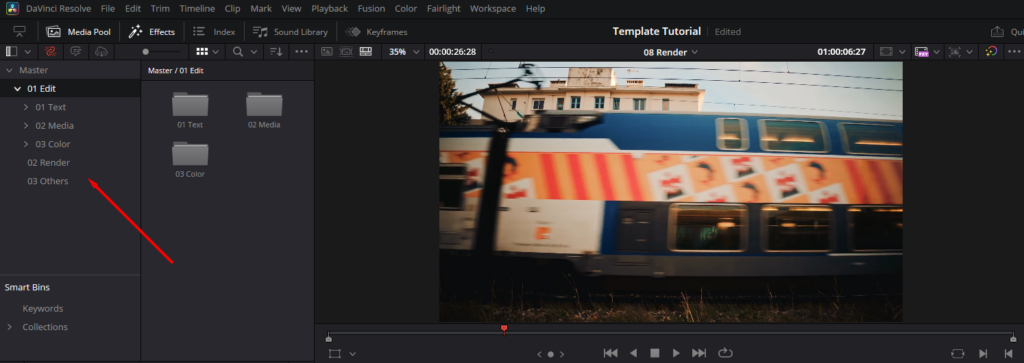
If you’re working with a full project template as a .dra file, you’ll find it in the Media Pool after you restore the project, rather than the Effects panel.
Can’t find your template?
Use the search bar at the top of the Effects panel and type the template name. If it still doesn’t appear, check that you placed the file in the right subfolder, then restart Resolve and look again.
3. Breaking down your template structure
Most templates share the basic building blocks:
- Media placeholders are where your footage or images go. These show up as placeholder clips in your timeline, usually labelled something like Media 01 or Image 01, and sometimes as MediaIn nodes if you’re working in Fusion.
- Text layers let you swap in your own copy. Most templates show these controls in the Inspector panel on the right side of the Edit page, so you can edit text without needing to open Fusion at all.
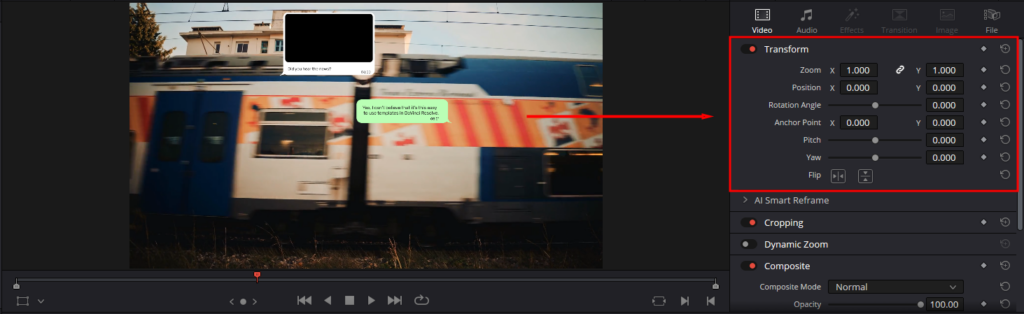
- Transform controls handle position, scale, and rotation. Like text, these are usually accessible inside the Inspector.
4. How to add templates to DaVinci Resolve
Before you drag anything onto the timeline, it helps to know what kind of template you’re working with. Edit page templates drop straight onto the timeline, and you can adjust them through the Inspector.
On the other hand, Fusion page templates are node-based and need more work inside the Fusion page. Most templates you download will be Edit page templates.
Step 1: Drag your template onto the timeline
The first step is to open the Effects panel in the top left corner of the Edit page and find your template. Once you’ve found it, drag it onto the timeline. Titles and generators go on a video track above your footage, and transitions go onto the cut point between two clips.
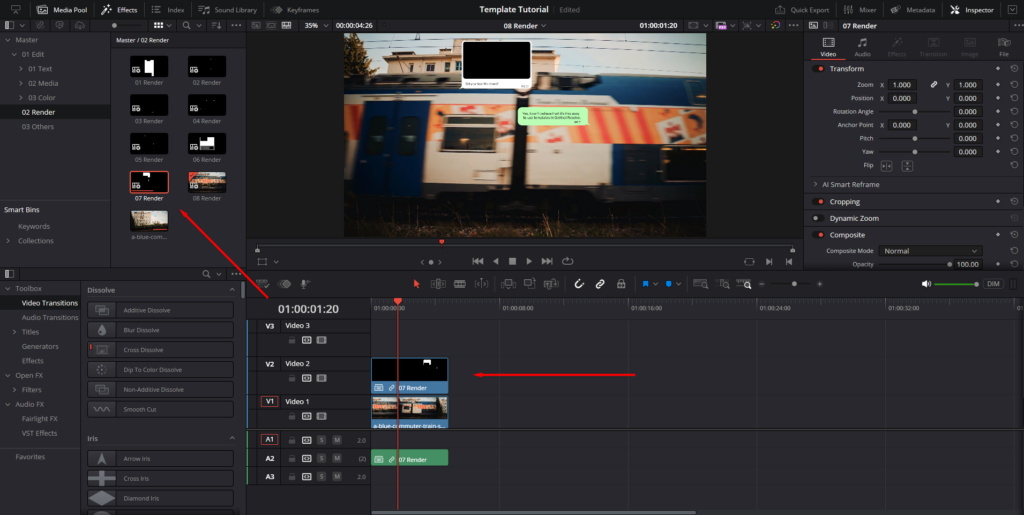
In our example, installing the .drp file from Storyblocks created a master folder with Edit, Render, and Others subfolders. The Edit folder contains the renders—these are the templates which you want to drag onto your timeline. We’ve chosen “07 Render”, which is a short animation of a text conversation with an image.
Step 2: Adjust the duration, position, and layering
When your template is in the right place, click and drag either edge of the clip to change how long it runs. To reposition it in the frame, select the clip and drag it in the viewer, or use the position controls in the Inspector. To control layering, move the clip to a higher or lower track.
5. How to replace placeholder content and customize elements
After you’ve positioned your template, you need to update the text and media elements. Here’s how.
Step 1: Swap in your own footage or images
First, add an image to the empty placeholder(s). The easiest method is to find the connected placeholder and drag an image or clip into it from your Media Pool.
Most templates will be set up in the same way as our example, where each template has corresponding files for placeholders and text. Since we chose “07 Render”, we need to find the linked placeholder. In this case, the placeholders are under the “01 Edit > 02 Media” subfolders.
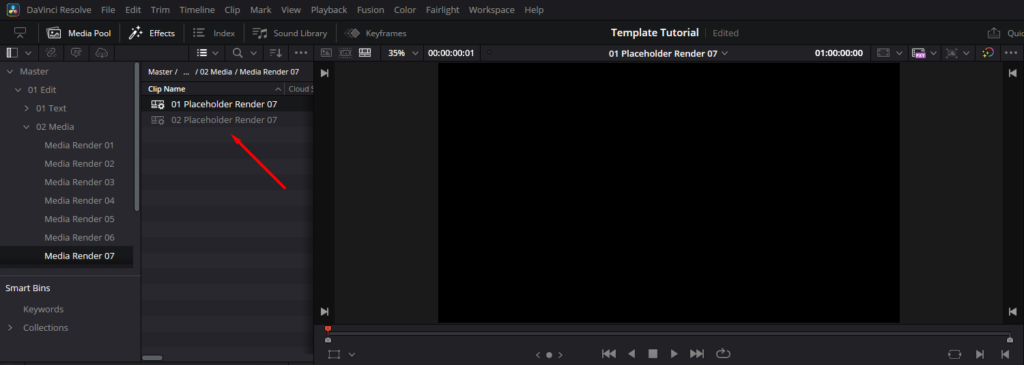
Find the correct one (for us, it’s the “Media Render 07” folder), double-click the placeholder, and drag your desired image onto the timeline.
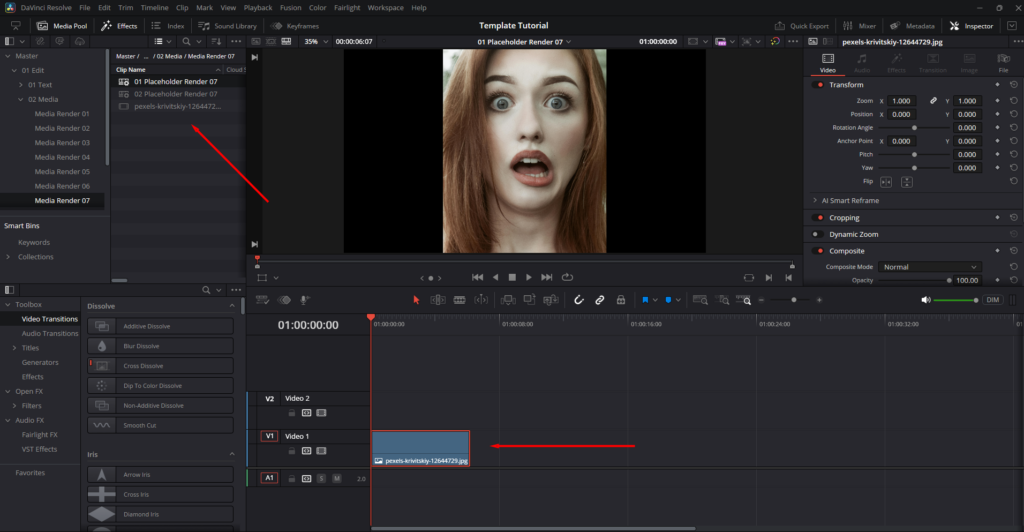
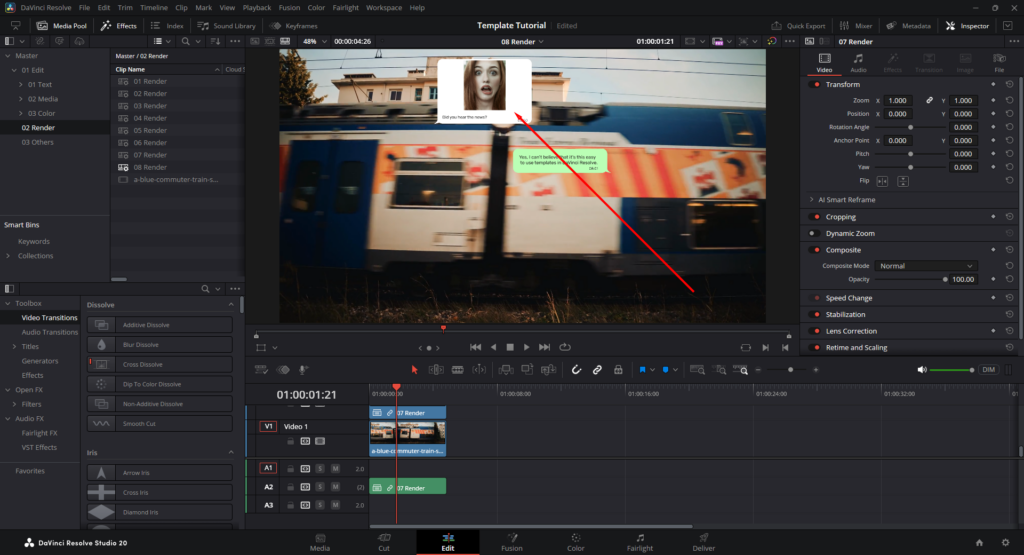
Now, when you head back to your project timeline, the image should appear where the template’s empty placeholder was just moments before.
Step 2: Edit your text, fonts, and colours
To edit your template’s text fields, you’ll need to find where these elements are in the folder structure. Like the media placeholders, they’ll probably have their own subfolder. For our example, it’s under “01 Text” > “Text Render 07”. Since this example template has a few text boxes, there are also multiple text placeholders to edit.
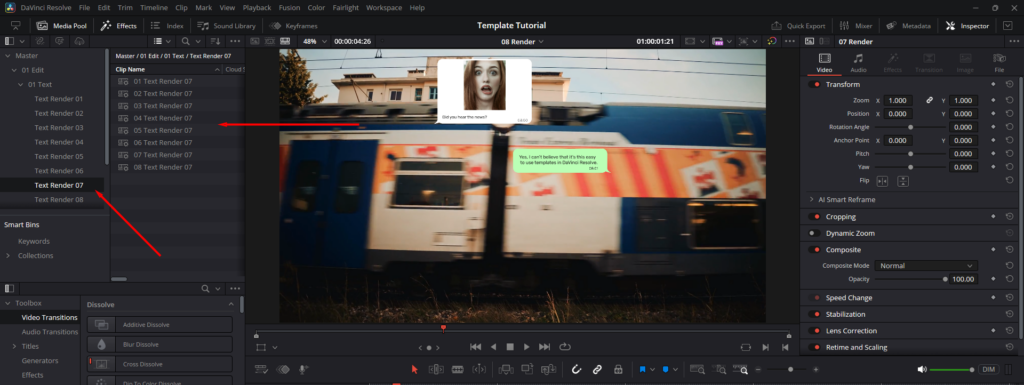
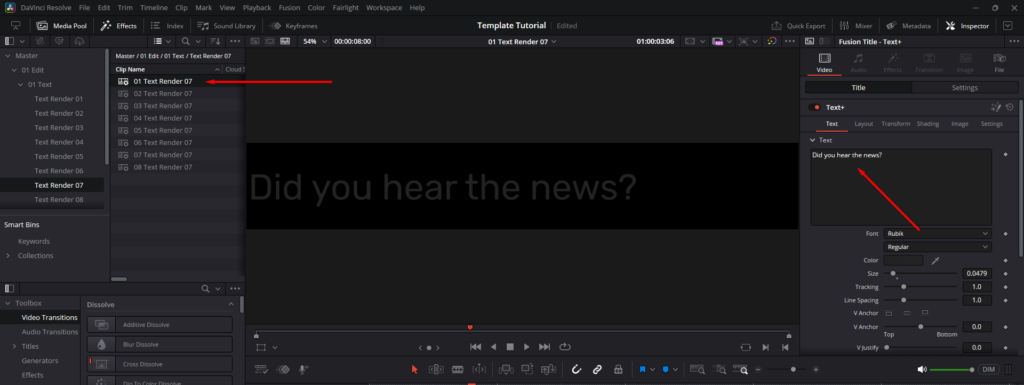
Find your linked text element (we’ll start with “01 Text Render 07”) and double-click it to open the Inspector panel. Here, you can type your content into the text fields, then use the font, size, colour, and alignment controls to style it. The viewer will update the text as you make changes.
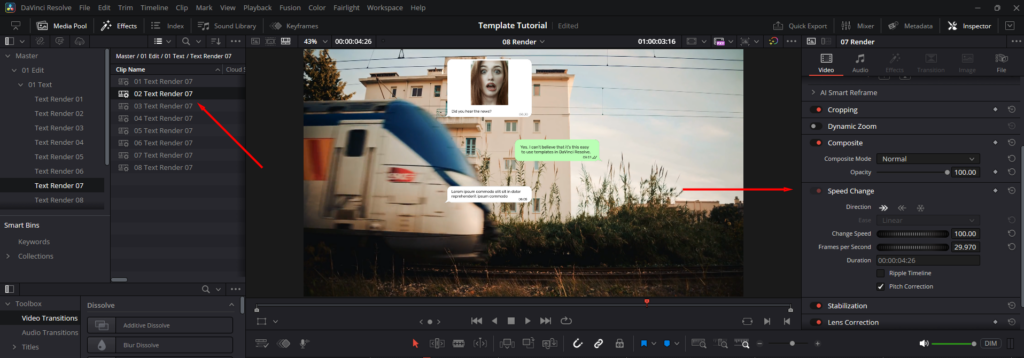
And here’s what the clip looks like now that we’ve added our text and images:

6. How to adjust the timing and animation
Once your content is in place, you may want the template to run longer, cut shorter, or hit at a different point in your edit.
Some templates give you timing controls in the Inspector. Select the clip on your timeline and check the panel on the right. You might see options like animation duration, delay, or easing that let you tweak the animation, but options vary by template.
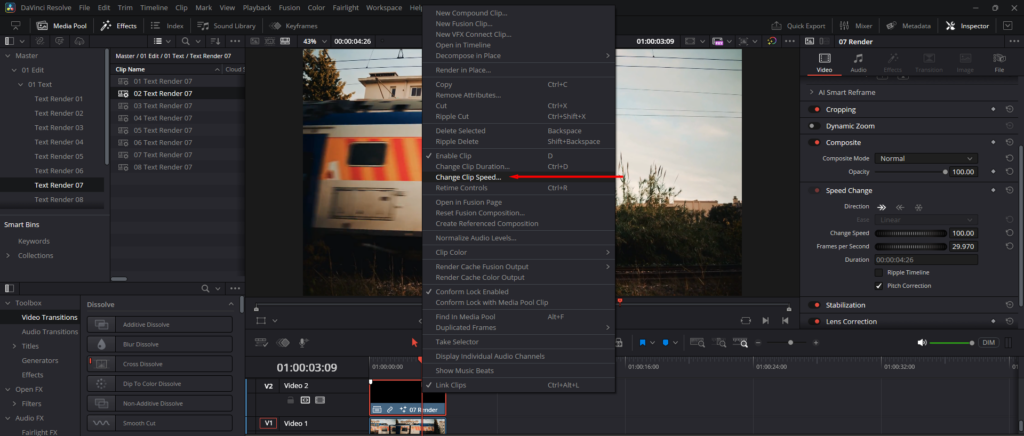
If you need the animation itself to run faster or slower, right-click the clip on the timeline and select Change Clip Speed. Dropping it below 100% slows the animation down, and pushing it above speeds it up. This works well for simple motion, but not always for complex animations.
For finer control over when specific elements appear, you’ll need to open the template in Fusion and adjust the keyframes on the spline or keyframe editor. Most templates won’t need this, but it’s worth knowing the option exists.
Using templates as a starting point for projects
Knowing how to use templates in DaVinci Resolve gets you to a working edit faster, but it’s also a useful tool for building consistency across your projects.
Once you’ve customized a template, save it as your own version so you’re not repeating the same process on the next project. Over time, you’ll have a library of ready-to-go assets that match your style. If you’re creating content for a brand or channel, that consistency adds up quickly.
Templates are also a practical way to learn how Resolve handles motion graphics. Pulling apart a template in Fusion shows you how keyframes, nodes, and timing work together in a way that’s easier to follow than building something from scratch. If you want to go further with Fusion, this introduction to Fusion in DaVinci Resolve covers the basics.
FAQs with using templates in DaVinci Resolve
Why am I seeing a media offline error?
A missing link to a font or media file will usually trigger a media offline error in your template. We go into more detail on how to fix it in our DaVinci Resolve media offline error guide.
Why am I seeing lag in Resolve?
There are a few different reasons why you’re seeing lag in DaVinci Resolve. If you’re struggling with playback, our article on how to make DaVinci Resolve run faster runs through seven things to try.
Explore more templates for DaVinci Resolve in the Storyblocks library
Templates take the setup work off your plate, but what you put into them is still up to you. The text, footage, timing, and color choices are what make a project feel like yours rather than something generic.
Don’t stick to one template style. The more you experiment, the faster you’ll work out which types of templates save you the most time and which ones you’d rather build yourself.
If you’re ready to get started, explore the full Storyblocks library of DaVinci Resolve templates and find one that fits your next project. A subscription gives you access to the entire library of over 6 million human-made stock assets, so you can download as many as you need without paying per file.


