Text animation is a technique used to add flair and movement to letters, words, sentences, and sometimes whole paragraphs. A creative concept with limitless possibilities, you can move text side to side, up and down, recede from view or move along a specific pattern. In most cases, the movement is coded to a replicating pattern, which replays endlessly. The animated text helps increase interest, engagement, and visual appeal, which is mostly lacking in static texts. In this post, we’ll go over different ways you can use Adobe After Effects to animate text.
Different Ways to Animate Text In After Effects
After Effects is considered the industry-standard program for visual effects and motion graphics. To use it, you will need training and extensive hands-on experience. Some professions that use it include animators, visual designers, video artists, editors and producers, UX professionals, social media professionals, and advertising agencies. This section explains a three ways you can use After Effects to create text animation: the text animator tool, animating via a path, or using presets.
Using the Text Animator Tool
The text animator tool gives you total control over all the possible features, and you only have to use your imagination to add flair to your animations.
Open the text layer options > Animate, and a drop-down menu of text animators will appear based on the text properties, which you can use to change the internal features of properties.
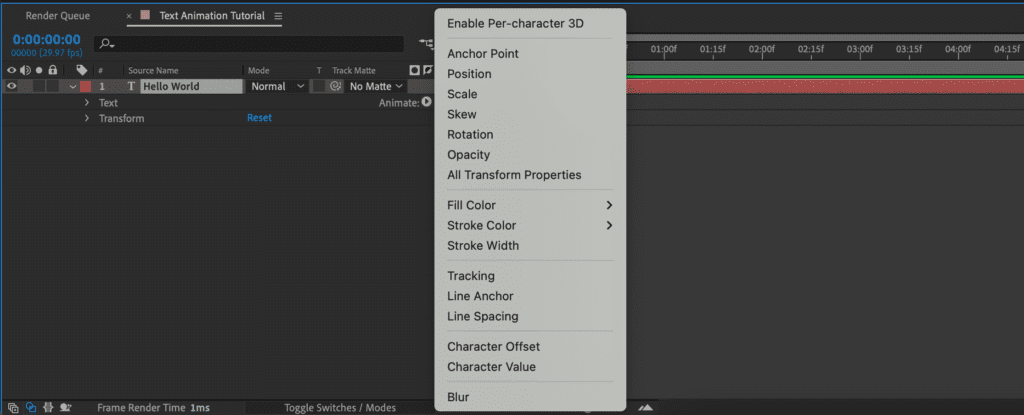
There are numerous text animators to choose from, including:
- Tracking – Animating the letter spacing in selected letters.
- Opacity – Ranges from 0 to 100% and is the transparency of a layer or object.
- Type on – Replicates someone typing on a screen.
- Blur – Lets you control how much Gaussian blur to add to a character. You can explicitly define the horizontal and vertical blur amounts.
- Skew – This means that the object or text is neither parallel nor at a right angle based on an implied line.
- Rotation – A function to rotate objects and ranges from 0 to 360 degrees.
- Anchor point – The center of all manipulations and is mapped on the adjustable x and y-axis.
- Position – This feature lets you point precisely where you want to layer the x and y-axis.
- Scale – Designed to keep the original ratio of your layer. It is measured by x and y values, representing the width and height.
- Stroke width – Allows you to adjust the width of the stroke you have applied to the text layer.
- Line anchor – Indicates the alignment racking for each line of text.
- All transform properties – Used when you need to create an effect using multiple text animator properties. So, you can select all transform properties instead of applying each property.
Creating Animated Text Using a Path
Path animation is a little more limited compared to other methods. It, however, still has its uses. The techniques involve consolidating multiple elements, which often seem unrelated. It is, however, easy to create animated text on a path once you understand how the various elements complement each other. What is more, this is a creative way of adding an element of fun into your design. There are numerous unique possibilities when animating along the Path. Here is how to go about it.
1. Select a layer
Choose a layer that your text will be added on.
2. Create the Path
Make the path that the text will move along. You can use a shape tool or a pen tool for this.
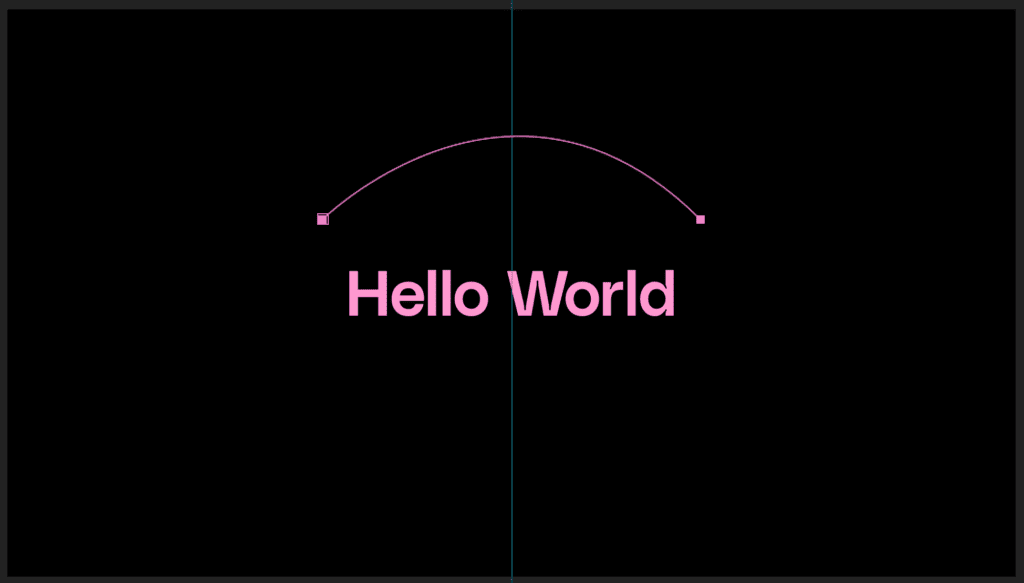
3. Change Path to Mask
Click the Text menu and select Path options. Then change Path to the Mask that you just drew.
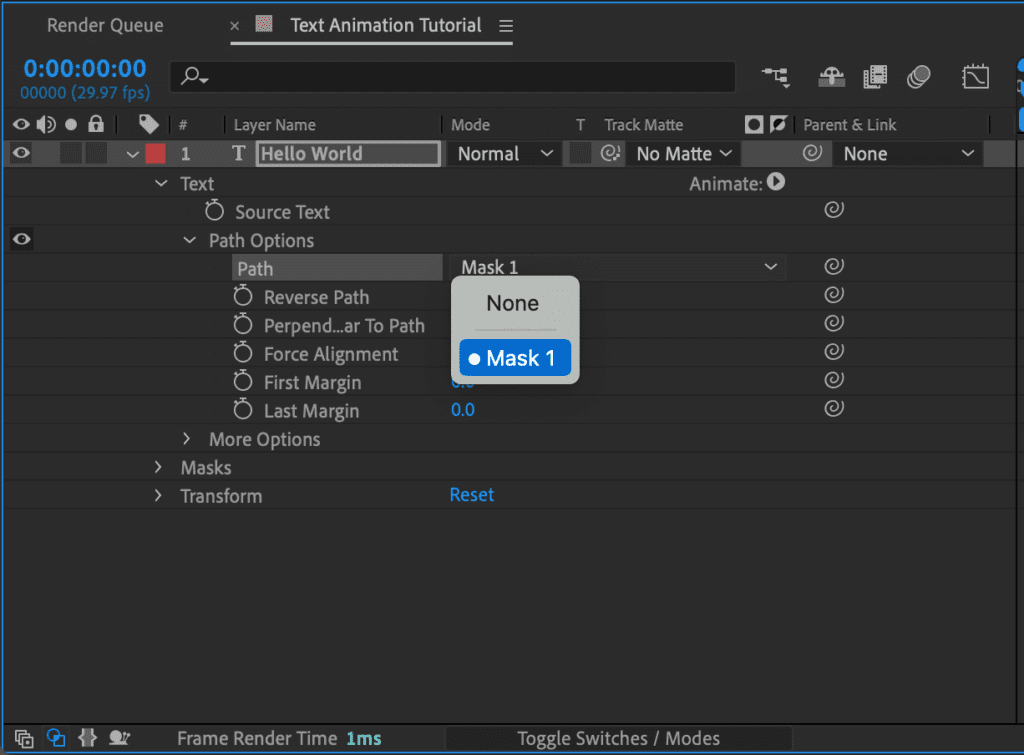
4. Update frames
Set a Keyframe for First Margin at frame 0. You can lower the value to what suits your Path. When you get to frame 30, change the First Margin value to 0 and apply Easy Ease to the frame.
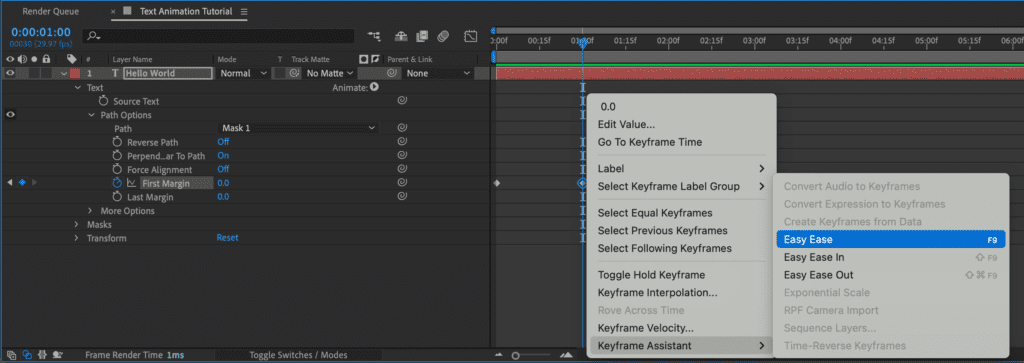
Next, move to Frame 45, add another Keyframe of similar value and apply Easy Ease as well.
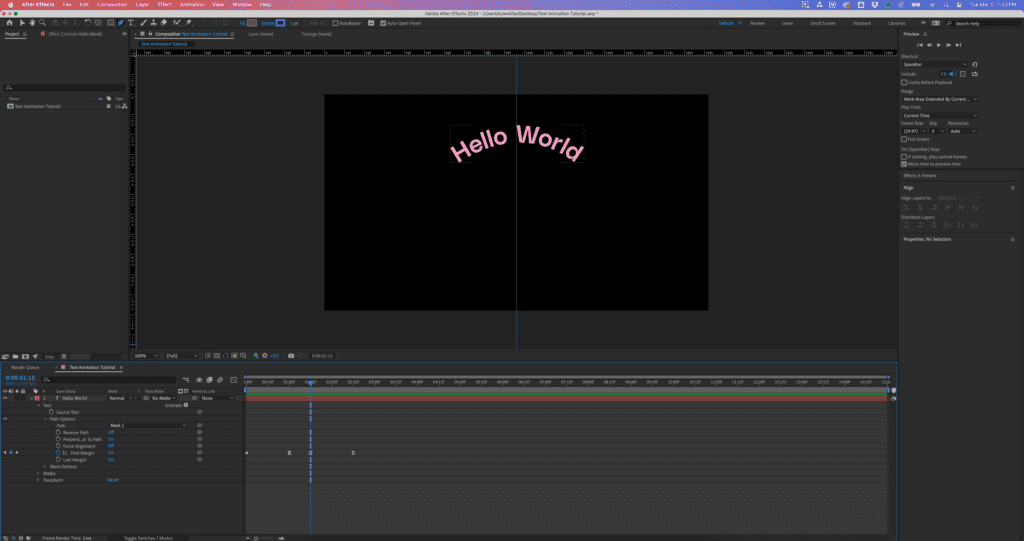
Finally, move to frame 75 and choose a high number for the First Margin value to animate it off the screen.
Creating a text animation with a Track Matte
A classic technique in text motion design is having your text slide into view as if emerging from behind an invisible wall. But if you’re new to After Effects, it can be confusing to figure out how to do this animation without impacting other elements in your composition.. To do it, we need to take advantage of Track Mattes. Let’s have a look:
1. Create a shape that covers your text
With your text in place, make sure no layer is selected, then switch to the rectangle tool. Draw a shape that fully covers the text.
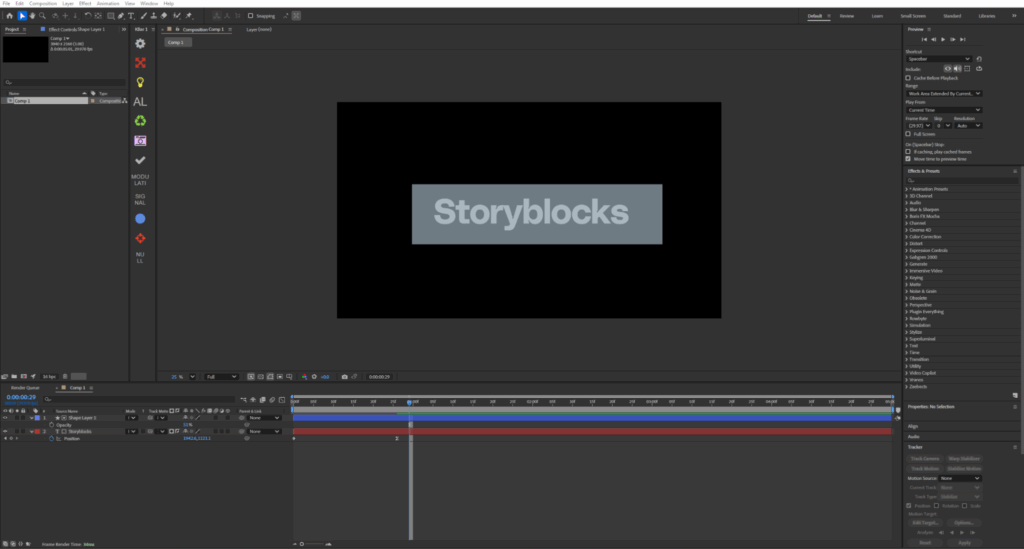
In this example, I’ve lowered the opacity of the shape so you can still read the text.
Once you’ve created it, you should turn the shape layer off while we focus on the animation.
2. Create your keyframe
For this animation, we want the text to rise up from below and settle dead center of the composition. First, create a Position keyframe by moving the playhead to the desired start point (usually the first frame of the composition), pressing P, and clicking the keyframe icon (small diamond).
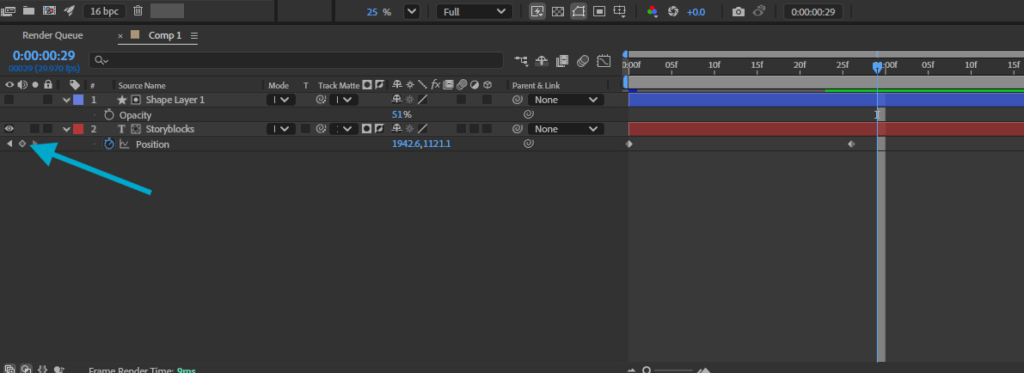
Then pull the text down to the bottom of the composition. Move the playhead forward a few seconds, and then bring the text up to its final position. Now, when you hit play, the text animates into view with a natural, organic motion.
3. Turn the shape layer on and set your Track Matte
Next, let’s add the magic by making the text appear from nowhere. First, turn the shape layer back on and ensure your text is positioned at the start of its animation. Position the shape layer so it covers the text.
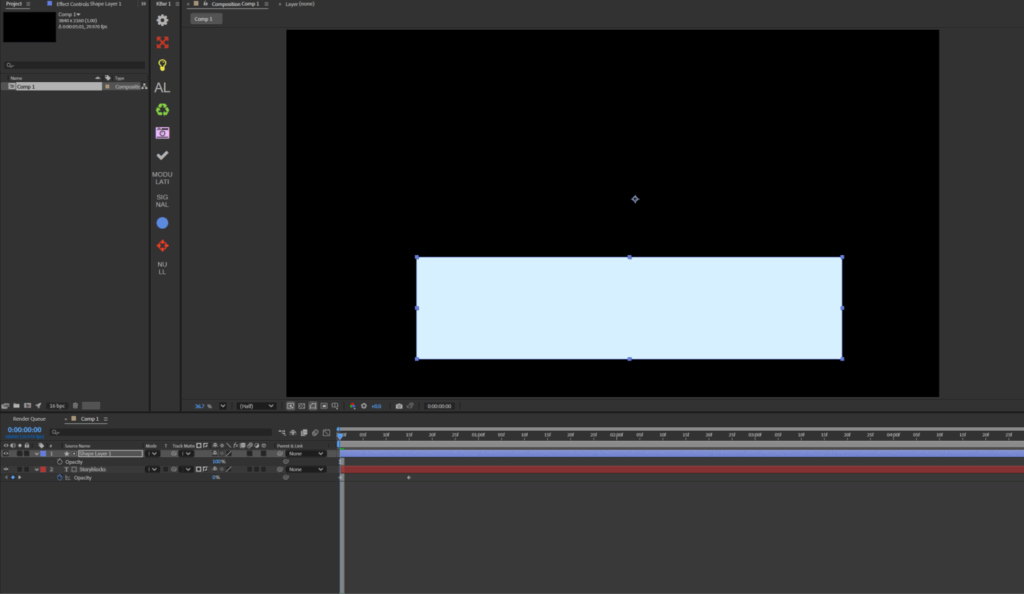
Select the text layer, then set its track matte to the shape layer. Next, choose Invert Matte. At first, it might just look like the shape layer has been turned off, but if you open the text layer’s Position and pull it downward, you’ll see the text now hides behind where the shape layer would be if it were visible. This is what a track matte is.
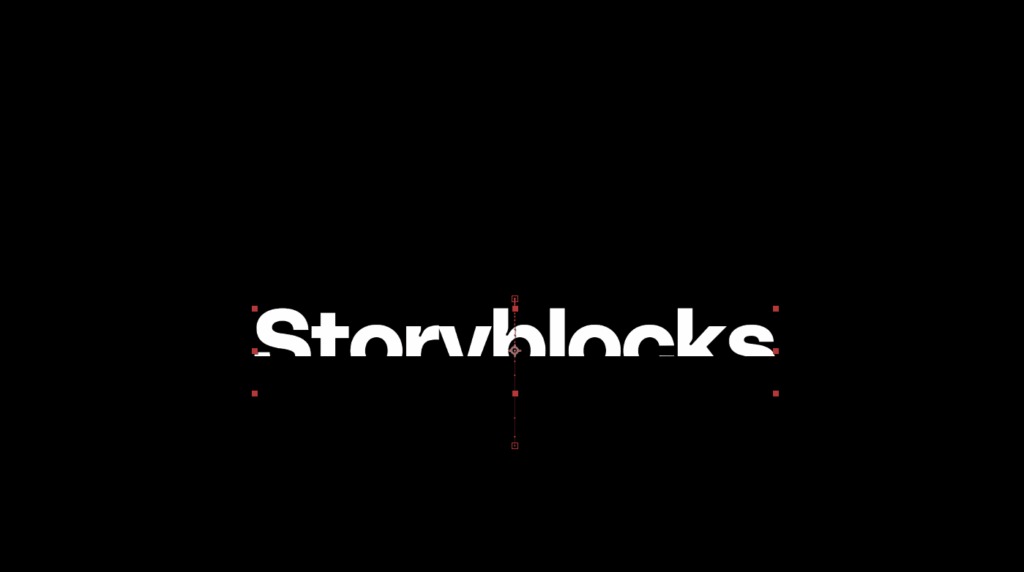
All we are doing here is using the shape layer’s data to hide the text inside the composition. Magic!
4. Adjust the opacity and apply easy ease (optional)
However, there are two more optional steps we can follow to improve the animation.
The first is to adjust the opacity. Set the text to 0% at the starting keyframe, then 100% at its final position. Shift that 100% keyframe slightly forward so the text reaches full opacity about halfway through the movement. This creates a more natural reveal, as the text now seems to brighten as it comes into view.
The second is to refine the motion, as it’s still quite rigid when it comes into view. Open the position keyframes, select the final one, and press F9 to apply Easy Ease. This slows the motion as it settles.
For an even smoother finish, open the Graph Editor. This is a tool that allows you to make mathematical adjustments to the movement for an animation. Here we’re going to grab the handle (yellow line) at the bottom of the final keyframe, and drag it forward. This gives the text a quick entry that eases into its resting point.
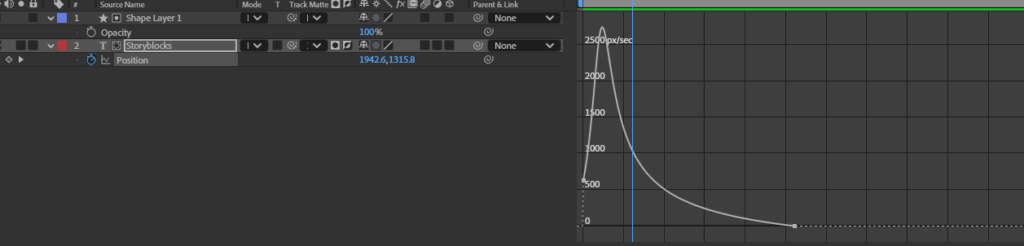
This is the final result:
Using presets for text animation
This is considered one of the easiest methods for creating animated text using After Effects. Packed within the After Effects program are numerous animation presets you can try out to discover the possibilities of text animation. Another benefit of using presets is saving time, as they come ready to use. There are free and paid preset options.
Browse and apply the text animation presets under the menu panel ‘Effects and Presets’ or Adobe Bridge.
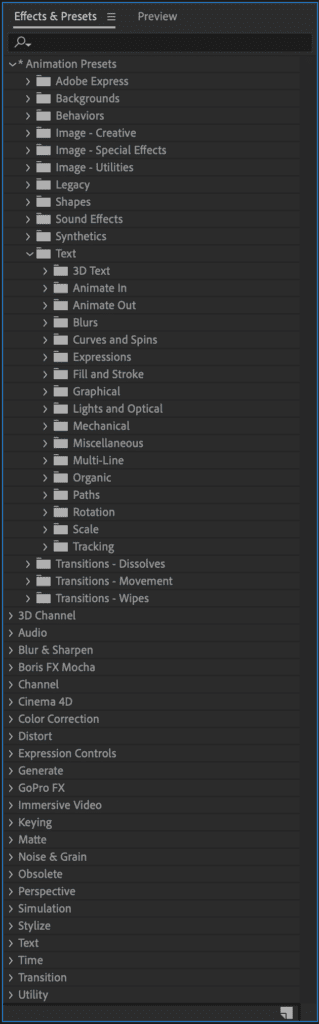
To apply, drag and drop the preferred animation or double-click on the preset if a layer is selected. Any of these actions will automatically apply to the preset. Afterward, you can make adjustments like changing the speed of the animation by dragging the Keyframes whichever way you desire.
Creating a typing animation
Given there are so many presets, let’s have a look at how we can use and adjust a fan favourite: the typing animation.
1. Apply the typewriter preset
With your text in the composition, open the Effects and Presets panel. If you don’t see it, go to Window > Effects and Presets, or press Ctrl+5 to bring it up. Search for Typewriter—you’ll see two Animate In options: Blinkin Cursor Typewriter Console and Typewriter. For this tutorial, choose Typewriter.
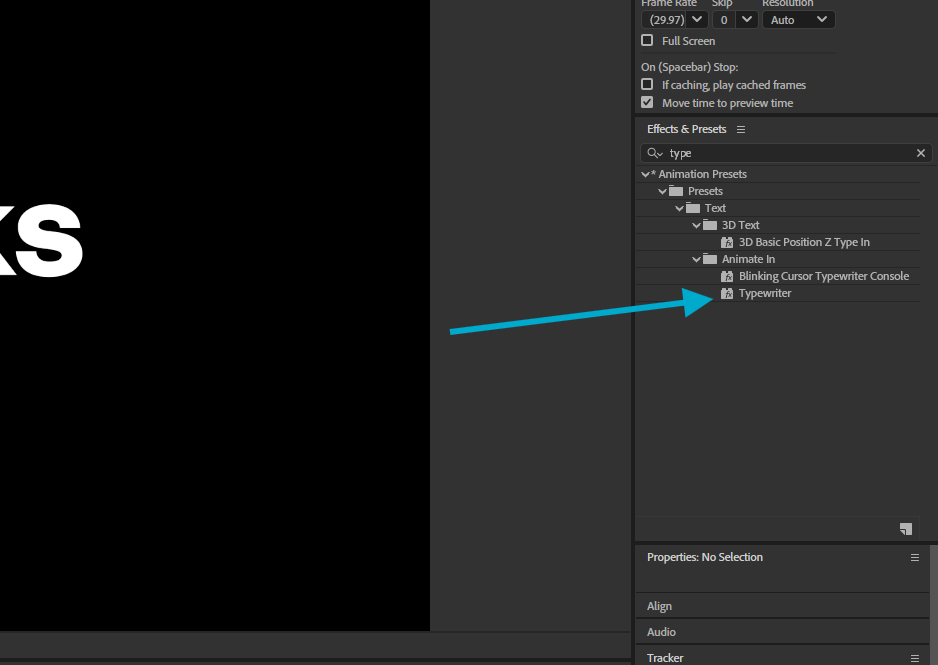
Before applying it, ensure your playhead is positioned at the start of the composition, or at least where you want the text animation to begin. Once applied, hit Play to preview the effect. You’ll notice it works, but it feels a bit slow.
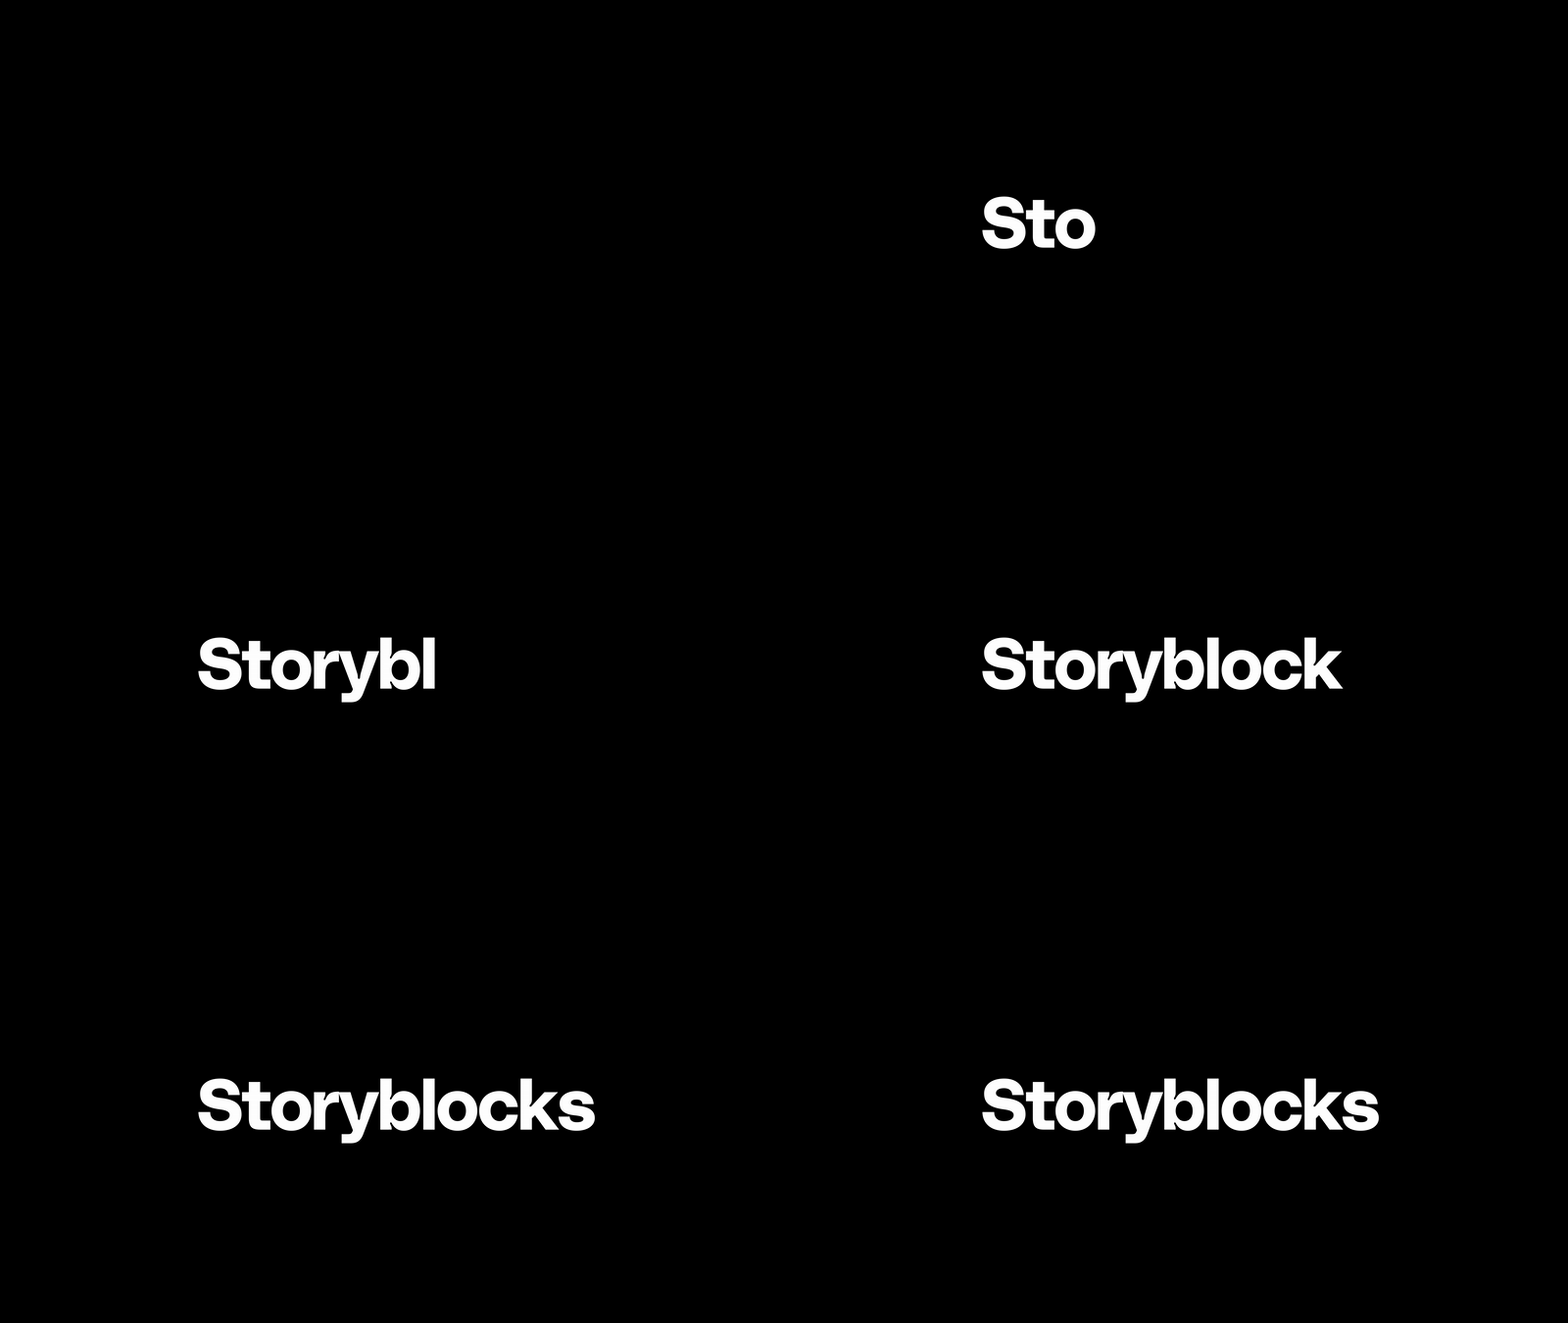
2. Adjust the settings
To adjust the speed of this animation, we need to do something a bit differently than going to the Effects Controls panel. Unlike most effects, you won’t see parameters here, because this preset is built using the Animator Range Selector (a text-specific function) rather than a standard effect like Blur.
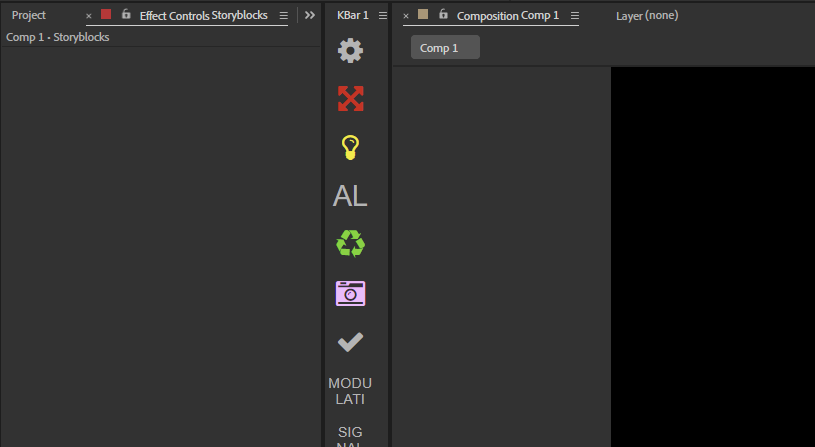
There’s nothing here in the Effects Control panel—abort!
To access these parameters, just select the layer and then press U on your keyboard. This will reveal all active keyframes. Here you’ll see Start and End keyframes added automatically when you applied the typewriter preset. Simply drag the End keyframe closer to the Start to speed up the typing effect.
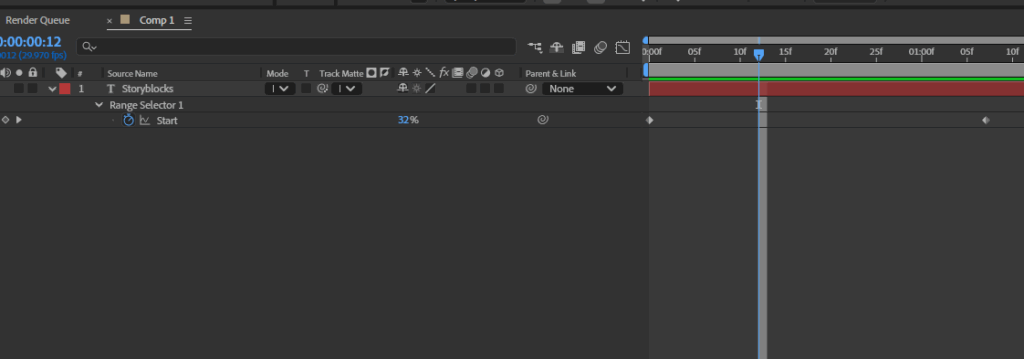
This is the revised animation. Much better.
Going beyond presets
If there’s one downside to some of the built-in After Effects presets, it’s that they can be a bit bland. They lack character, for better words.
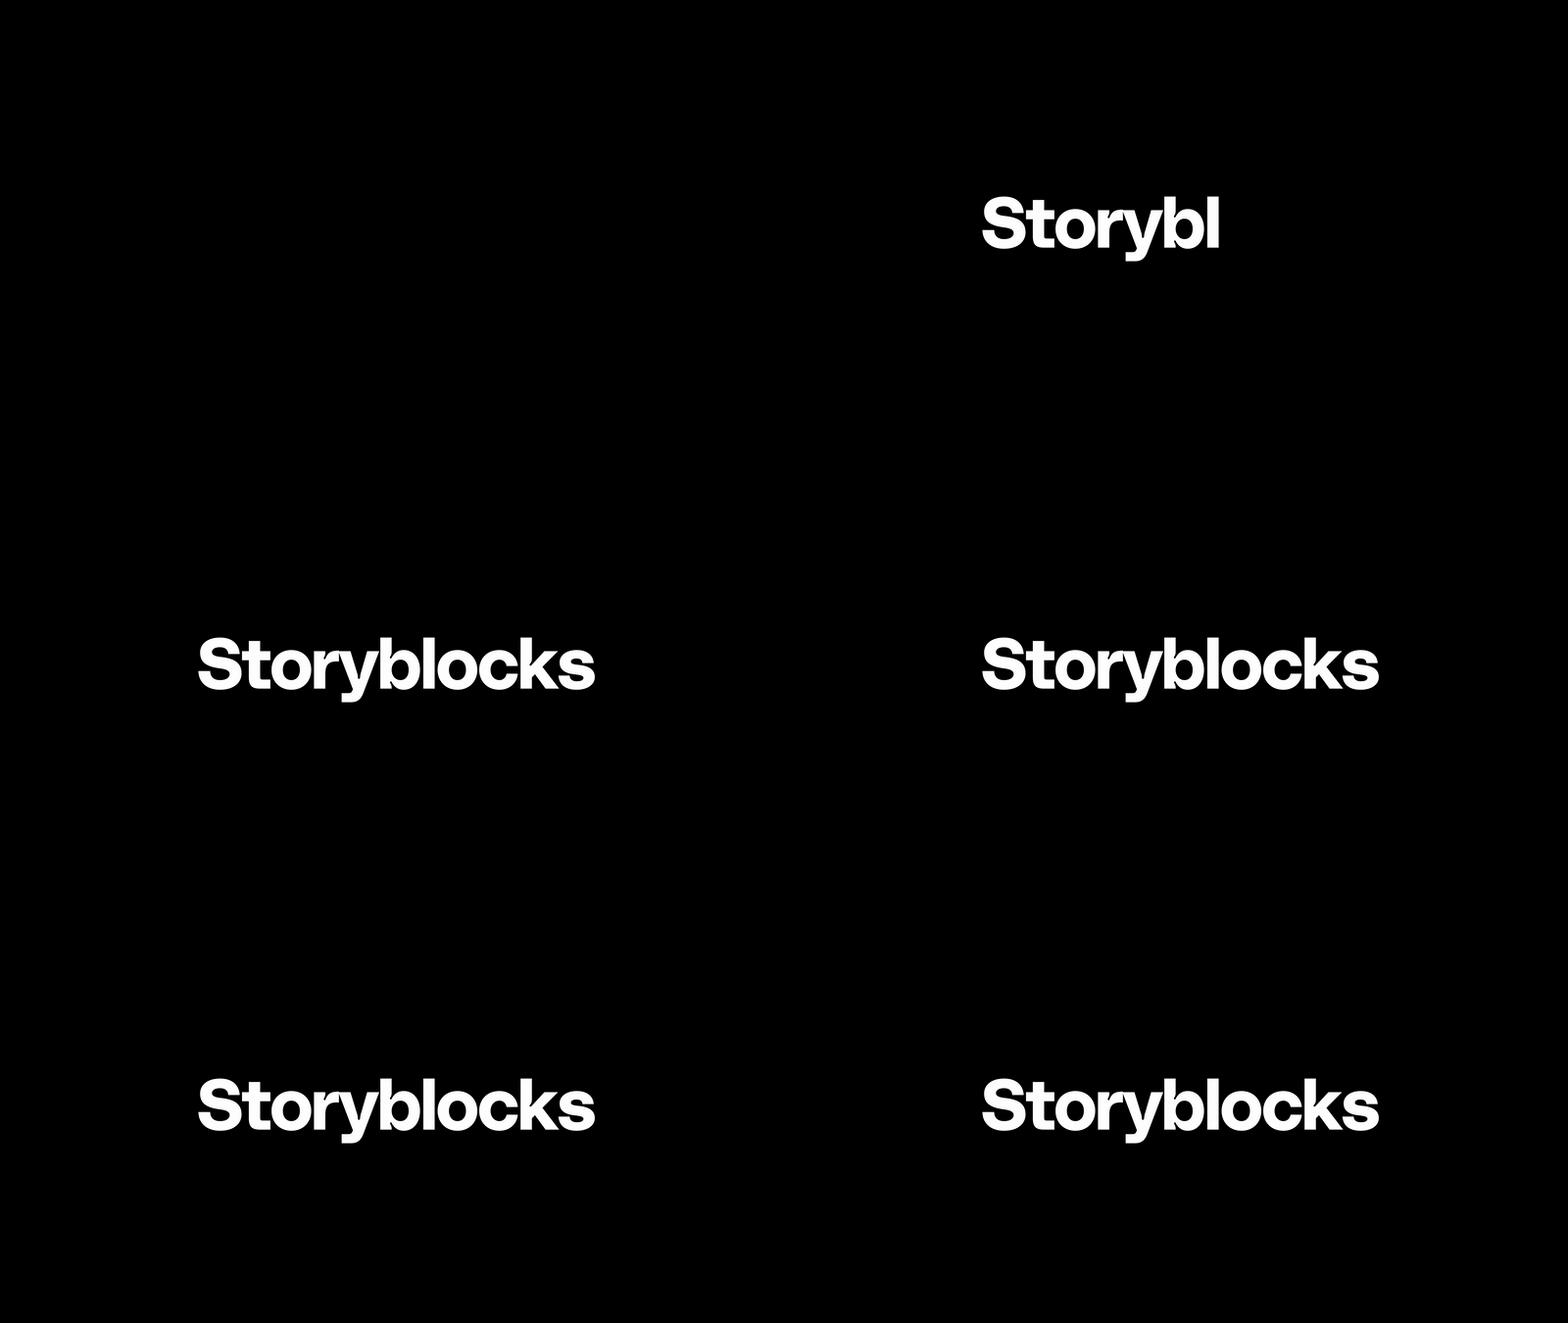
If you’re still fairly new to After Effects and want a typewriter effect but with something that has more grandeur, look no further than the Storyblocks library. There’s a wide variety of templates and MoGRTs that implement unique typewriting animation design, such as this one:
This template includes eight different typewriting animations, allowing you to add that missing flair that some of the built-in presets lack.
Go further animating text with expressions
Expressions are a staple way to introduce organic life into specific object and layer properties, such as position, opacity, and scale, through the use of JavaScript code. An expression is essentially a coded instruction that tells an object how to behave.
However, and it’s a big however, they’ve historically always been tied to the entire word or sentence within the text field. Meaning if you wanted the expression to affect individual characters or words, these would have to be separated into individual text layers. And this, if you’ve spent more than an hour on After Effects, can be a big headache.
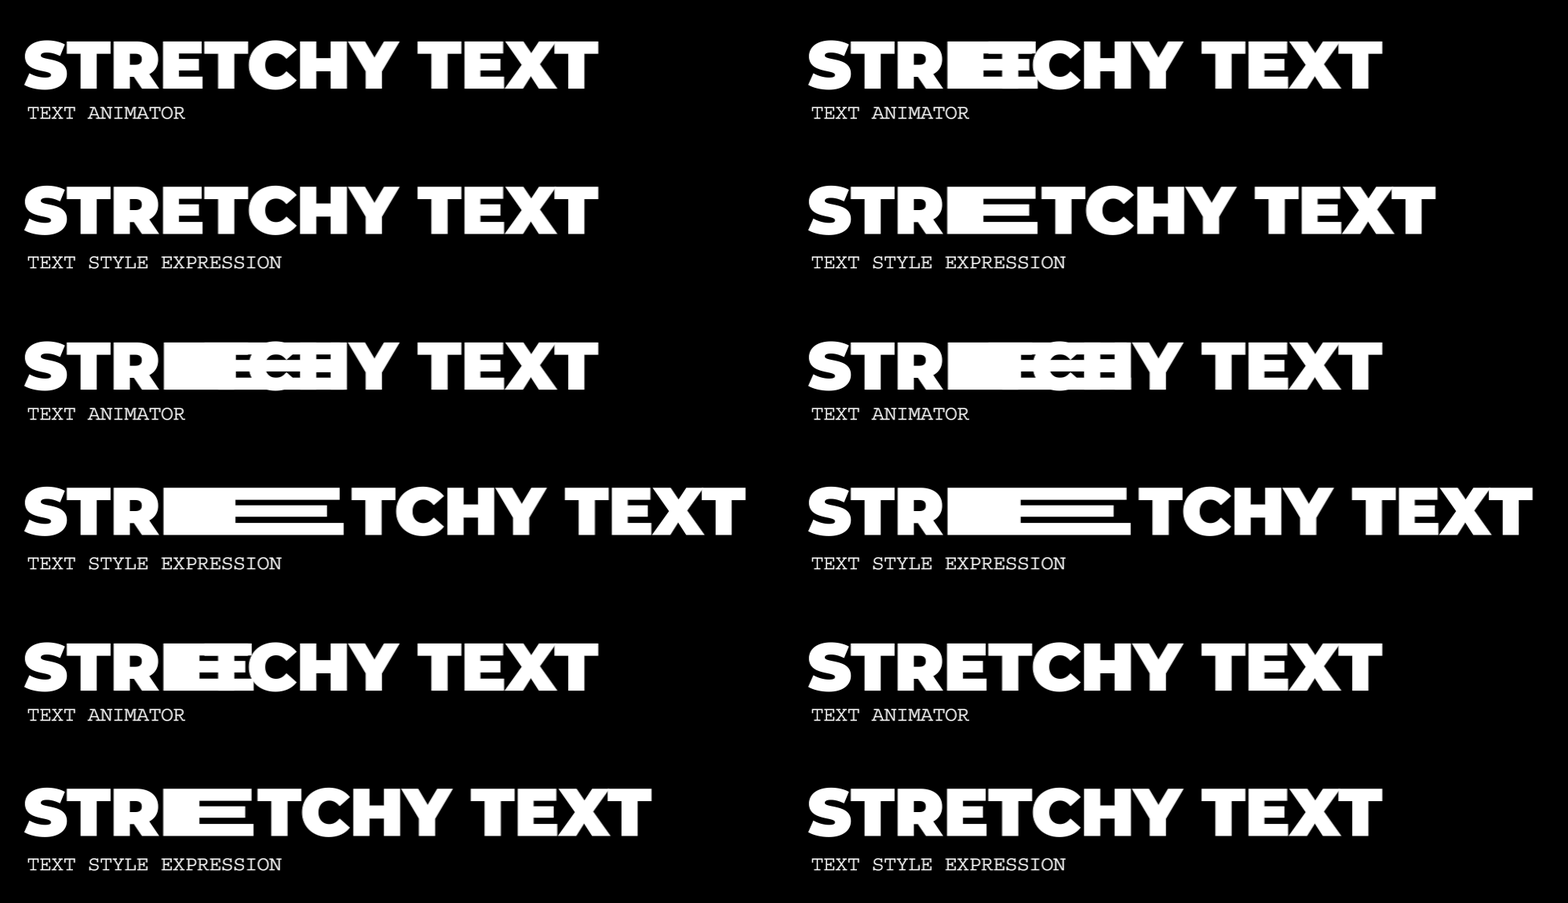
This all changed with a 2024 update, which introduced per-character text and paragraph styling! This has been a long-requested addition to expressions, and one welcomed warmly, because the benefits enhance the motion graphic artist’s life tenfold. For example, one advantage of per-character control is the automatic reflow of text when scaling letters or switching fonts. You can see this in an example from the GIF below, provided by Adobe.
How to access per-character expressions
Sound great? We think so too. Here’s how you can find your way to these expressions.
1. Set your Expression Engine to JavaScript and open the menu
First, ensure that your Expression Engine is set up to use JavaScript.
Then, open the expressions menu. You can do this by alt-clicking the stopwatch on Source Text to bring up the expressions panel, then selecting the expression language menu (the play icon). (It’s important that you alt-click the Source Text parameter, and not anything else that features a stopwatch, otherwise the expression will fail.)
Here, under the Text>Styling menu, there is a wide variety of expressions to play with to create unique text animations.
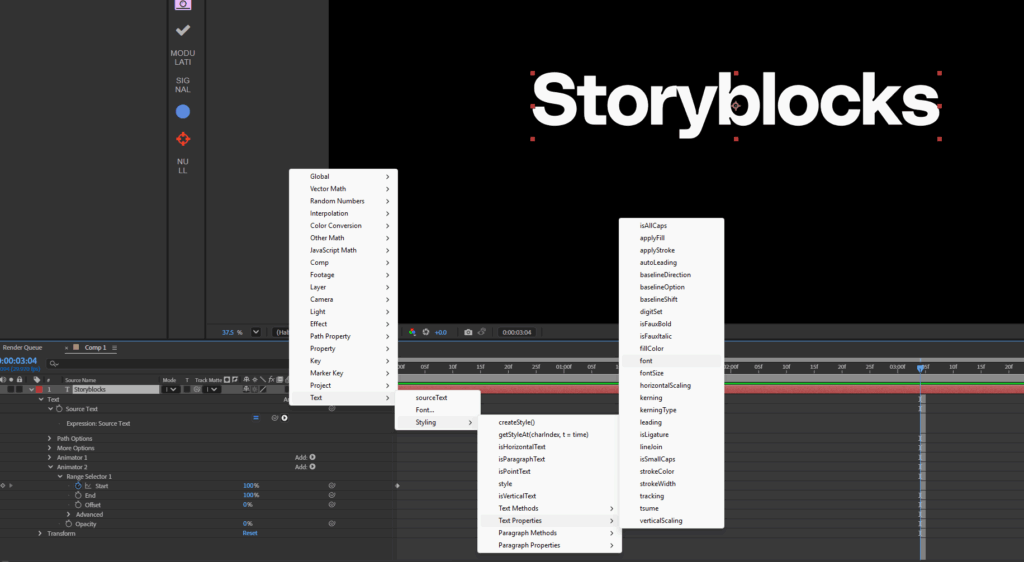
For example, if we were to go Text>Styling>TextProperties>Font, we could then put in this expression to alter the font of a singular text layer.
text.sourceText.style
.setFont(“Montserrat-Light”)
.setFont(“Gigantic”, 0, 6).setFont(“Gigantic”, 10, 6).setFont(“Gigantic”, 20)

Ok, time for a little self-admission. I’ve been using After Effects since 2006, and to this day, expressions somewhat elude me. I’m not overtly proficient with coding, and well, expressions run on that language. So, outside of some of the basics, I often have to refer to an expression handbook when I’m working on my designs.
It can, after all, feel like a foreign language. If you feel the same, be sure to visit the Adobe Community Board where this update was first shared. An Adobe staff member also shared an Expression API document, which lists a vast array of expression codes you can use to take your text animations even further.
Alternatively, if you have the time, MoGraph Mindset offers a one-hour video that provides a comprehensive overview of this new update. One hour!
https://www.youtube.com/watch?v=yG8UbiKKeYw&
Increase efficiency with text styling Property Pasting
Okay, yes, this is an article about After Effects, but bear with me on this one because, if there’s one thing I love about DaVinci Resolve, it’s its Paste Attributes function. This allows you to copy a video clip and then paste its attributes, such as position, crop, effects applied, and any other adjustable parameters, onto a different video clip. It saves so much time when I need to quickly apply the properties of one video clip to another.
When it comes to After Effects, you’re often working with countless text layers in any motion design project involving typography. The real frustration here is when a new idea comes to light, or perhaps client feedback necessitates restyling specific words throughout the animation.
Previously, you would have to go through every single text layer and make adjustments. However, thanks to a new update that was released only several weeks ago, this is no longer necessary, as you can now paste the text formatting only, such as font, size, color, and style, without actually changing the text itself. This allows you to match text styles across various layers and quickly apply formatting from one text element to another.
Now, all you need to do is find the layer with the text that you intend to copy its properties, highlight the text, press Ctrl-C to copy, and then go to the other text layers, highlight the text right-click, and select Paste Text Formatting Only. This will then copy and apply all of the attributes from the text layer.
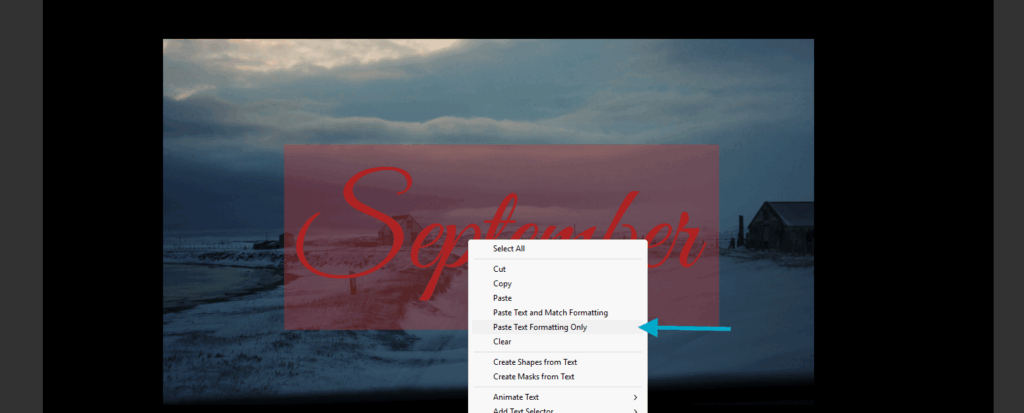
It’s important to note that this option only appears when you’ve highlighted the text itself; you can’t right-click the layer from the timeline.
Explore text animation templates for After Effects
Text animation is just one of the effects you can create within After Effects to set your videos and projects apart. Explore more of our After Effects tutorials here to learn even more tips and tricks for getting the most out of your favorite video editor, including how to animate a logo. If you’re looking for an easier way to add animated text into your projects, explore our selection of text templates to use with After Effects. All of our templates can easily be downloaded and completely customized. AE templates are easy to use and require minimal technical skills to edit.
Typography is a specific subset of motion design in which the artistry derives from the words and text themselves. If you’ve ever watched a well-produced lyric video, you’ve more than likely seen typography put into play.
Now, unlike creating a lower third for some of the simpler animations we’ve discussed throughout this article, typography is something that requires considerable practice and knowledge with After Effects.
But if you’re looking to skip the queue, there are a wide variety of templates available in the Storyblocks library, such as the Kinetic Typography Template or the Chaotic Typography Template. These allow you to hit the ground running with that type of motion design. Perfect for lyric videos.
With a Storyblocks subscription, you get built-in access to all of our content, plus our plugin that brings 6 million stock assets right into After Effects. Our library of over 8 million assets includes high-quality royalty-free stock videos, templates, images, and audio. So you not only get AE templates to create advanced animated text effects, but you also get other tools to edit and enhance your video content. Our plans are designed to fit your budget through affordable subscription packages that include licensing for both individual creators and businesses of any size.


