Animating your business logo can change someone’s perception of your company from a mom-and-pop shop to an efficient start-up before you know it. Today, we’ll walk you through how to animate a logo in After Effects. Even if you’ve never opened After Effects, this tutorial is beginner-friendly and covers the very basics of animating. All you need is a PNG of your logo to get started.
To guide you through this tutorial, you can watch the video below, or use this written guide to follow along step-by-step at your own pace. However, since this is an animation, keep in mind that references to motion may not be visually represented in the article.
How to create a logo animation
1. Set up your composition
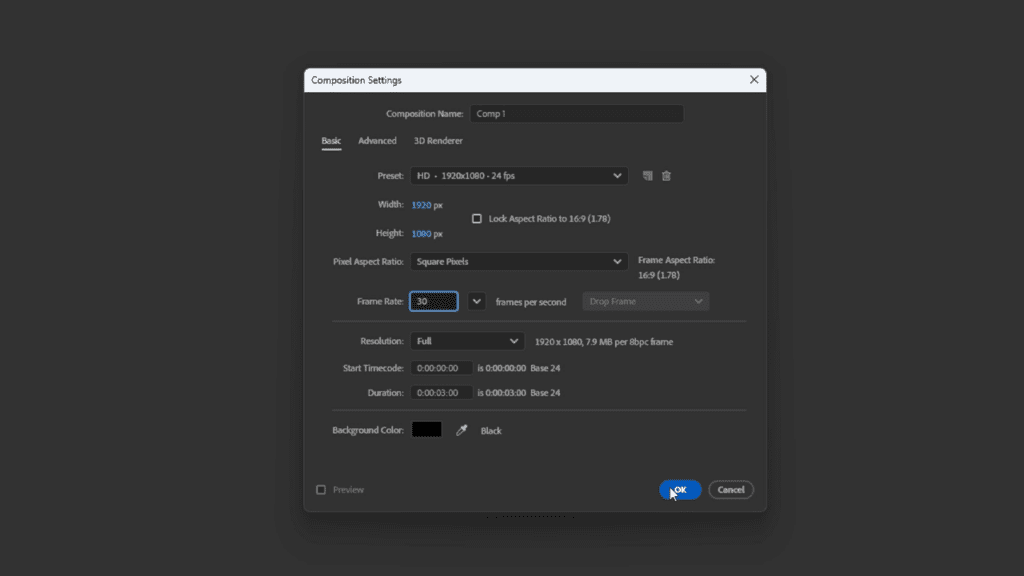
First, we need to create a new composition. Set the resolution to 1920×1080 and adjust the frame rate to 30 frames per second. This will allow for a more responsive animation. Then, set the duration as 10 seconds and name the composition. Once you’ve got your settings in, hit the blue OK button.
Once you’ve got your composition, your next step will be to create a background layer. There’s two ways you can do this: press the shortcut Ctrl+Y/CMD+Y or navigate to Layer > New > Solid. Then set the background color to white (you can change it later if needed).
2. Add your logo
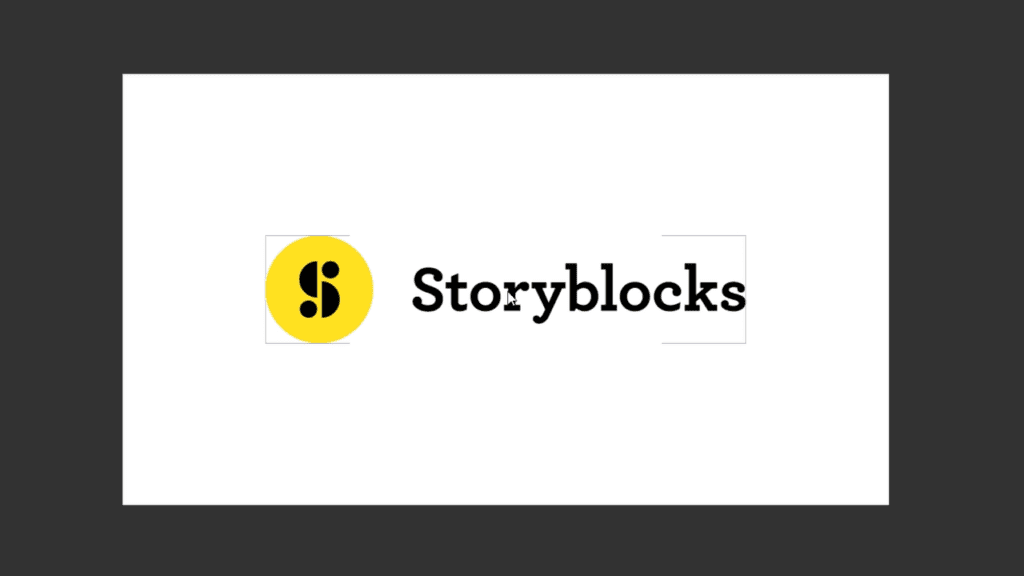
Next, import your logo and place it on the timeline. In our example, we’re using a standard PNG Storyblocks logo that hasn’t been professionally prepared. By this, we mean that it contains text and an icon as one combined file. We’ll need to separate these elements before we can animate.
To do this, first press Ctrl + D to duplicate the file. Then, rename one layer “Icon” and the other “Title.”
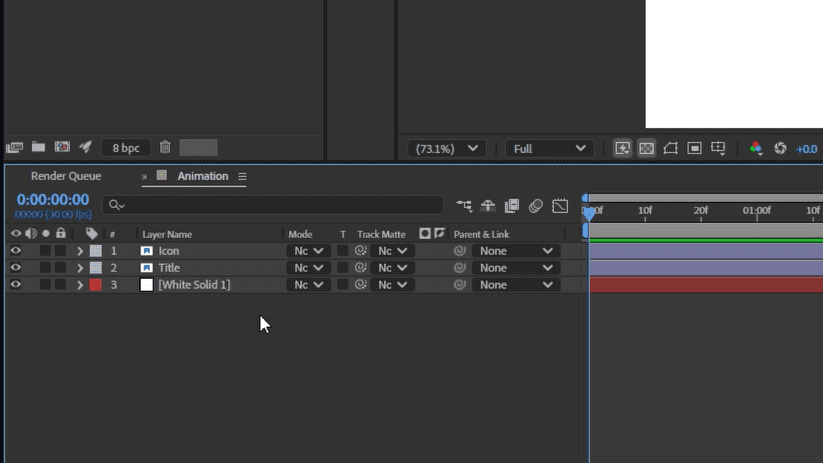
We need to use the Mask Tool to separate the icon and text into two distinct layers. First, ensure that you have selected the layer in the timeline (otherwise, it will create a shape).
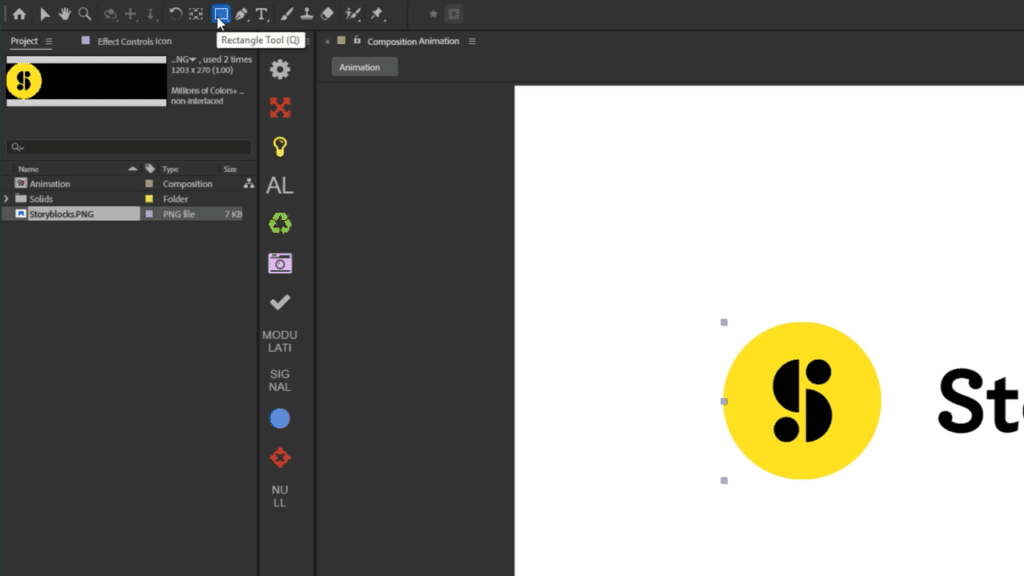
Next, choose the Rectangle or Square Tool, and drag a mask around the icon on the Icon layer. Then, do the same for the other layer.
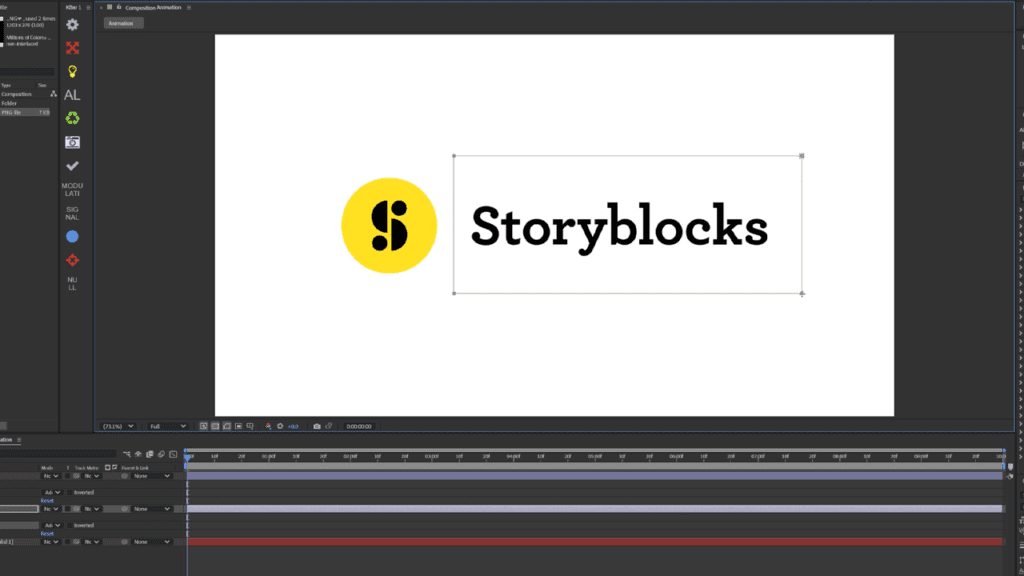
If you adjust the layers, like rotating one, the layer will likely feel lopsided. This is because the anchor point for each layer is still at the center of the original image, not on the two newly separated elements.
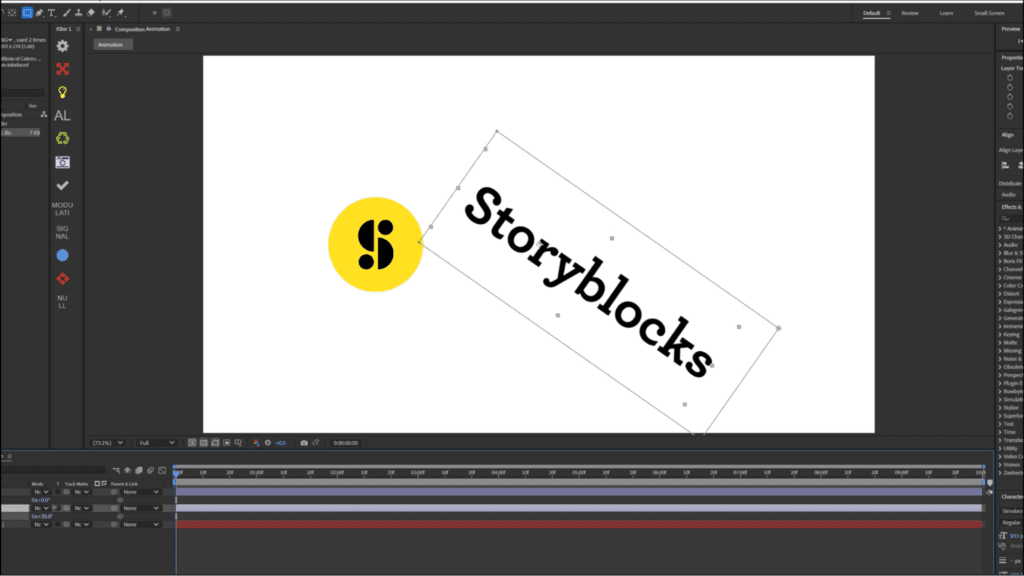
To adjust the anchor points for each layer to fix this., select a layer, go to the Layer menu, and select Transform > Center Anchor Point in Layer Content. You can also quickly use the shortcut Ctrl + Alt + Home. Repeat this process for both layers. Now, their anchor points will be correctly centered on their content.
Next, open the Align menu on the right side of the user interface. If you don’t see it, go to Window > Align and ensure it’s ticked. For the Icon layer, click Align Horizontally to center it and snap it into the correct position. It might look messy right now, but this is precisely where it needs to be.
Finally, turn off the text layer by clicking the eye icon on the left.
3. Set keyframes for scale, position, and rotation
Our logo is centered and masked, ready to be animated. Hold shift and press S, P, and R to bring up the Scale, Position, and Rotation parameters. Then, click the keyframe button (stopwatch icon) to set a keyframe for all three. Move a few frames forward in the timeline and set another keyframe for each parameter.
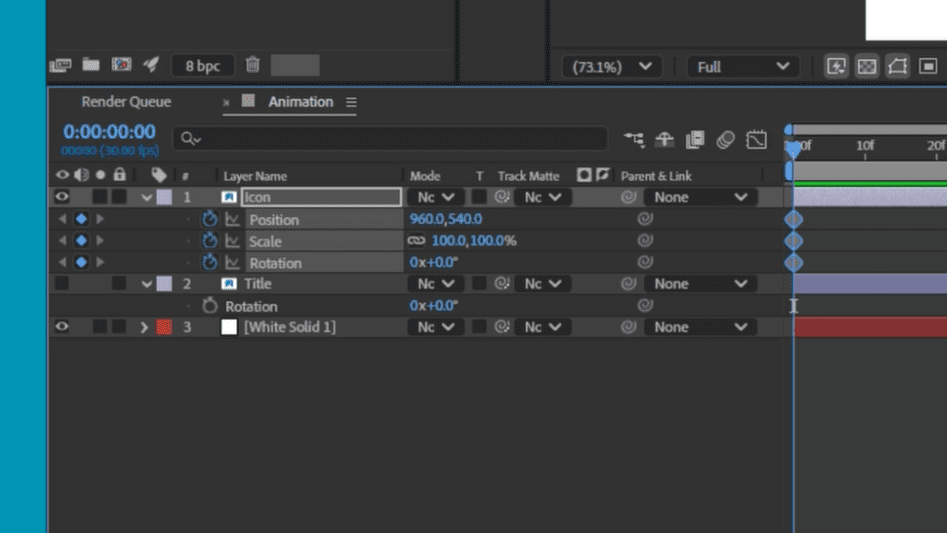
Then, return to the first frame and reduce the Scale to 0. If you hit Play, you’ll see the animation starting to take shape, but it’s rough.
4. Change Scale keyframes to Easy Ease
To improve this, select both Scale keyframes and press F9 to make them Easy Ease keyframes. As seen in the video tutorial, this motion is okay, but we can refine it by adjusting the motion within the Graph Editor, represented by this icon on the right.
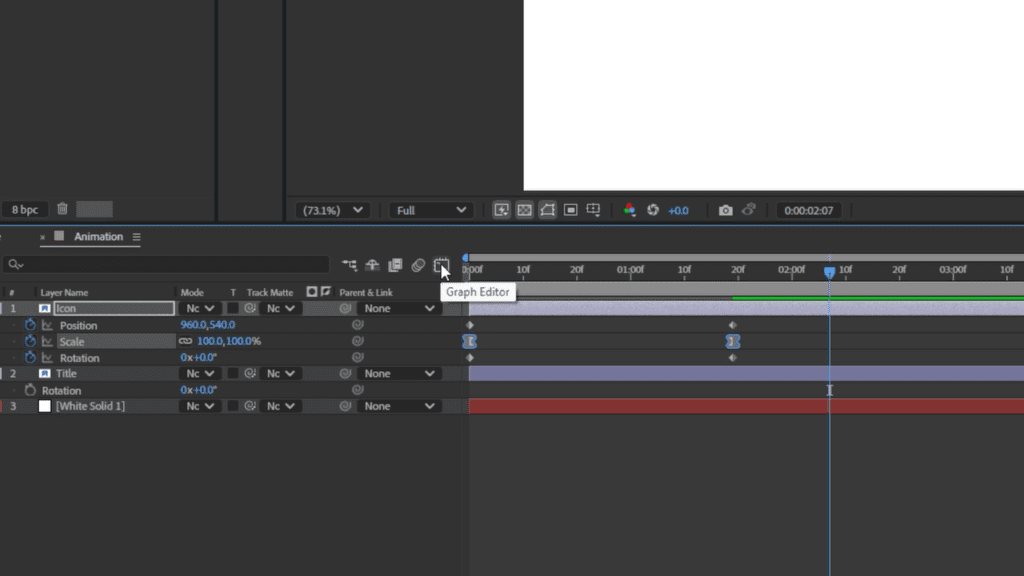
5. Adjust the Speed and Value Graph
You should start with the Speed Graph, which is the default view. Drag the yellow handle across to create a sharp peak in the graph. When you press Play, you’ll see the animation accelerate and decelerate, creating a nice ramp-up effect.
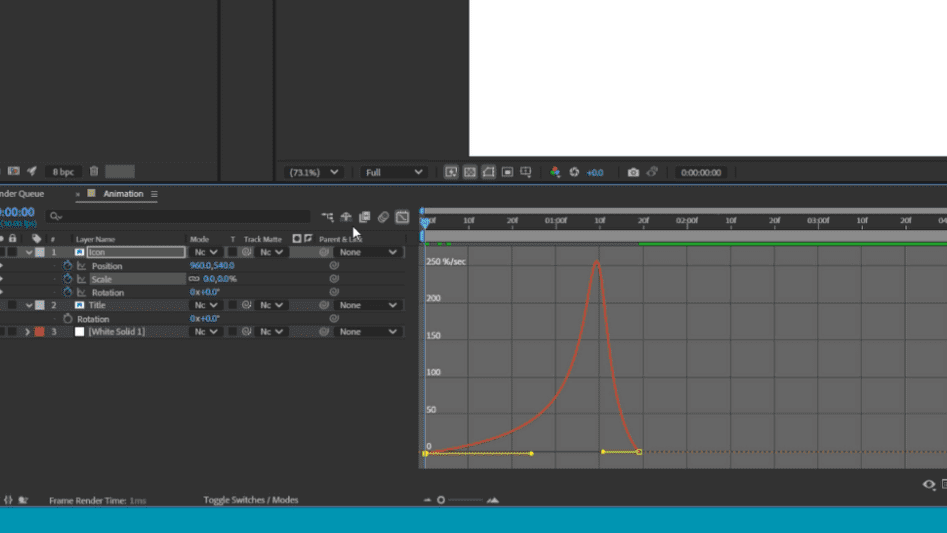
Next, switch to the Value Graph. To do this, click Choose Graph Type and Options and select Edit Value Graph. In this graph, adjust the scaling behavior toward the end of the animation. Grab the yellow handle and pull it up to create a slight increase in scale just before the animation finishes. This adjustment adds a subtle bounce effect when the icon loads.
When you now hit Play, the animation should feel smoother and more polished, with a satisfying bounce at the end.
6. Add in rotation
Now, let’s add some organic life to the animation by slightly rotating it.
For the Rotation keyframe, move the playhead to the beginning of the timeline. As we’ve already set a keyframe at the finish point, we need to set a slight adjustment here. Depending on the shape of your logo, you could set the first keyframe to -90 or -180, so there’s only a small amount of rotation as it scales in.
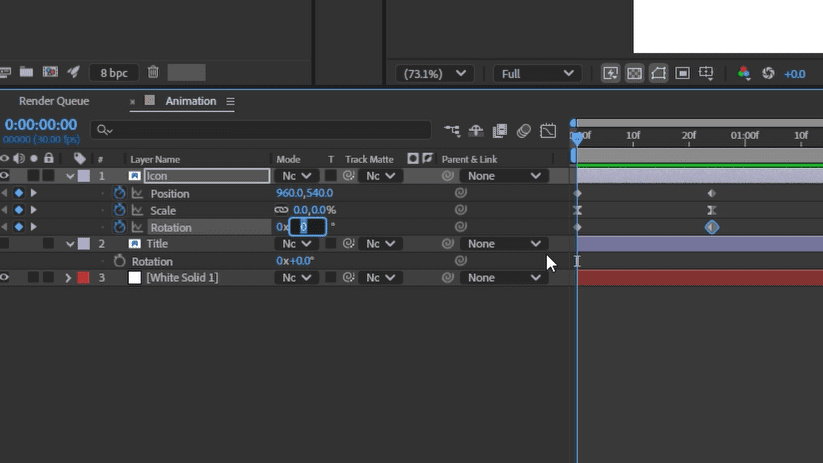
Now, the animation scales with acceleration and rotates into view.
7. Animate the text layer
Now, let’s turn the text layer back on. It’ll look pretty messy, but the next step is to animate the text into view.
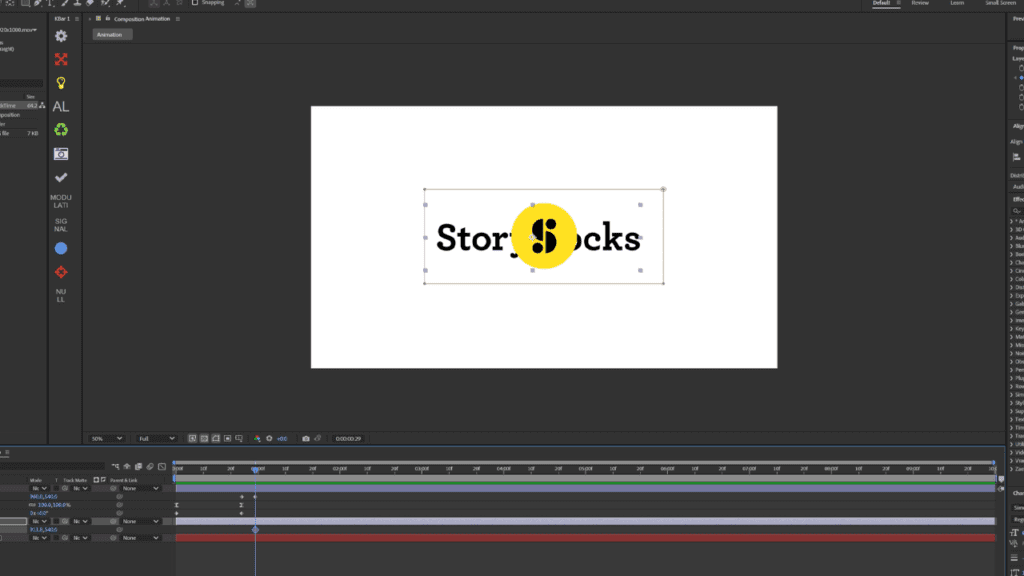
First, activate the text layer’s Position keyframe by pressing P on the keyboard. Move the text slightly to the left so it starts hidden behind the logo. Then, move forward in the timeline (around half a second) and adjust the text layer’s position so it slides fully into view.
At the same time, shift the logo slightly to the left until it returns to its original starting position before the separation. If you’re having trouble with alignment, consider bringing in the original, unedited logo to align the animation correctly—then delete it once done.
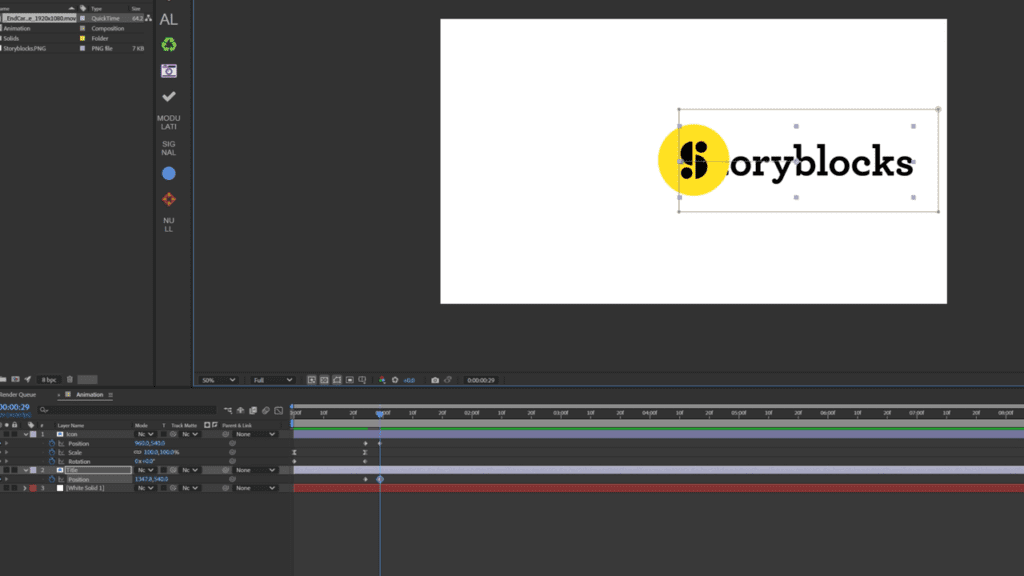
8. Convert keyframes to Easy Ease and edit the Speed Graph
The animation is starting to look solid, but the movement of both elements lacks kinetic energy. To improve this, select all the keyframes on the position values, press F9 to convert them to Easy Ease, and open the Graph Editor to refine the motion.
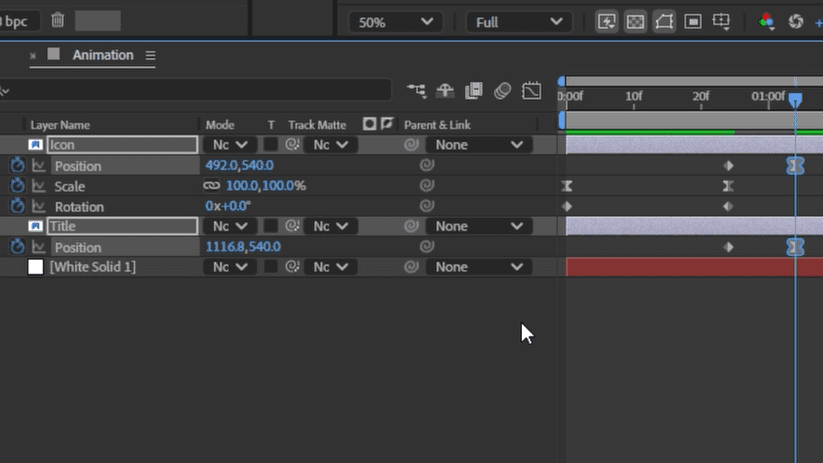
Unlike the Scale animation, you don’t need to touch the Value Graph. Instead, edit the Speed Graph to make the movement smoother.
Repeat this process for the Icon layer, too!
9. Adjust the text layer mask
Now, your animation looks much better, but there’s still one glaring issue: the text is visible before the animation starts. There are two ways to address this with a mask.
Via Mask Path
Since the text layer is already masked, press M to open the Mask Path properties. Then, add a keyframe to adjust the mask path so that the text appears in sync with the animation. While this works, it’s undoubtedly tedious and time-consuming.
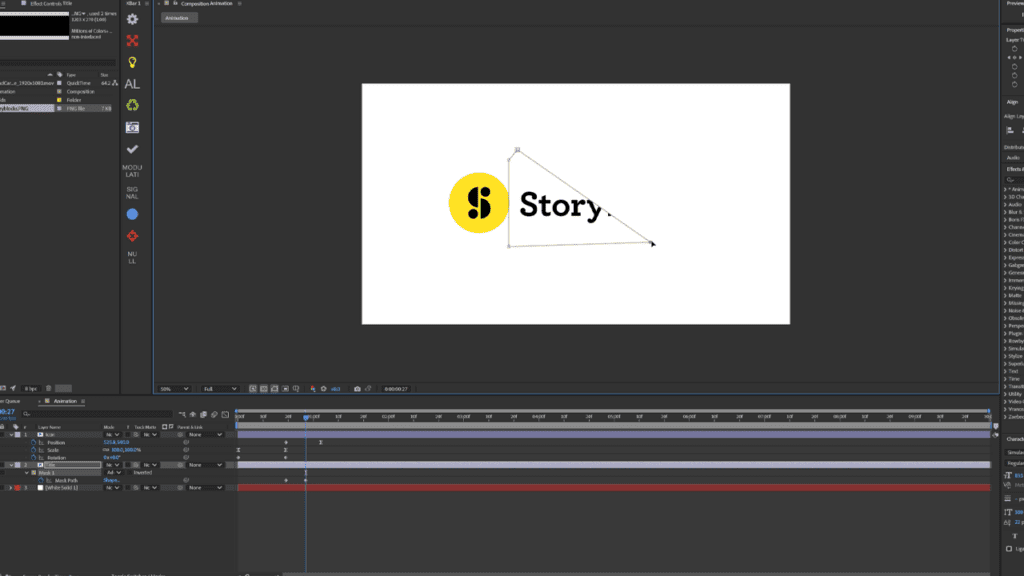
Via Track Matte
A more straightforward approach involves creating a Track Matte element, which is easier to manage and faster to produce. To do this, ensure that no layers are selected in the timeline, and then select the Rectangle Tool to create a Shape Layer instead of a mask.
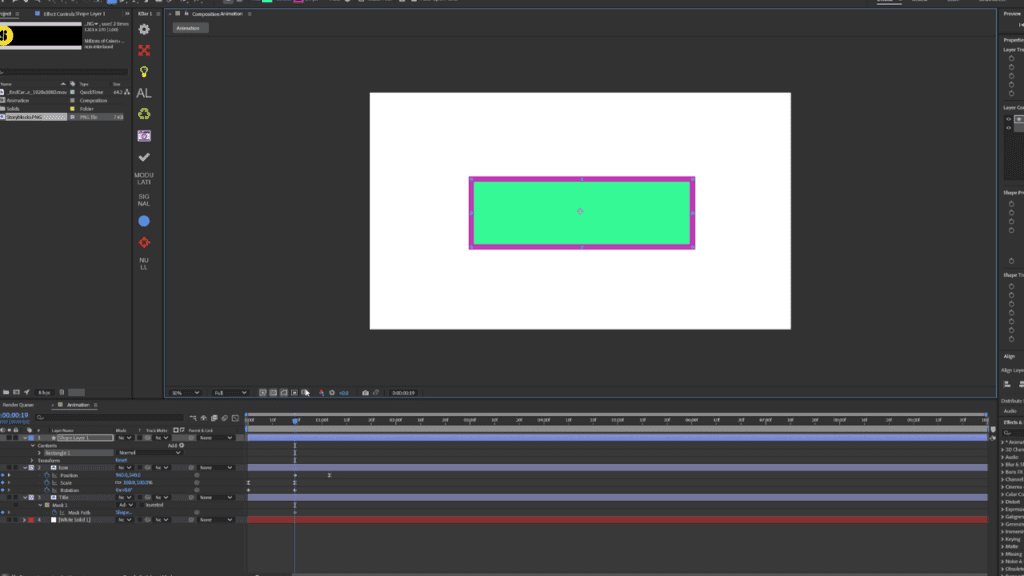
Draw a rectangle on the left side of the composition so it fully covers the text and is positioned above the text layer in the timeline. Then go to the Track Matte selection in the timeline panel, usually found in the Modes column. By default, it’s set to No Matte. Change this to Alpha Matte: Shape Layer 1, then check Click to Invert Matte.
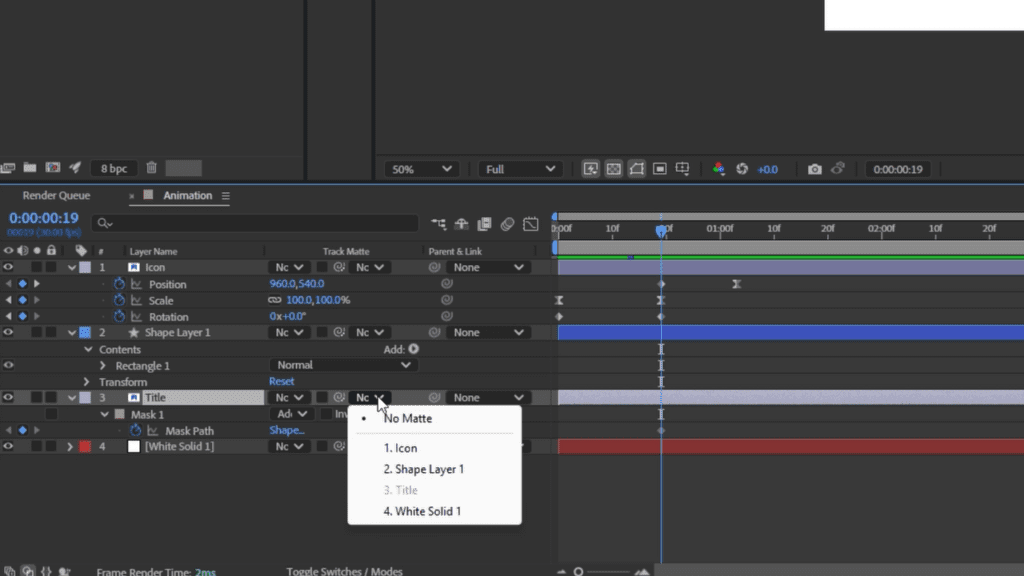
Once inverted, the text is no longer visible at the start. As you move the play head forward, it will begin to appear only once it moves past the boundaries of the shape layer.
You might need to adjust the size or scale of the shape layer to match the length of your text and the direction of the animation.
10. Enable Motion Blur
Lastly, to achieve a smoother, more dynamic effect, enable motion blur by clicking the Motion Blur icon and checking the corresponding boxes for the text and shape layers. Your animated logo is now complete!
Not bad for a logo that was nothing more than a static PNG file a few moments ago.
Using Storyblocks Logo Reveal Templates
If you’re not entirely comfortable with After Effects or prefer something more elaborate, consider using an After Effects template from the Storyblocks library. This library offers a wide selection of professionally designed logo reveal templates.
Once you find the perfect template, click download and then extract its contents. Inside, you’ll find a few different folder options. If you want to use the exact font from the preview, there’s a font file or a link to the font file. If not, you can skip that step and jump into the After Effects project.
Editing the Template
First, open the After Effects project file by double-clicking on it. A pop-up may appear if the required font isn’t installed on your PC. This is not a problem; you can install any font to suit your branding needs better.
If you’re using a newer version of After Effects, it might ask you to update and convert the file. Simply press OK to proceed. One fantastic thing about these templates is that, despite their impressive and complex animations, adjusting them to fit your logo or company name is incredibly simple.
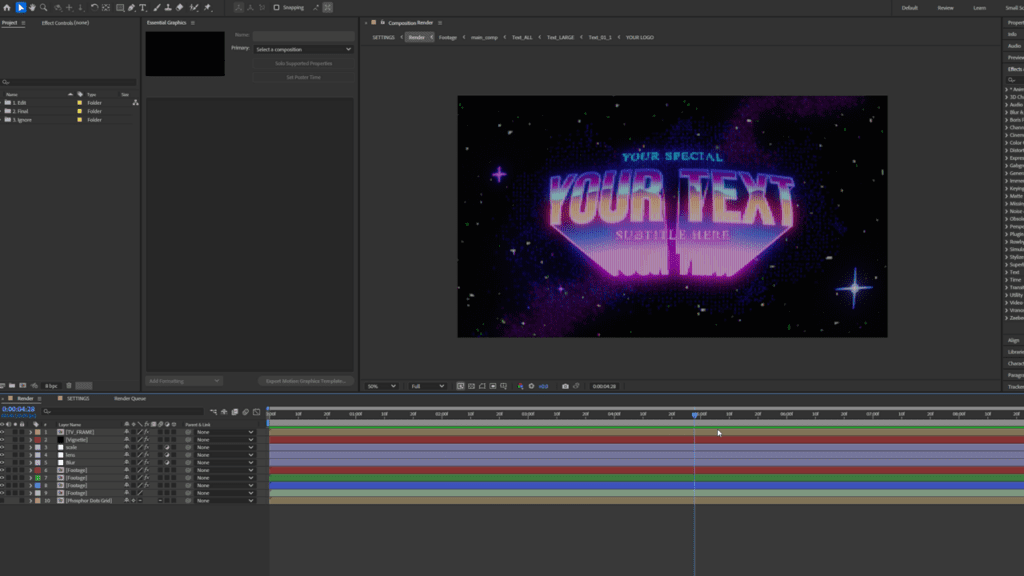
On the left-hand side, with this specific download, you’ll see three folders, but there’s only one you need to open: the Edit folder. This goes for all templates you can download.
This template has four individual compositions labeled Text 1 through Text 4. When you open each composition, you can see the various titles used in the template.
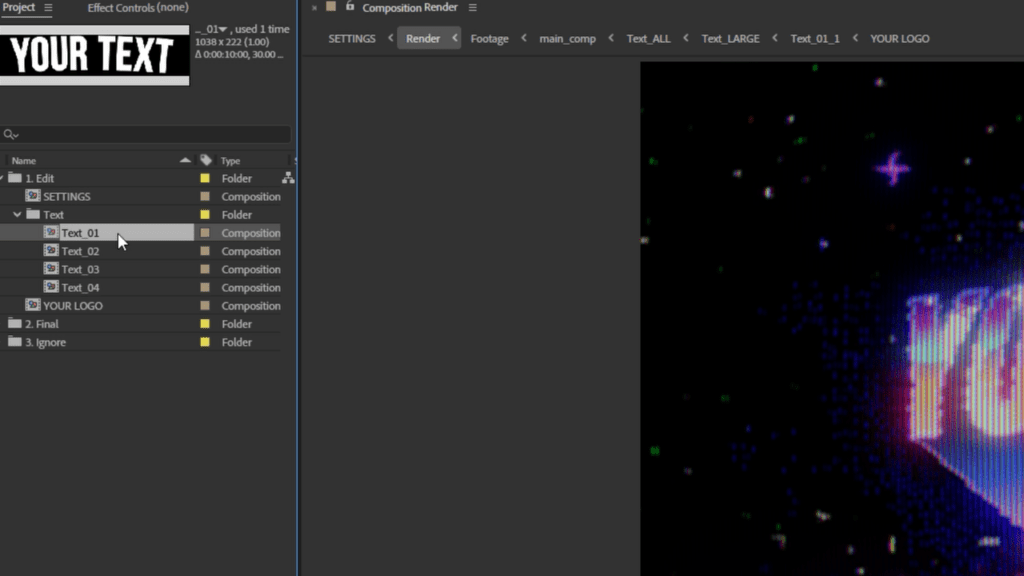
Start with Text 1 and replace it with your company name.
Do this with each text composition. You can remove the text if you’re not looking to include a tagline or subtitle. However, do not delete the composition from the project file, as this could break the template.
Customizing the Template
By the end of this process, you’ll have something that looks like the original preview but with your branding.
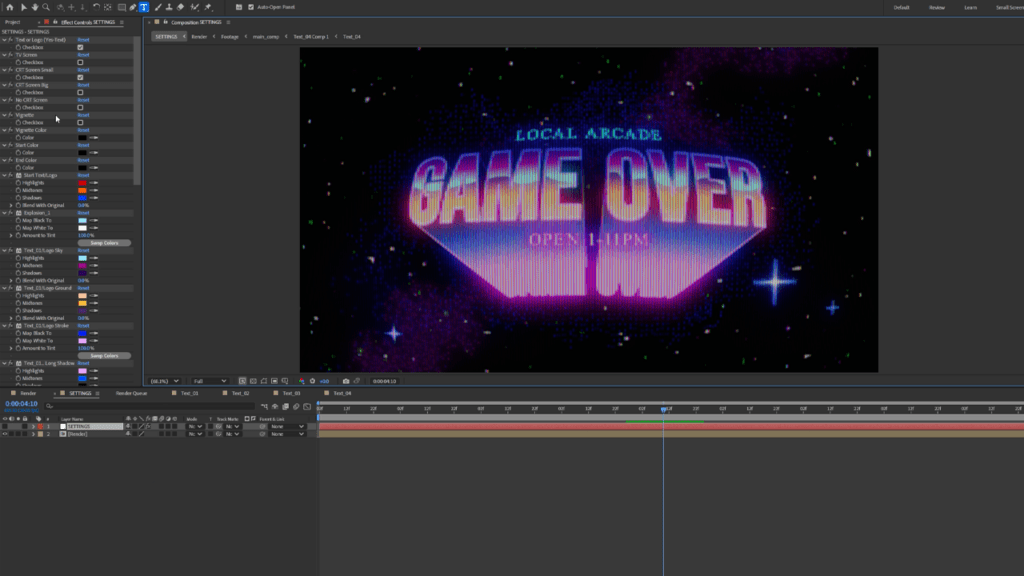
Plenty of customization options are available if you want to add your touches. To access them, open the Settings Composition, then navigate to the Effects Controls panel. From here, you can adjust nearly every aspect of the template, such as:
- Adding a television screen effect.
- Toggling CRT features.
- Enabling or disabling the logo.
- Adjusting the color gradient of the text, background, stars, and other elements.
Explore more After Effects tutorials and templates
Learning how to animate in After Effects is a great way to level up your videos and add professional polish to your edits. If you’re new to the software, check out our other tutorials that will help you get familiar with everything you can do with it, including how to create drop shadow effects, warp stabilizer effects, designing a lower third, and more.
Of course, with a Storyblocks subscription, you can get access to thousands of pre-made, customizable templates for After Effects to help you save time and easily add advanced effects into your videos. On top of that, you’ll get unlimited downloads of over 8 million royalty free stock footage clips, music tracks, images, sound effects, and more. Sign up today to get started!


