
This scenario might sound familiar: You nail a great shot, but looking through the footage at home, you see that it’s way too shaky. And that shakiness is too distracting to leave alone. This is where Warp Stabilizer in After Effects can help rescue that clip and make it usable.
Warp Stabilizer is a tool in AE that smooths out motion and reduces the unwanted camera shake with the simplest of actions. In this tutorial, we’ll walk through what warp stabilizer is, how to use it in After Effects, and when to choose it instead of Stabilize Motion. We’ll also touch on how this compares to using warp stabilizer in Premiere Pro, which is covered in this comprehensive guide.
What is warp stabilizer?
Warp stabilizer is a tool that analyzes motion in your footage and smooths it automatically. It works frame by frame to track movement and apply corrections. The goal is to create a stable and natural looking shot without manual keyframing.
Warp Stabilizer works by analyzing and rebuilding motion in your footage rather than just moving the frame around. It doesn’t necessarily “steady” the clip. It studies how every part of the image moves over time, then it rewrites that motion into something smoother.
At a high level, the tool runs in two stages. First it analyzes motion, then it applies a new version of that motion back onto the footage.
How it uses motion analysis
Warp Stabilizer starts by tracking thousands of points across the frame. These points can be edges, textures, or contrast (high highlight and shadowy) areas. The software follows how each point moves from frame to frame. This creates a detailed motion map of the entire image.
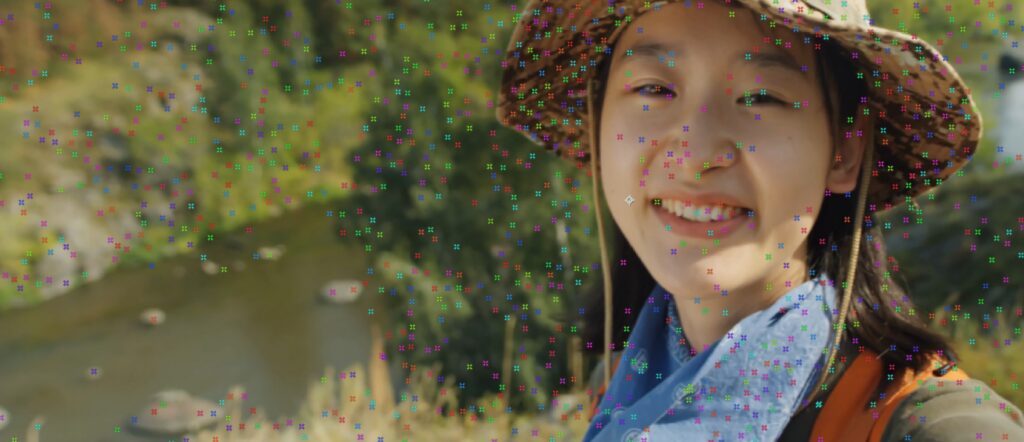
Once the motion is understood, Warp Stabilizer creates a new, smoother camera path. Think of your original motion as a shaky line. The tool redraws that line into a cleaner curve.
The smoothness setting controls how much the original motion gets altered. A low value keeps most of the original movement. A high value pushes the motion closer to a locked off shot.
At this point, the software has two things. It has the original motion and a new target motion.
The next step is making your footage follow that new path.
Choosing the right method of stabilization
This is where Warp Stabilizer becomes more advanced than basic stabilization tools. Instead of applying one global transform, it can warp different parts of the image independently.
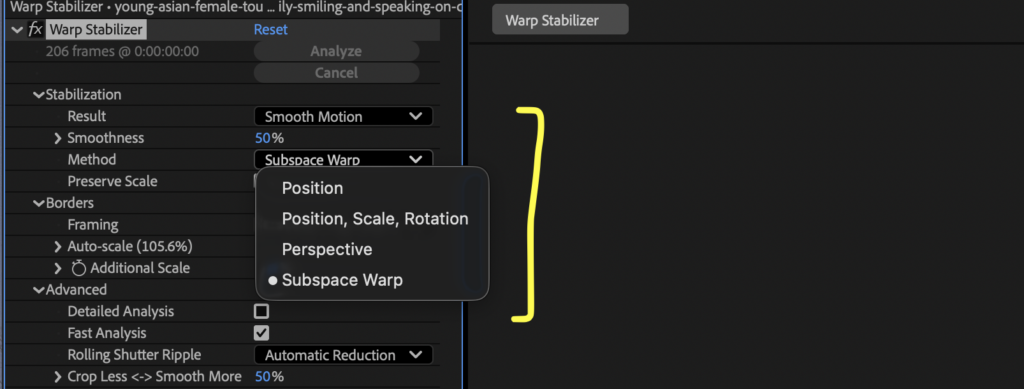
If you use Position, Scale, Rotation, the tool applies a simple transform to the whole frame. This works like moving or rotating a layer.
If you choose Perspective, this stabilizes footage by treating your frame like a flat plane that can tilt and shift in 3D space. Perspective applies a corner pin style transformation to the entire image. Instead of just moving or scaling the frame, it fixes all four corners separately. This lets the image skew and tilt to correct for pesky unwanted camera movement.
If you use Subspace Warp, this tool creates a mesh over the image. That mesh can bend and stretch. Each section adjusts based on the motion data from earlier. This allows the tool to fix complex movement without making the whole frame feel rigid.
With all of these options, you have the ability to choose to Preserve Scale
This is also why you may see slight distortions. Straight lines can bend because the image is being reshaped to match the new motion path.
As a whole, Warp Stabilizer depends on consistent visual data. It struggles when the scene has heavy motion blur, fast pans, or large objects crossing the frame.
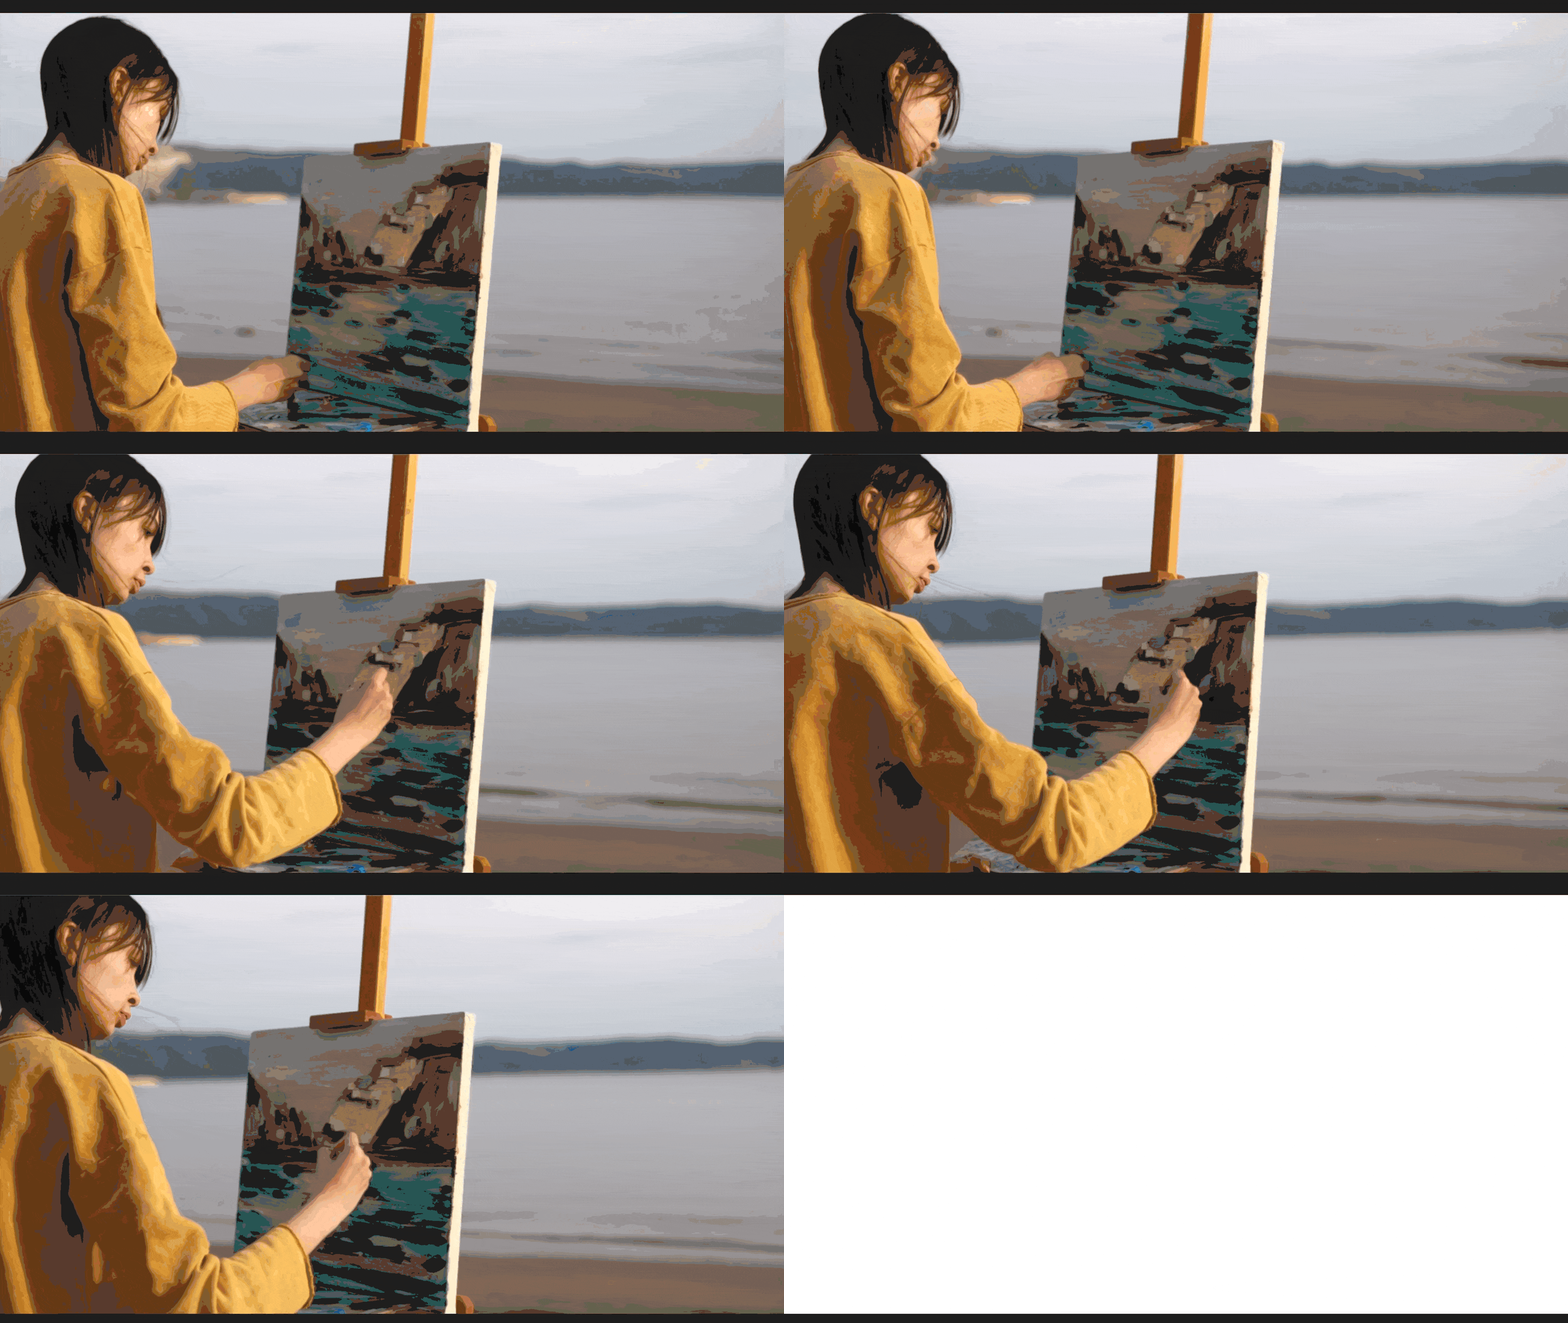
As you can see in the example above, If the tool cannot track points reliably, the motion model breaks down. When that happens, you may see warping artifacts or unnatural movement.
It also struggles when foreground and background move in very different ways. The mesh has to compromise, which can cause visible bending and “warping.” The effect works well for handheld clips, walking footage, and small jitters. It can even out subtle movements that distract from your subject. The result often looks like it was shot on a tripod or gimbal.
When should you use warp stabilizer?
Warp stabilizer works best when your footage has small to moderate camera shake. It performs well on handheld shots where the motion feels natural but uneven. It can also help smooth walking shots or light movement from longer lenses.
You will often use warp stabilizer in After Effects when you need more control or when working in a VFX pipeline. Premiere Pro works better for quick edits and timeline based workflows. The stabilization engine is the same, but the context of your project matters!
How to use warp stabilizer in After Effects
1. Import your footage and create a composition
Start by importing your clip into After Effects. Drag the footage into a new composition to match its settings. This ensures your timeline reflects the original clip.
2. Apply the warp stabilizer effect

Next, open the Effects and Presets panel and search for Warp Stabilizer.
Drag the effect onto your clip in the timeline. After Effects will begin analyzing the footage right away.
3. Let the stabilization analysis run
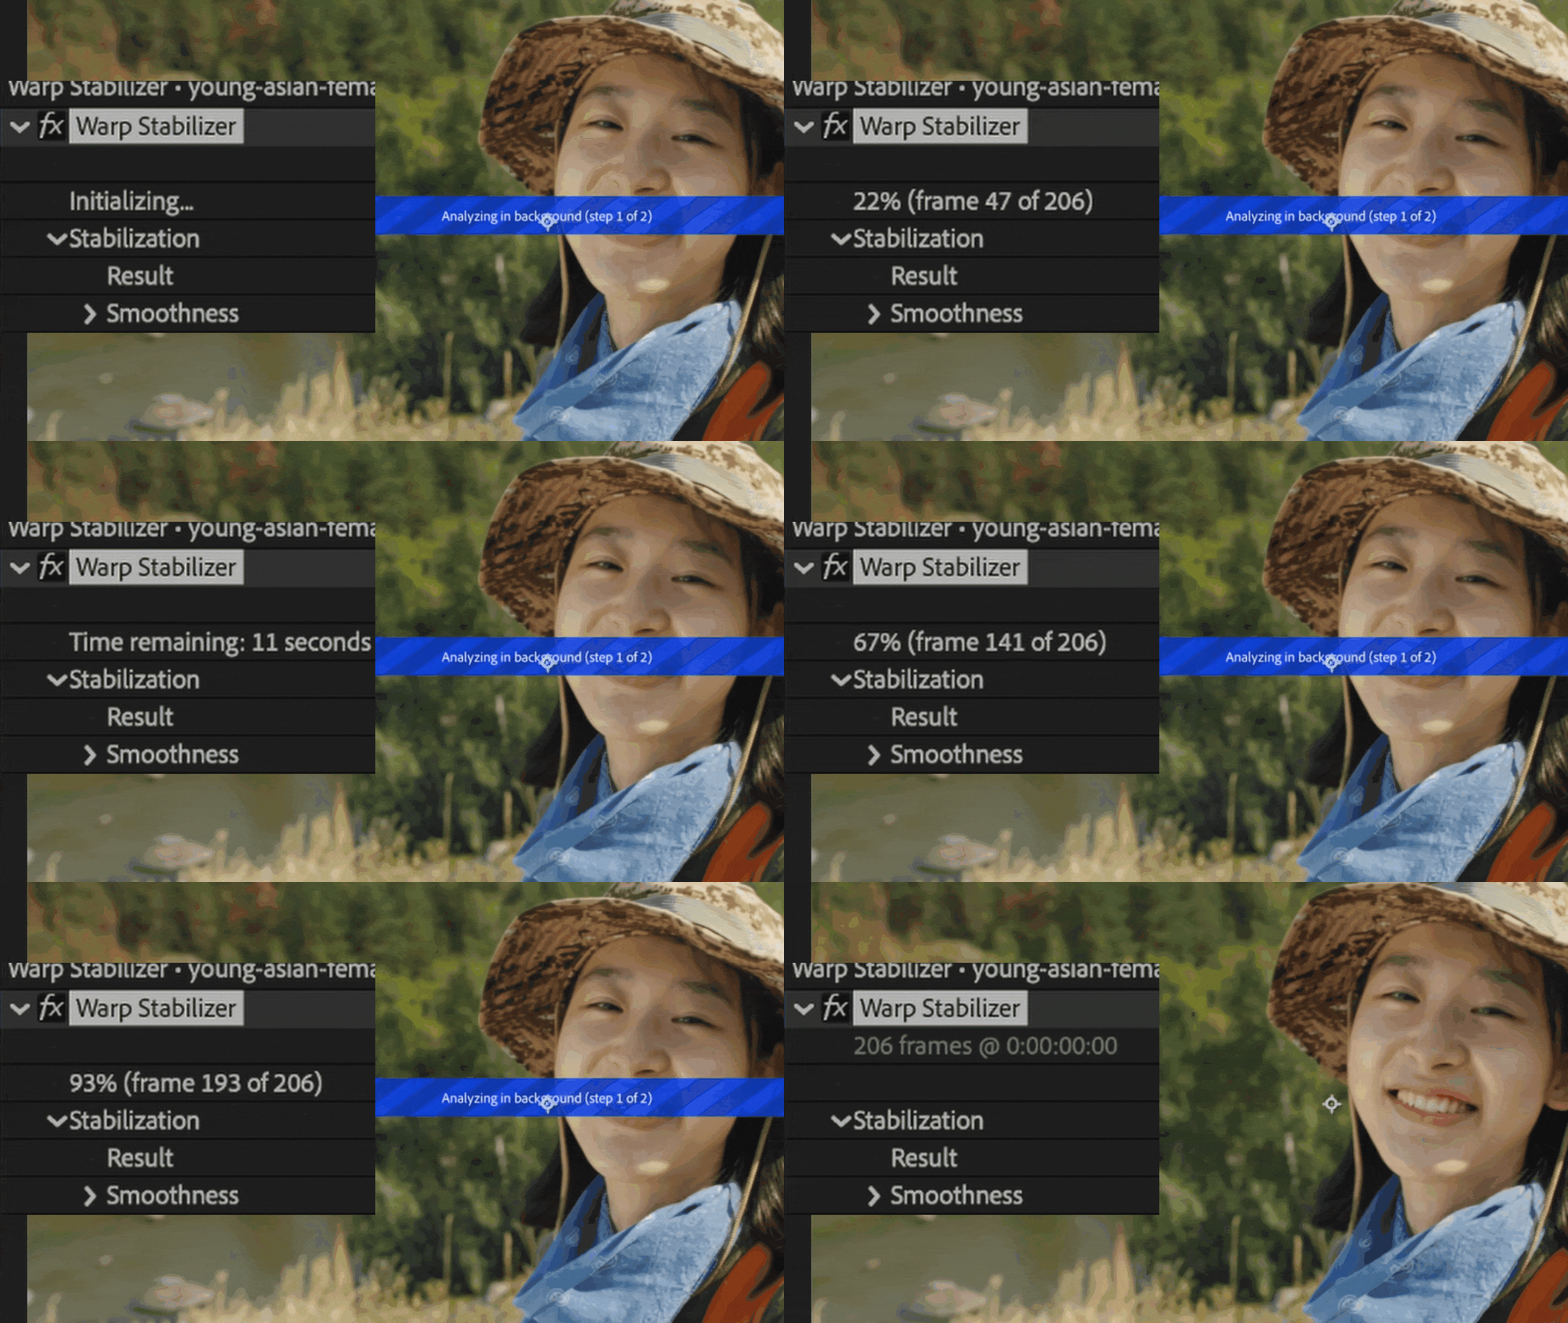
The Warp Stabilizer effect runs in two stages. It first analyzes motion, then applies stabilization. You should let this process finish before making changes.
The preview updates once both stages are complete.
4. Adjust the result for better control
Now, open the Effect Controls panel to refine your settings. Warp stabilizer includes several settings that affect how the final image looks.
The Smoothness value controls how much motion gets reduced or how strong the stabilization feels. A lower value keeps the original feel, while a higher value creates a steadier shot. This specificity is good for when you need some shakiness but not as much as your camera provides.
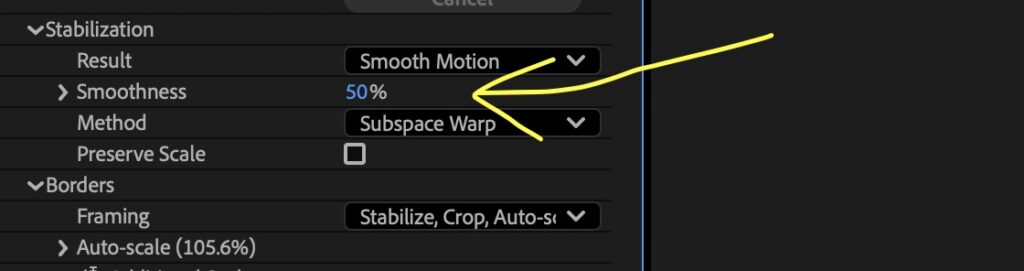
Can’t tell you how many times this has been the case when sitting down to edit and find that I just need a happy medium between what I shot and what warp stabilizer provides (at 100%).
Framing options control how the edges behave. Cropping and auto scaling help hide gaps created during stabilization. These settings can affect image quality if pushed too far.
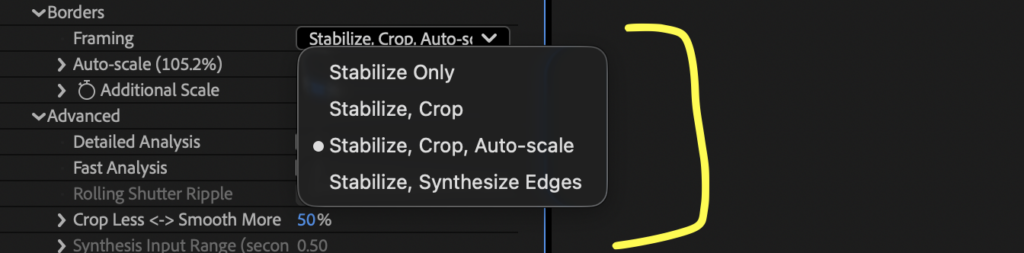
You can also adjust the Method setting. Subspace Warp works well for complex motion. Position, Scale, and Rotation handle simpler clips. Position works best when you want minimal changes.
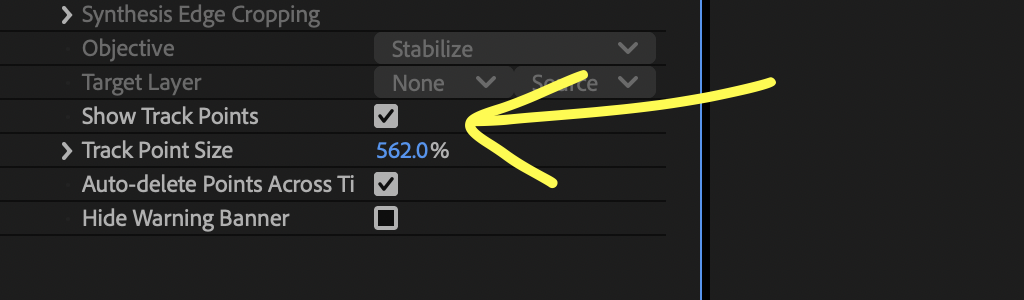
You can also check the Show Track Points box and then highlight all of the points on the foreground (subject) then hit the Delete key.
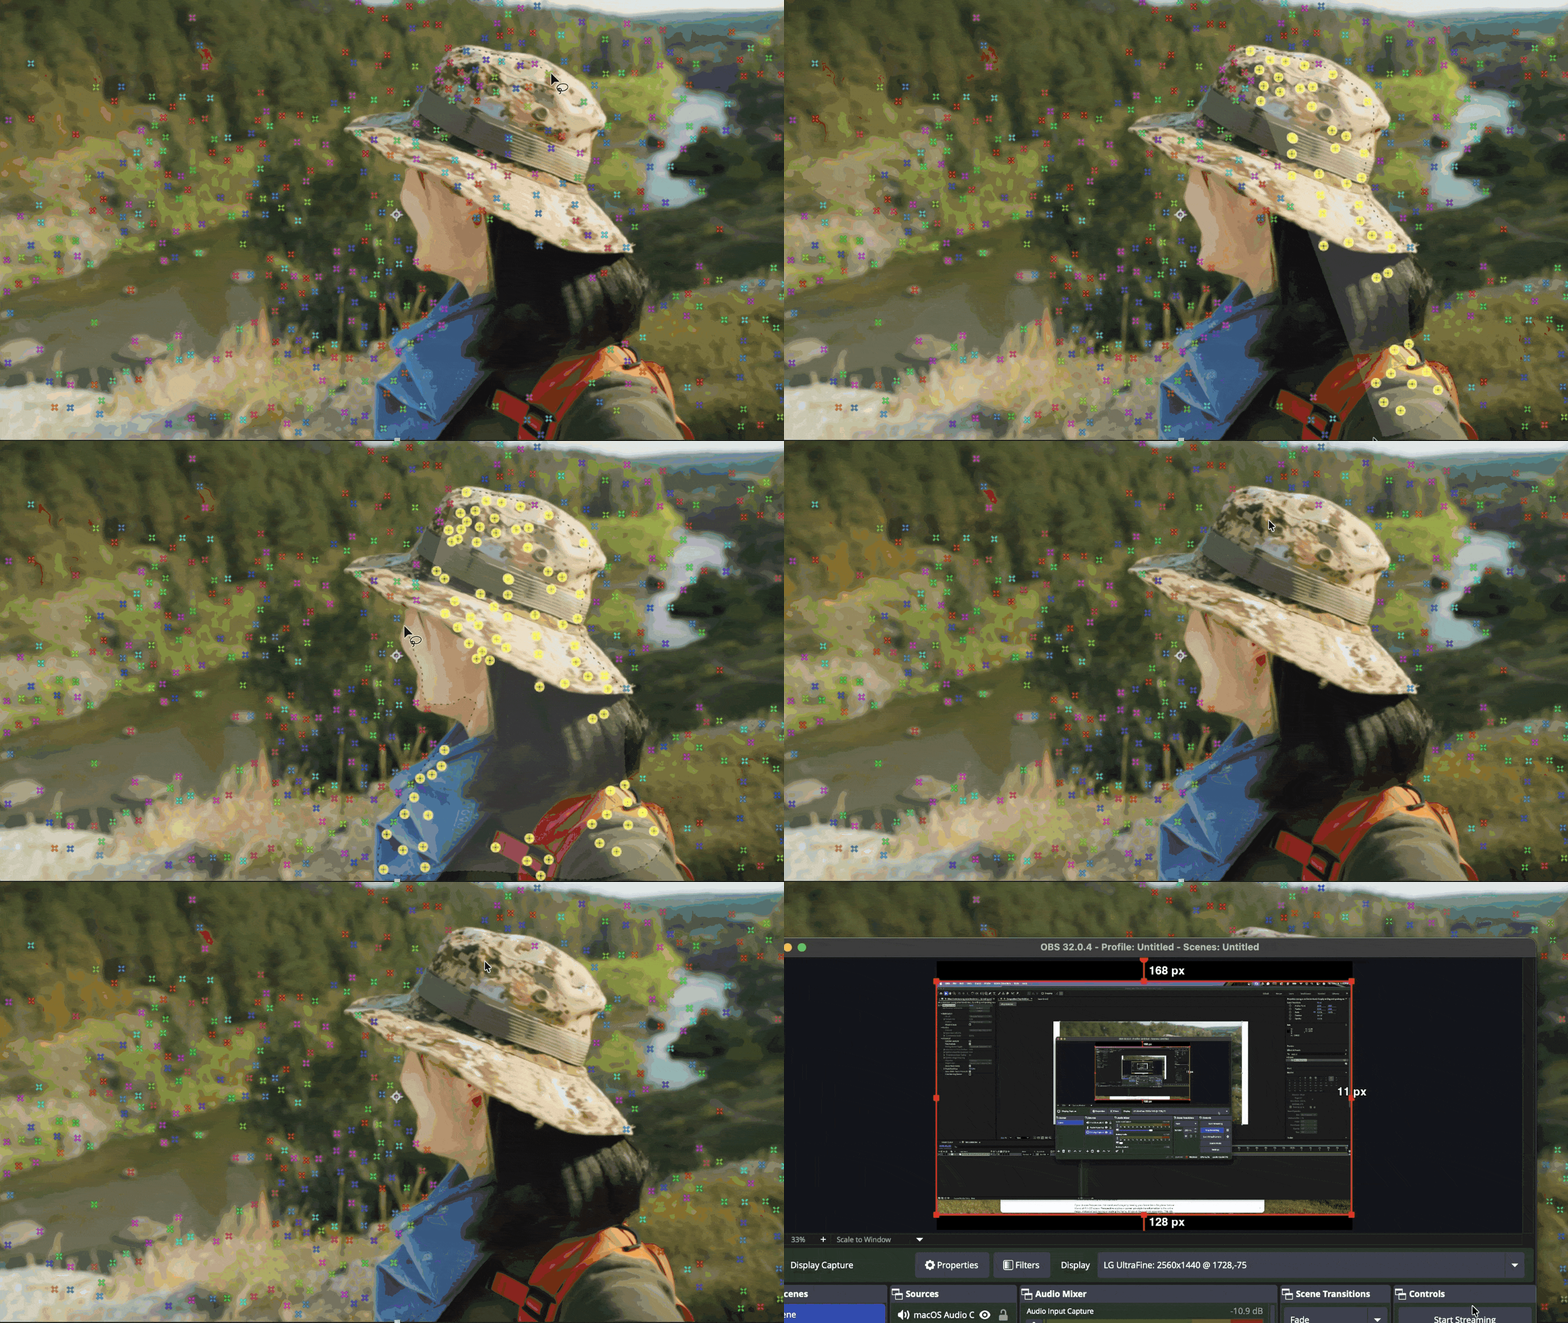
This will focus the tracking on the background. Keeping your subject still and without distortion.
5. Fine tune framing and cropping
Warp stabilizer may crop your frame to hide edge movement. You can adjust the framing settings to control this behavior.
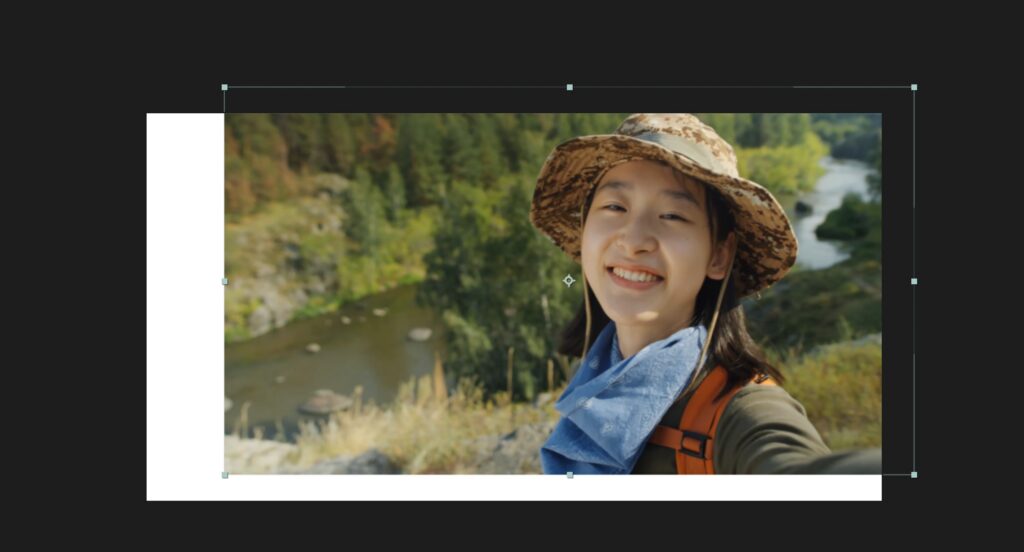
Stabilize, Crop, Auto Scale is the default and works well in most cases. You can reduce scaling if you want to preserve more of the frame.
With that, you should have a stabilized video.
Warp Stabilizer vs Stabilize Motion: Which should you use?
Warp stabilizer and stabilize motion solve similar problems, but work differently in After Effects.
- Warp stabilizer is automatic and handles most of the work for you.
- Stabilize motion requires manual tracking and keyframes.
Stabilize Motion gives you precise control over specific points. It works well when you need to lock onto a subject or match movement across layers. It is also useful when Warp Stabilizer introduces unwanted distortion.
In simple terms, Warp Stabilizer fits most quick workflows. Stabilize Motion fits detailed or technical shots where control matters more than speed.
Where to find Stabilize Motion in After Effects
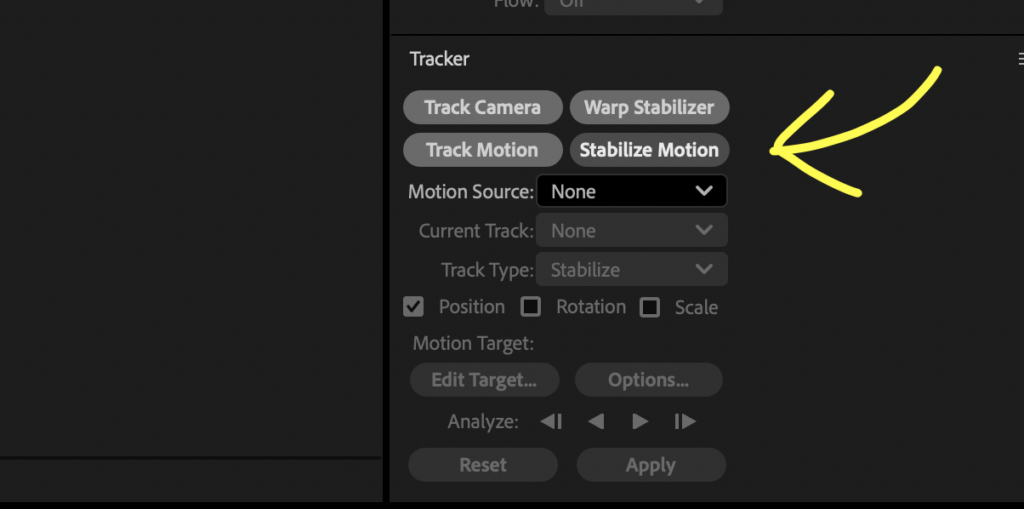
Go to Window and make sure Tracker is checked for the “tracker window” to appear. Here you’ll find the option to Stabilize Motion.
Tips for better stabilization
Film with editing in mind
This might sound annoying, but you have to plan for your edit before you start shooting. Better stabilization starts during filming. Try to keep your movements smooth and controlled when shooting handheld footage. Use a gimbal, an easy rig, or just rest the camera on an object nearby. Even small improvements in technique can make a big difference later!

Film at a wider frame to give cropping room
Shoot at a slightly wider frame when possible. This gives Warp Stabilizer room to crop without losing important details. It also helps preserve composition after scaling. You should also shoot at a higher resolution, if you can. Again, this just gives Warp Stabilizer more to work with.
Try to avoid fast pans or movements
Avoid fast pans and sudden camera movements if you plan to stabilize later. These motions are harder to correct and can introduce that wonky distortion we saw earlier. Consistent, steady movement gives the tool better data to work with.
Keep smoothness values low
Use lower smoothness values to maintain a natural look. Keep it around that 20-35% range. Over stabilizing can make footage feel artificial. A subtle correction often looks more realistic.
Stabilizing plugins for After Effects
Several plugins can extend what Warp Stabilizer can do. Tools like Mocha Pro and MaskTracker+ offer advanced tracking and stabilization workflows. These options can handle complex shots that need more precision.
Some After Effects plugins focus on camera tracking and scene reconstruction. Others specialize in reducing rolling shutter or motion artifacts. These tools can complement warp stabilizer when standard settings fall short.
Learn how to do even more in After Effects
Warp stabilizer is a powerful tool for improving bad footage. It analyzes motion, smooths movement, and helps rescue clips that might otherwise be unusable. You now know how to apply it, adjust its settings, and decide when to use it over Stabilize Motion.
If you want to keep building your skills, explore more After Effects tutorials on compositing, motion graphics, and visual effects. There are many ways to refine your workflow and expand your creative toolkit.
For even faster editing, check out Storyblocks’ Adobe Creative Cloud plugin and After Effects templates. These resources help you streamline your process and focus more on creating.
On top of that, Storyblocks has a massive library of high-quality stock footage that you can rely on in case your shots can’t be saved with Warp Stabilizer. B-roll is a great backup option for that exact situation. Sign up for Storyblocks today to start downloading right away.


