Many visual effects artists will tell you that rotoscoping is one of the more monotonous tasks that you can do. But ultimately, the results are timeless. That’s the reason why, despite advanced AI-powered tools, traditional rotoscoping is still very much in demand.
Rotoscoping is the process of masking an object or person so that you can isolate it from the rest of the footage. From there, you animate the mask frame by frame. This allows you to apply effects directly to the subject, change the background behind them, or even place them into a completely different scene, similar to what you would do with a green screen.
Keep reading to go through our rotoscoping tutorial for After Effects, or watch our video tutorial below where we outline the entire process step by step.
Rotoscoping in After Effects
Using the Pen Tool
The Pen Tool is the traditional method to rotoscope in After Effects. It works by manually creating masks around your subject frame by frame, allowing for precise control over the shape and movement of the selection. Traditional geometric shape masks don’t allow for the level of precision you need to accurately mask out a human subject compared to the Pen Tool.
1. Use the Pen Tool to trace your subject
First, select the Pen Tool (G on the keyboard), and ensure that your footage layer is selected. If your footage layer is not selected, you will create a shape layer instead. Then, go to the preview window and start tracing around your subject.
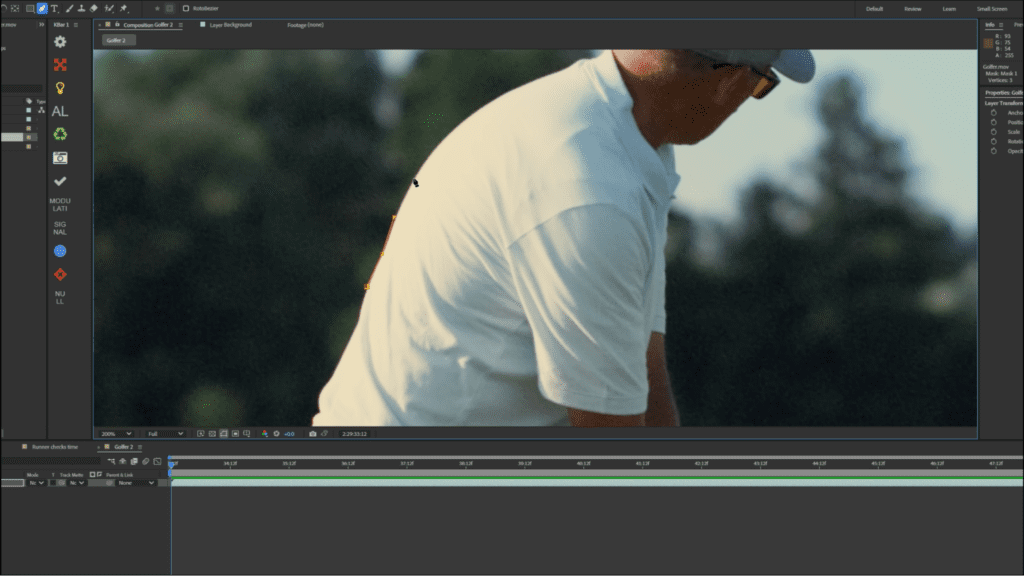
Each click adds a point, which then forms a path. It’s best to keep a short distance between the points to help the mask move more smoothly with the subject.
If you need to move the preview window around as you’re creating your mask path, you can either click the middle button on your mouse while in the preview window or press H to switch to the Hand Tool if you don’t have that feature.
In the video example, we reach a point near the golfer’s shoulder, and since straight lines won’t follow the curve of the shoulder well, we will have to click and drag to create a Bezier curve. The longer you drag, the smoother the curve.
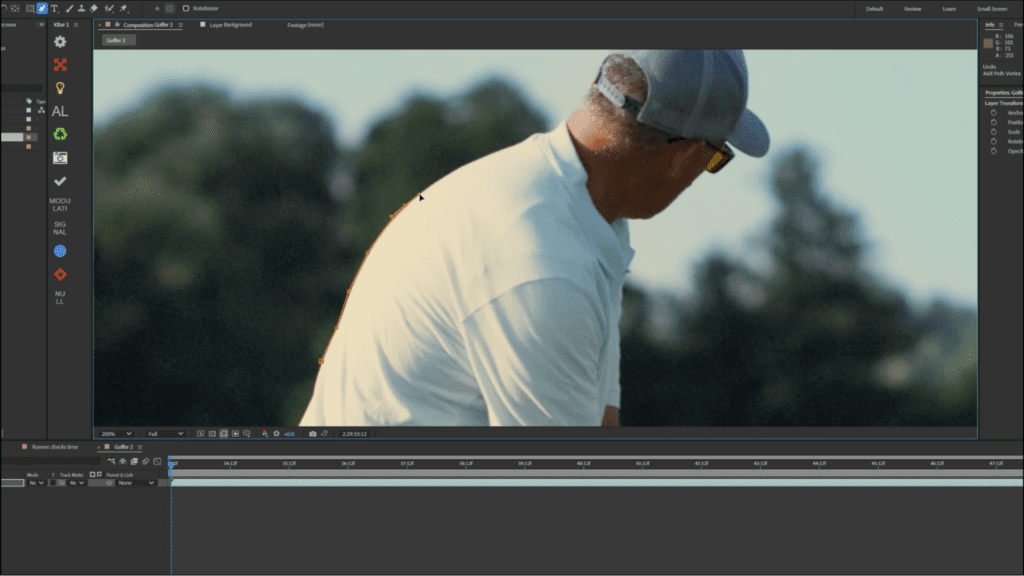
Keep doing this around the entire subject. If you make a mistake, that’s fine—keep going and go back to fix it later.
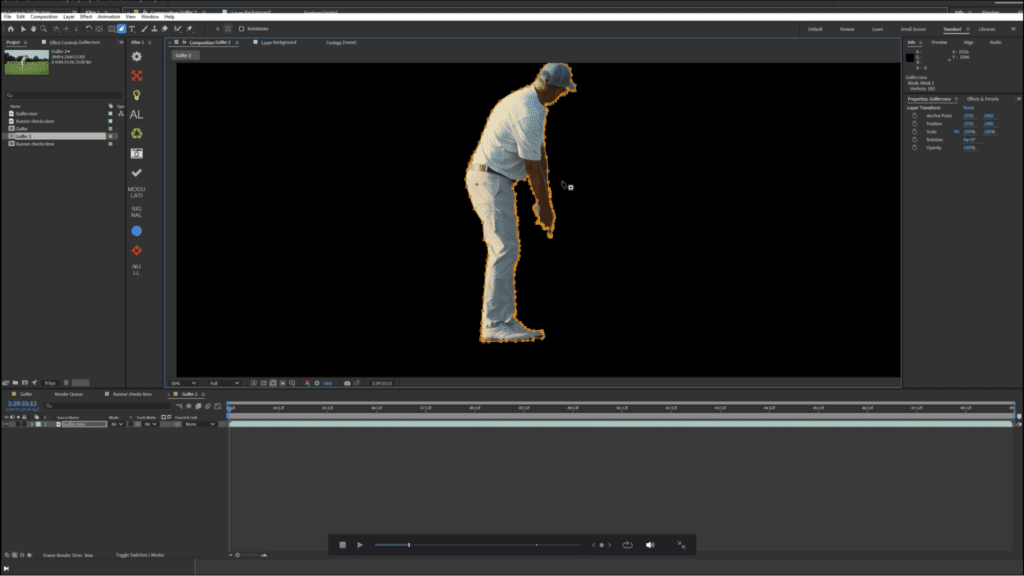
Once you’re done, connect the last point to the first to close the mask. You should now have a black background as your subject is now masked.
2. Adjust or refine your mask as needed
If you need to make any changes to your mask, the steps are simple:
- To rearrange points, click and drag them to a new position.
- To add an additional point, hover over the path line and click.
- To remove a point, hold Control (or Command on Mac) and click when the icon turns to a minus.
- To curve an existing point, hold Alt (or Option on Mac) to change it into a Bezier point.
You can also soften a mask if needed, which is helpful in achieving softer edges, such as those found in fabric. Select the layer, press F to open Feather settings, and increase the setting slightly.
However, that was just one frame out of the 24 for a single second. If it’s a 10-second shot, that’s 240 frames you have to mask individually, and depending on the character’s movement, this could easily be a task that takes all day to complete.
3. Animate the mask path
- First, open the drop-down menu on the footage layer and select Masks > Mask Path.
- Then click the stopwatch icon next to Mask Path to create a keyframe.
- Press Page Down on your keyboard to move one frame forward.
- Make slight adjustments to the mask points to match the subject’s movement. Repeat for each frame, making adjustments as needed.
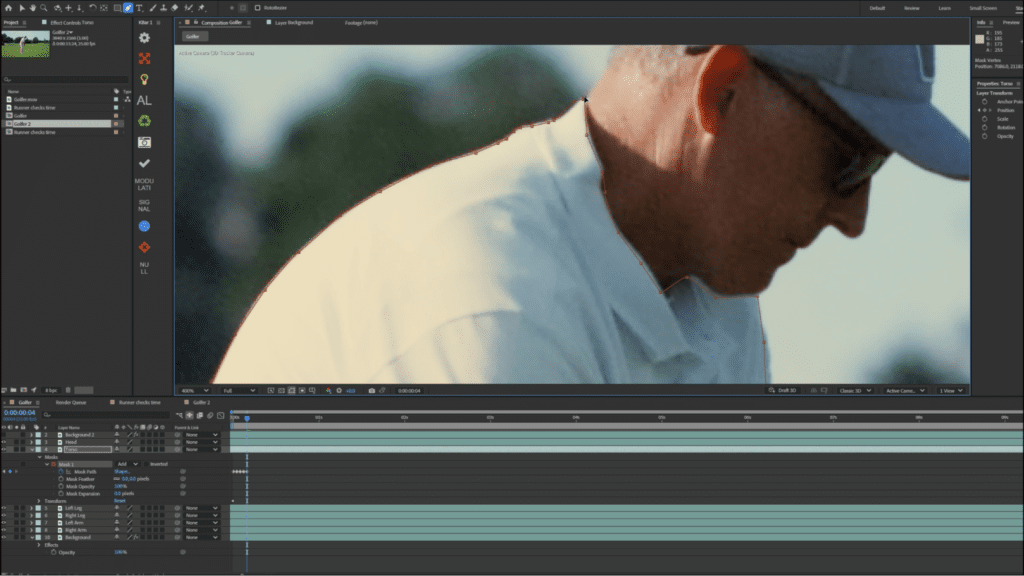
Now’s the time to pull up a podcast, make some coffee, and get to work—you’ll be here a while.
This is the final result: a clean rotoscope. Using the original footage as a background layer enables us to place our text between the golfer and the background, making it appear to be behind the golfer.

This is why green and blue screens are so widely used. They eliminate the need for manual rotoscoping, allowing you to simply key out the green or blue background.
Rotoscoping complex movement with multiple masks
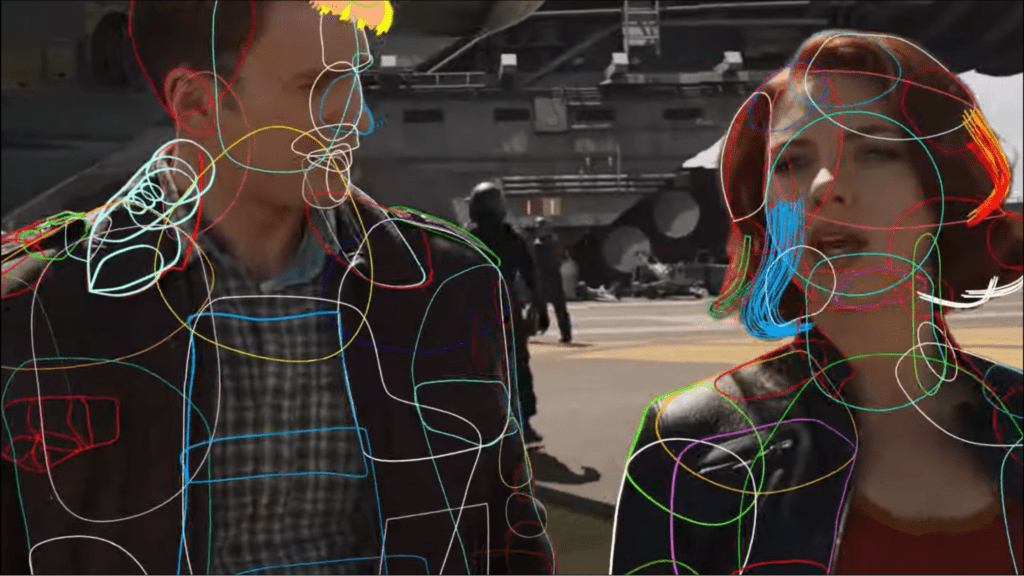
When there’s a lot of movement, especially with people, managing all the points around a subject gets tricky. If limbs cross over, it’s easy to break parts of the mask while adjusting the path.
A more innovative technique is to separate the body into parts and mask them individually. This gives you more control and makes it easier to adjust each area. You can take this level of detail as far as you need, even masking individual fingers if it’s helpful for your workflow.
Using the Rotobrush in After Effects
When your subject is relatively stationary, with little arm movement and no objects passing by, manual rotoscoping is often unnecessary.
That’s because After Effects houses an AI-powered Rotobrush tool, which can handle most of the work for you. Let’s break down how it works.
1. Select the Rotobrush
To begin, double-click your layer to open the Layer preview. Then, select the Rotobrush tool or press Alt + W (Option + W for Mac) from the top toolbar. The icon for the Rotobrush has a person with a paintbrush.

2. Use the brush to paint over your subject
To adjust the size of your brush, hold Control and drag up or down to increase or decrease the brush size. Once you’re happy with the size of your brush, all you need to do is paint over a small part of your subject.
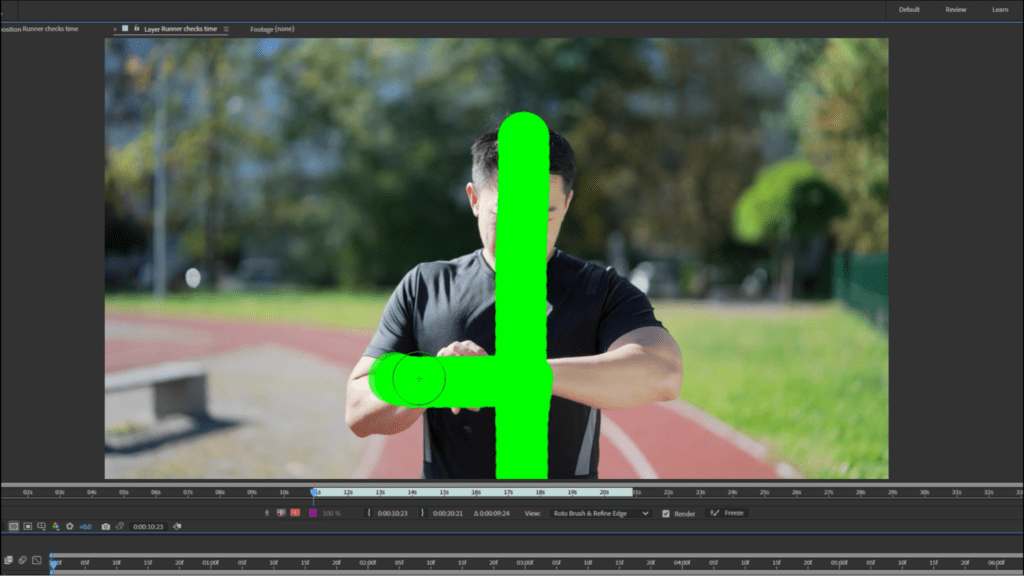
The Rotobrush uses pixel data to guess the edges based on your paint strokes, and it’s usually pretty accurate.
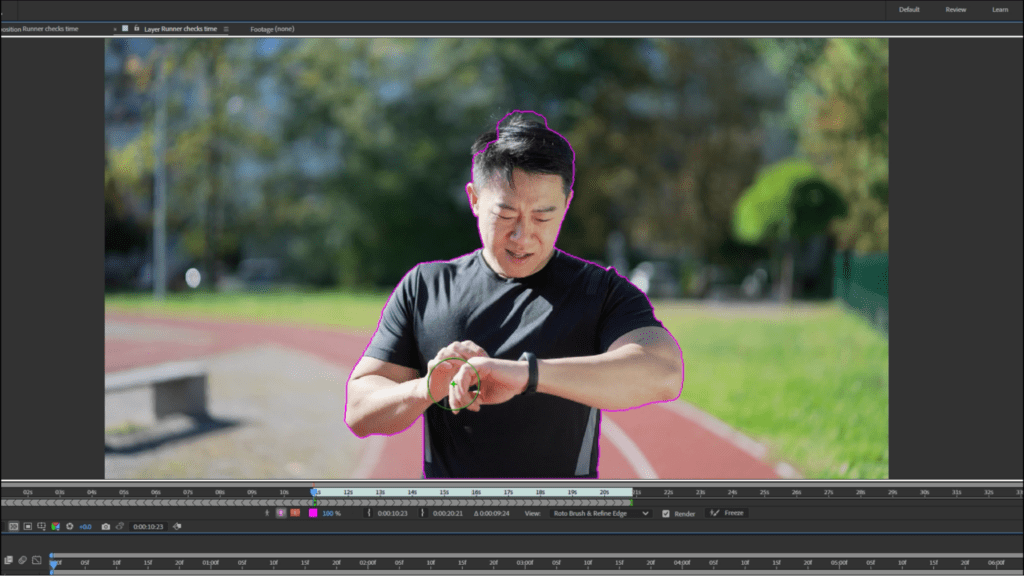
3. Make any corrections to your mask
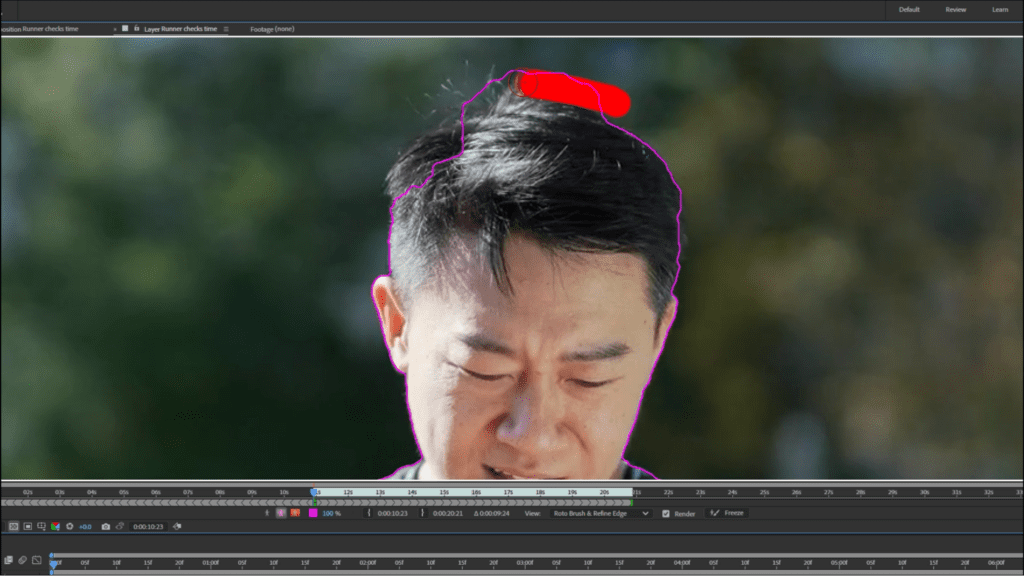
In this example, the tool made a mistake near the head. To correct this, shrink the brush and switch to a minus stroke by holding the Alt key, which tells After Effects to exclude an area from the mask. Then paint over the part you want to remove.
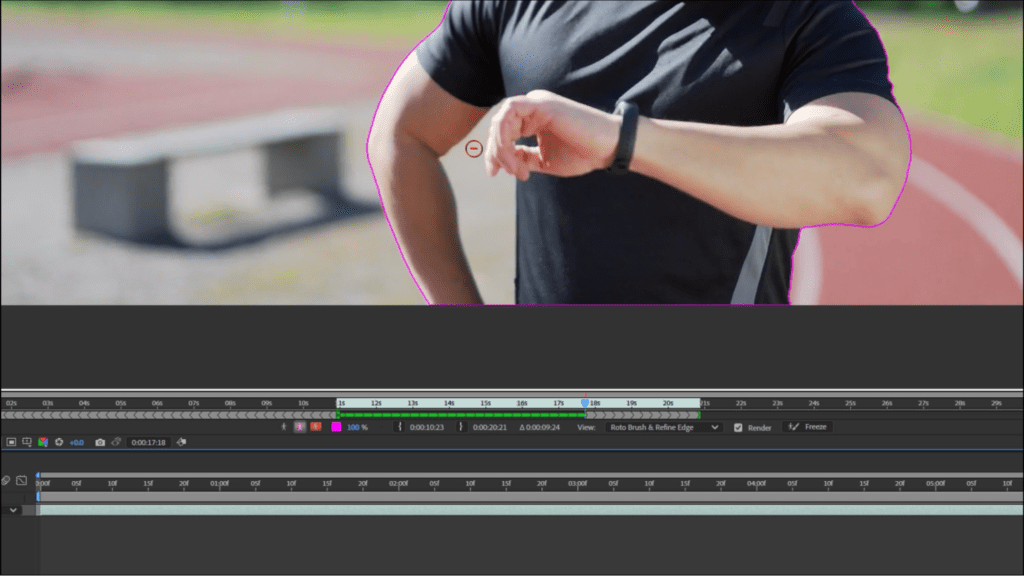
If your subject moves their arm away from their body, which creates a gap between the torso and arm, After Effects will usually detect this and exclude that area from the mask automatically.
If it doesn’t, simply go to that point in the timeline, hold alt to bring up the minus brush, and paint within the area. This gives After Effects more information about what to exclude.
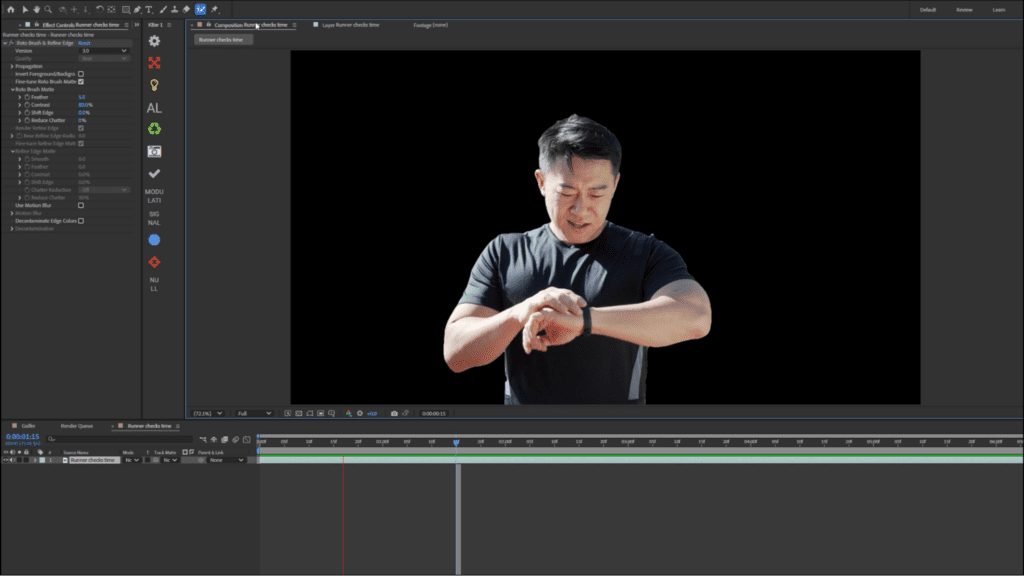
When you press play, After Effects propagates the Rotobrush, automatically applying the mask across other frames using the initial information you provided. If you toggle back to the Composition window, you’ll often find it’s done a decent job in a fraction of the time it would take to rotoscope manually.
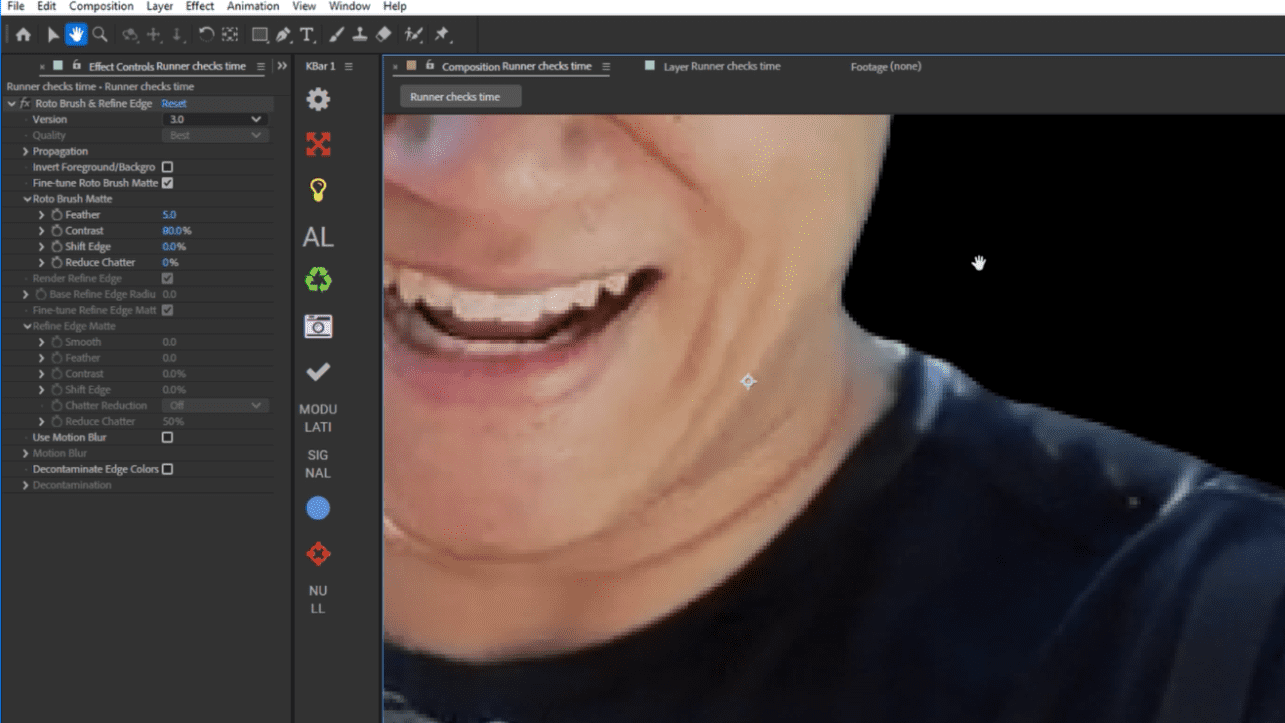
4. Correct edge issues with the Effects Controls panel
If you see any edge issues, there are a few settings in the Effects Controls panel that can help. If this panel isn’t already open, navigate to Window > Effects Controls.
The main settings to focus on are:
- Feather – Softens the edges of your mask
- Contrast – Creates a tighter boundary by sharpening the edge
- Shift Edge – Adjusts the boundary of an edge
- Reduce Chatter – Reduces noise or flickering around the edges
These default settings are typically the most effective for fine-tuning the edges. How you adjust them depends on the specific needs of your video clip.
5. (Optional) Use the Refine Edge tool to correct the Rotobrush
If the Rotobrush still didn’t deliver great results, double-click the layer to return to the Layer view. Then double-press Alt + W (Option + W for Mac) to bring up the Refine Edge tool. You’ll know it’s active when the Rotobrush icon changes.
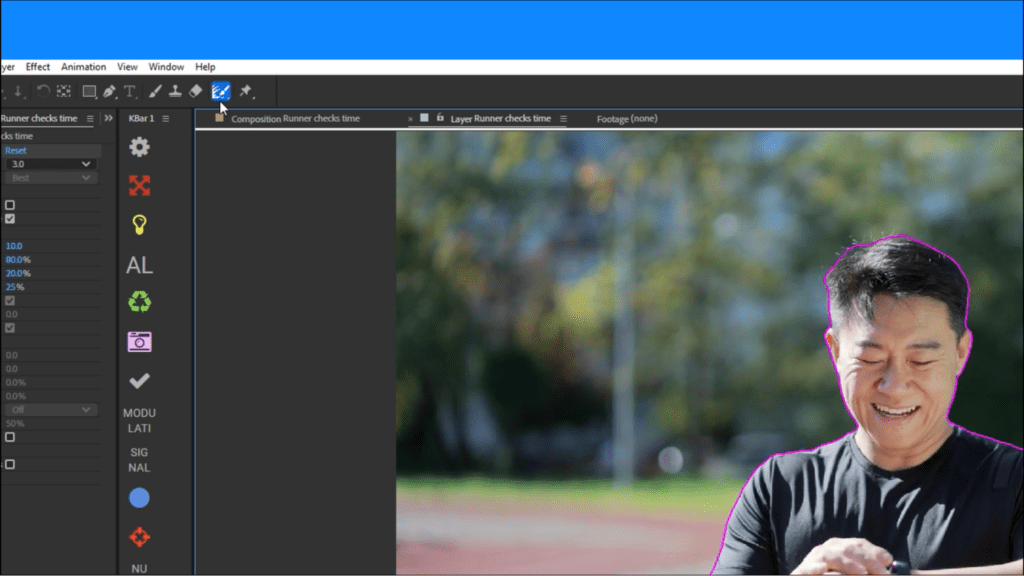
Use this tool to follow the edges, especially around hair or fabric, to instruct After Effects to more precisely refine the mask’s edge.
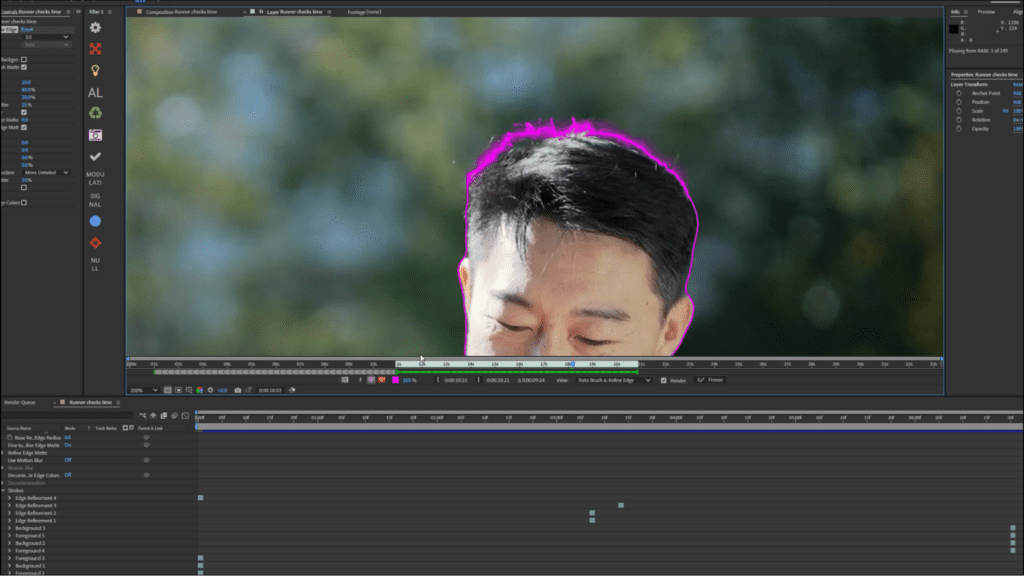
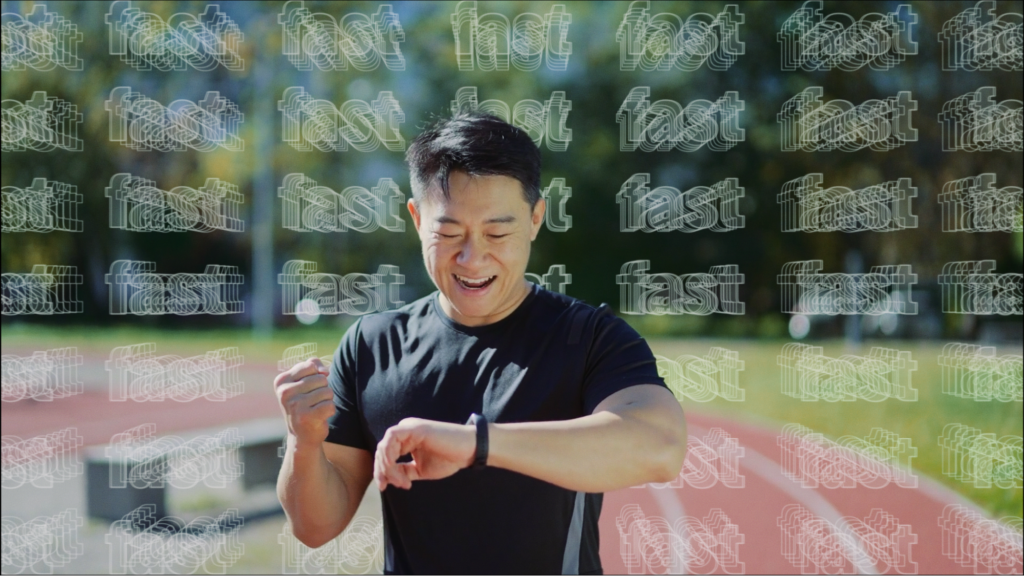
Once that’s complete, this is the final result.
Choosing the Pen Tool vs Rotobrush for rotoscoping
When comparing the Pen Tool to the Rotobrush, when should you gravitate toward one over the other?
Well, here’s the thing: the Rotobrush is pretty decent. It’s not like it’s some thrown-together tool that doesn’t work most of the time. In fact, in many instances, it vastly outdoes the monotonous nature of using the Pen Tool.
Especially when you’re dealing with objects that have defined shapes, such as cars, the Rotobrush can significantly speed up your workflow. And every year, Adobe updates the feature to some degree, refining its capabilities.
But the Pen Tool? That’s the classic, timeless option. It’s the one that will always give you better results, cleaner edges, more control, and more precision.
As with most things, achieving the best result often requires more time and patience, and that’s precisely what the Pen Tool requires.
Adding animation and effects after your rotoscope is finished
Now that your rotoscope is done, the options for how you can use your footage is endless. Here’s one of my favorite tricks for adding excitement to an otherwise flat edit.
As seen in our video example, the preview with the runner checking his running app features a kinetic typography animation that appears behind him, indicating that he has just set a new record. This kind of addition can add a level of organic energy to your sequence if you feel like it’s missing some “magic.”
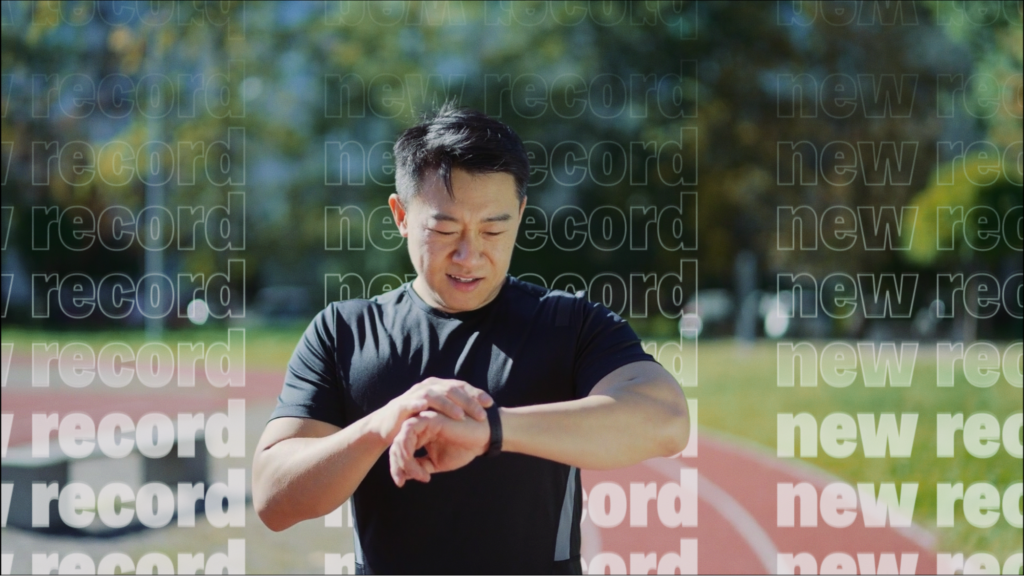
After you use the Rotobrush to refine your subject, you should check out the Storyblocks library to explore their kinetic typography and 13,000+ other After Effects templates.
The one I’ve used here is called Stomp Rhythmic Typography, and you can grab it directly from Storyblocks. Just sign up for their unlimited download subscription, and you’ll get access to over 8 million options for royalty free footage, music, templates, sound effects, and more.


