If you’ve ever been captivated by an animated title sequence, a slick lower third, or a mesmerizing video essay, chances are it was created in After Effects. As the industry standard for motion graphics, After Effects gives you incredible creative freedom. But when you open it for the first time, the number of panels, tools, and settings can be extremely intimidating and quite frankly overwhelming.
The good news? Learning how to animate in After Effects doesn’t have to be scary. Once you understand the basics like how compositions work, how to set keyframes, how to control motion, and how to use presets, you’ll quickly feel comfortable creating animations that look professional. This guide will walk you through those essentials along with ways to speed up your workflow.
Table of contents
Understanding the basics of After Effects animation
Before you start animating, it helps to understand how After Effects structures your project. Unlike other NLE programs like Premiere Pro or Final Cut Pro, where you arrange clips into a sequence, After Effects focuses on creating motion over time for individual elements.
What’s involved with animation in After Effects?
Your main workspace centers around a Composition or “comp”. Think of a comp as your project’s canvas. It has a set resolution, frame rate, and duration. Inside the comp, your elements, whether its text, shapes, images, or videos, each live on their own Layer.
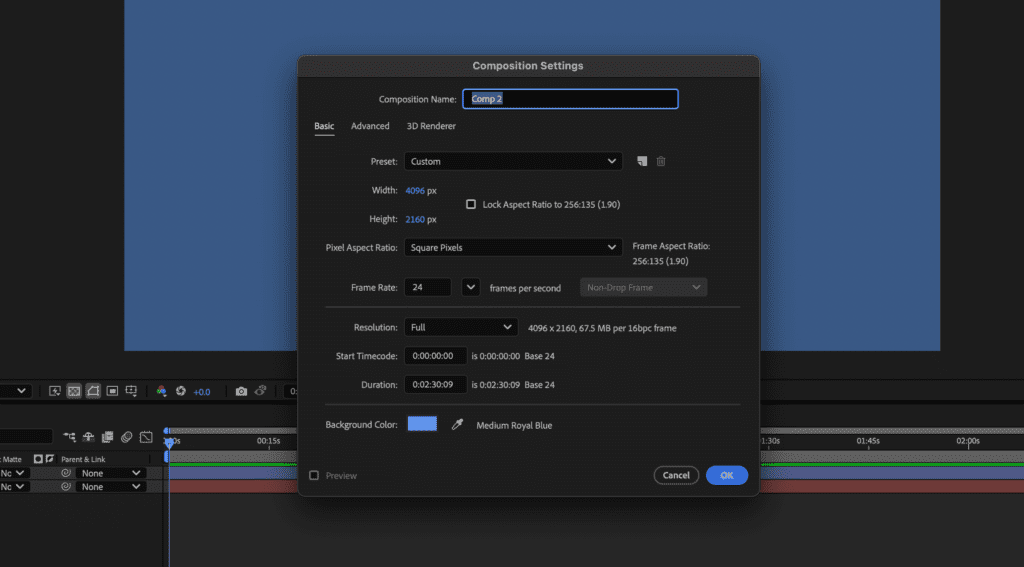
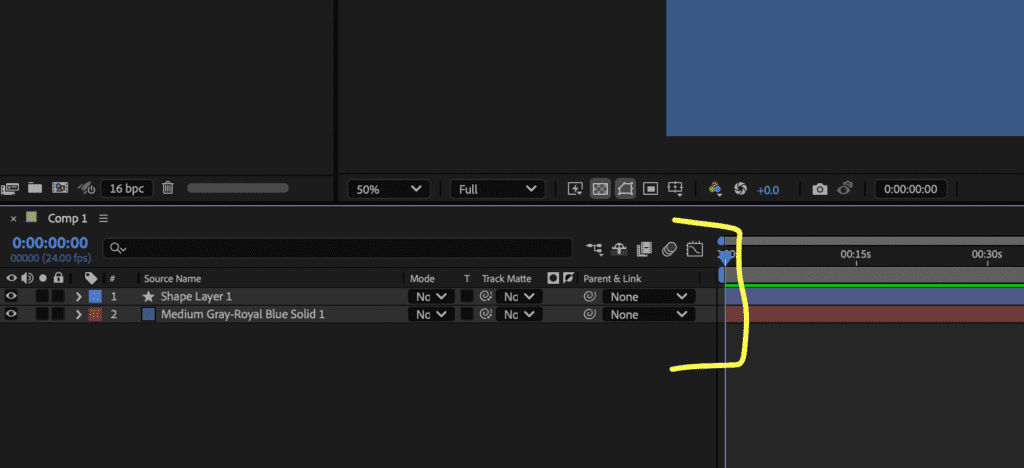
Below that, the Timeline is your control panel. It’s like a visual map of when things happen.
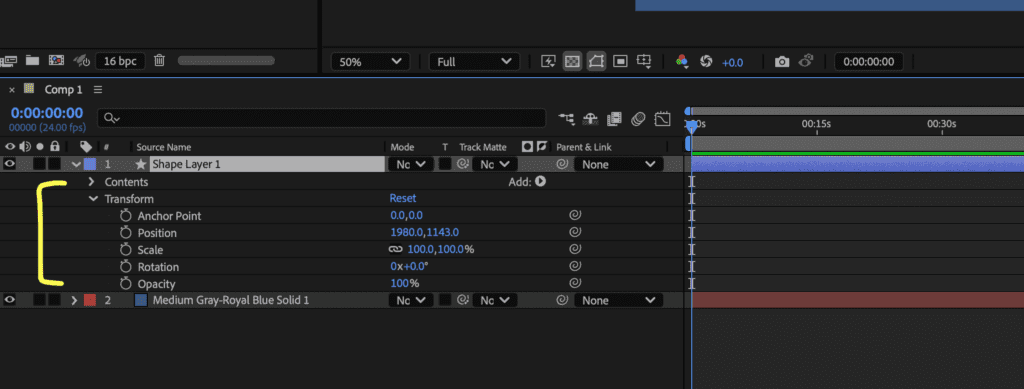
Each layer has different Properties, like position, scale, rotation, and opacity, which can change over time. This is where Keyframes come in. By setting a property’s value at specific points on the timeline, you tell After Effects where to start and end an animation. The software then fills in the frames between, making smooth motion possible.
How keyframes work
Keyframes are the foundation of every After Effects animation. If you picture animation as a journey, keyframes are the checkpoints along the way.
Let’s say you want a logo to slide from off-screen left to the center. You’d move the timeline playhead to the start of the comp, set a position keyframe for the logo sitting off to the side, then slide the playhead forward a couple seconds and drag the logo to center stage.
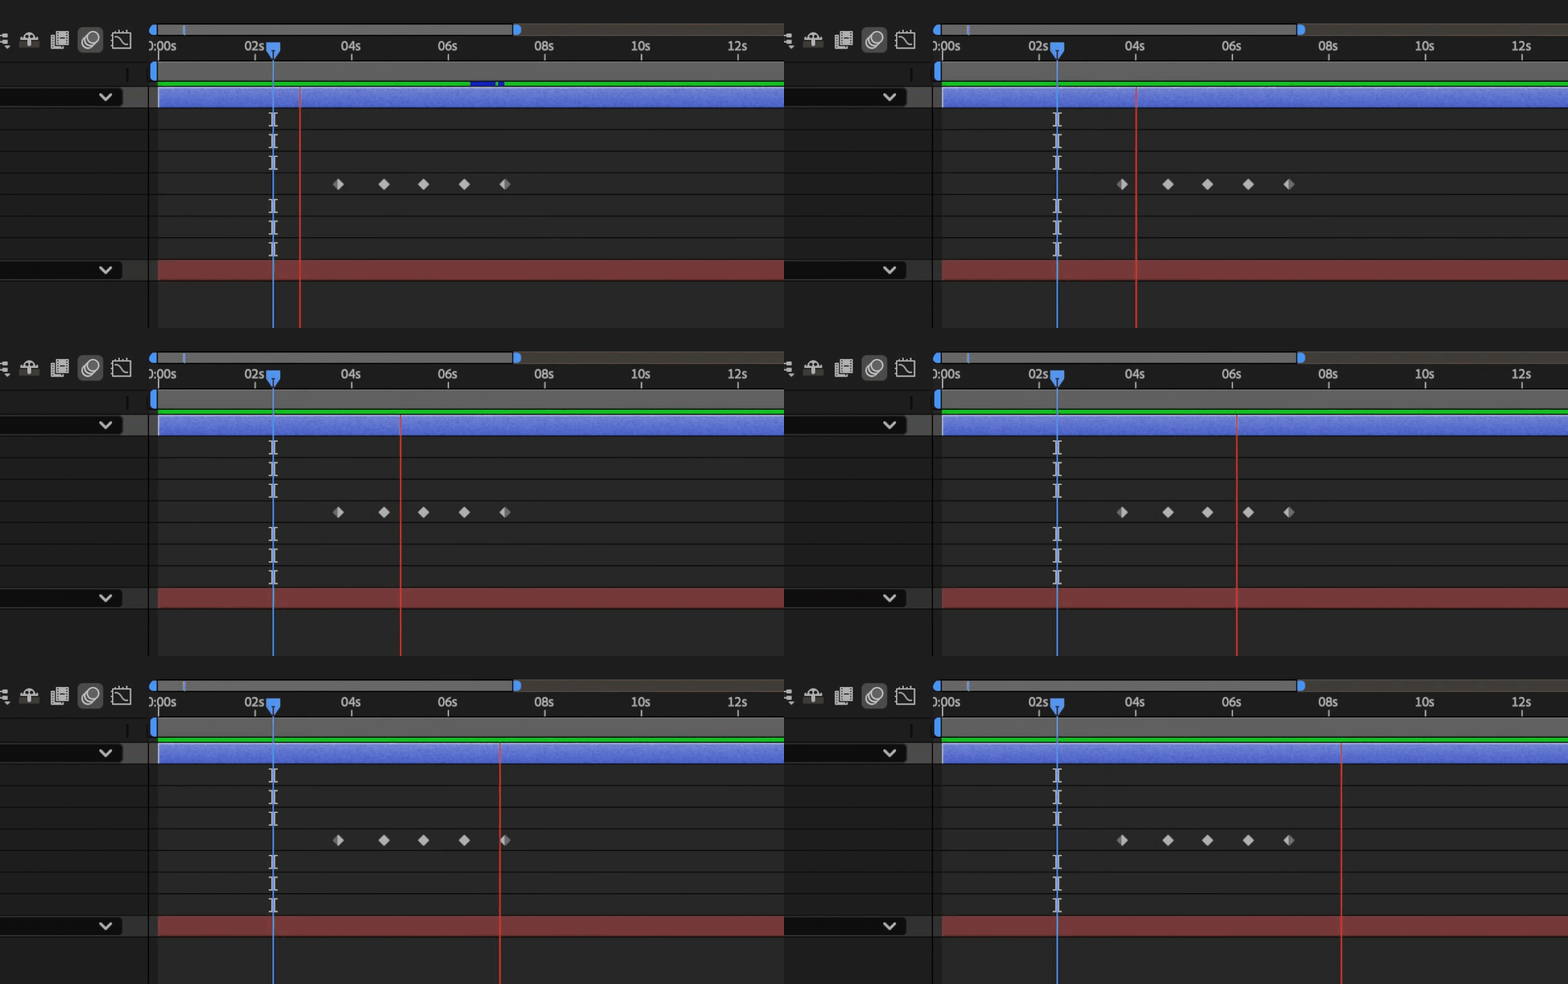
The moment you add that second keyframe, After Effects automatically generates the in between frames through interpolation. You can add as many keyframes as you need, whether you want to scale, rotate, fade, or change color. The possibilities are endless.
If something is off with the animation or the movement isn’t moving correctly, a quick troubleshooting tip is to check that you’re on the right layer and your keyframes aren’t accidentally placed on the same frame.
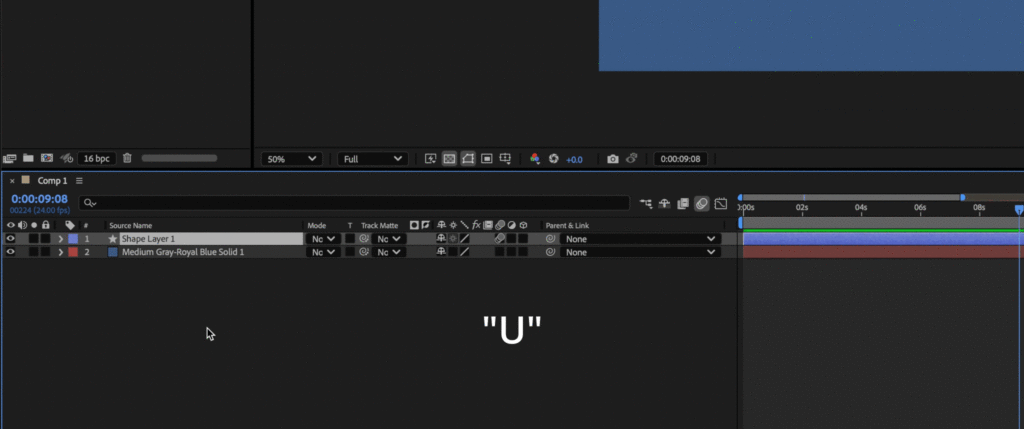
One of the keyboard shortcuts I use most is the U key. Pressing the U key reveals all keyframes on a selected layer, letting you spot timing issues in an instant. If you highlight every layer and hit U, you can see where all the keyframes are – painting a picture for what the entire animation will look like.
Mastering animation controls
Once you’re comfortable setting keyframes, you’ll want to refine how your animation looks and feels. This is where After Effects’ Transform properties come in – anchor point, position, scale, rotation, and opacity.
The Anchor point is the pivot your object rotates or scales around. If you want to manually drag the anchor point to a different position, hit Y and your cursor will change into the Anchor Point Tool. Changing the position of your anchor point can drastically affect the feel of your animation. These can be “controlled” two ways: changing the X value and changing the Y value.
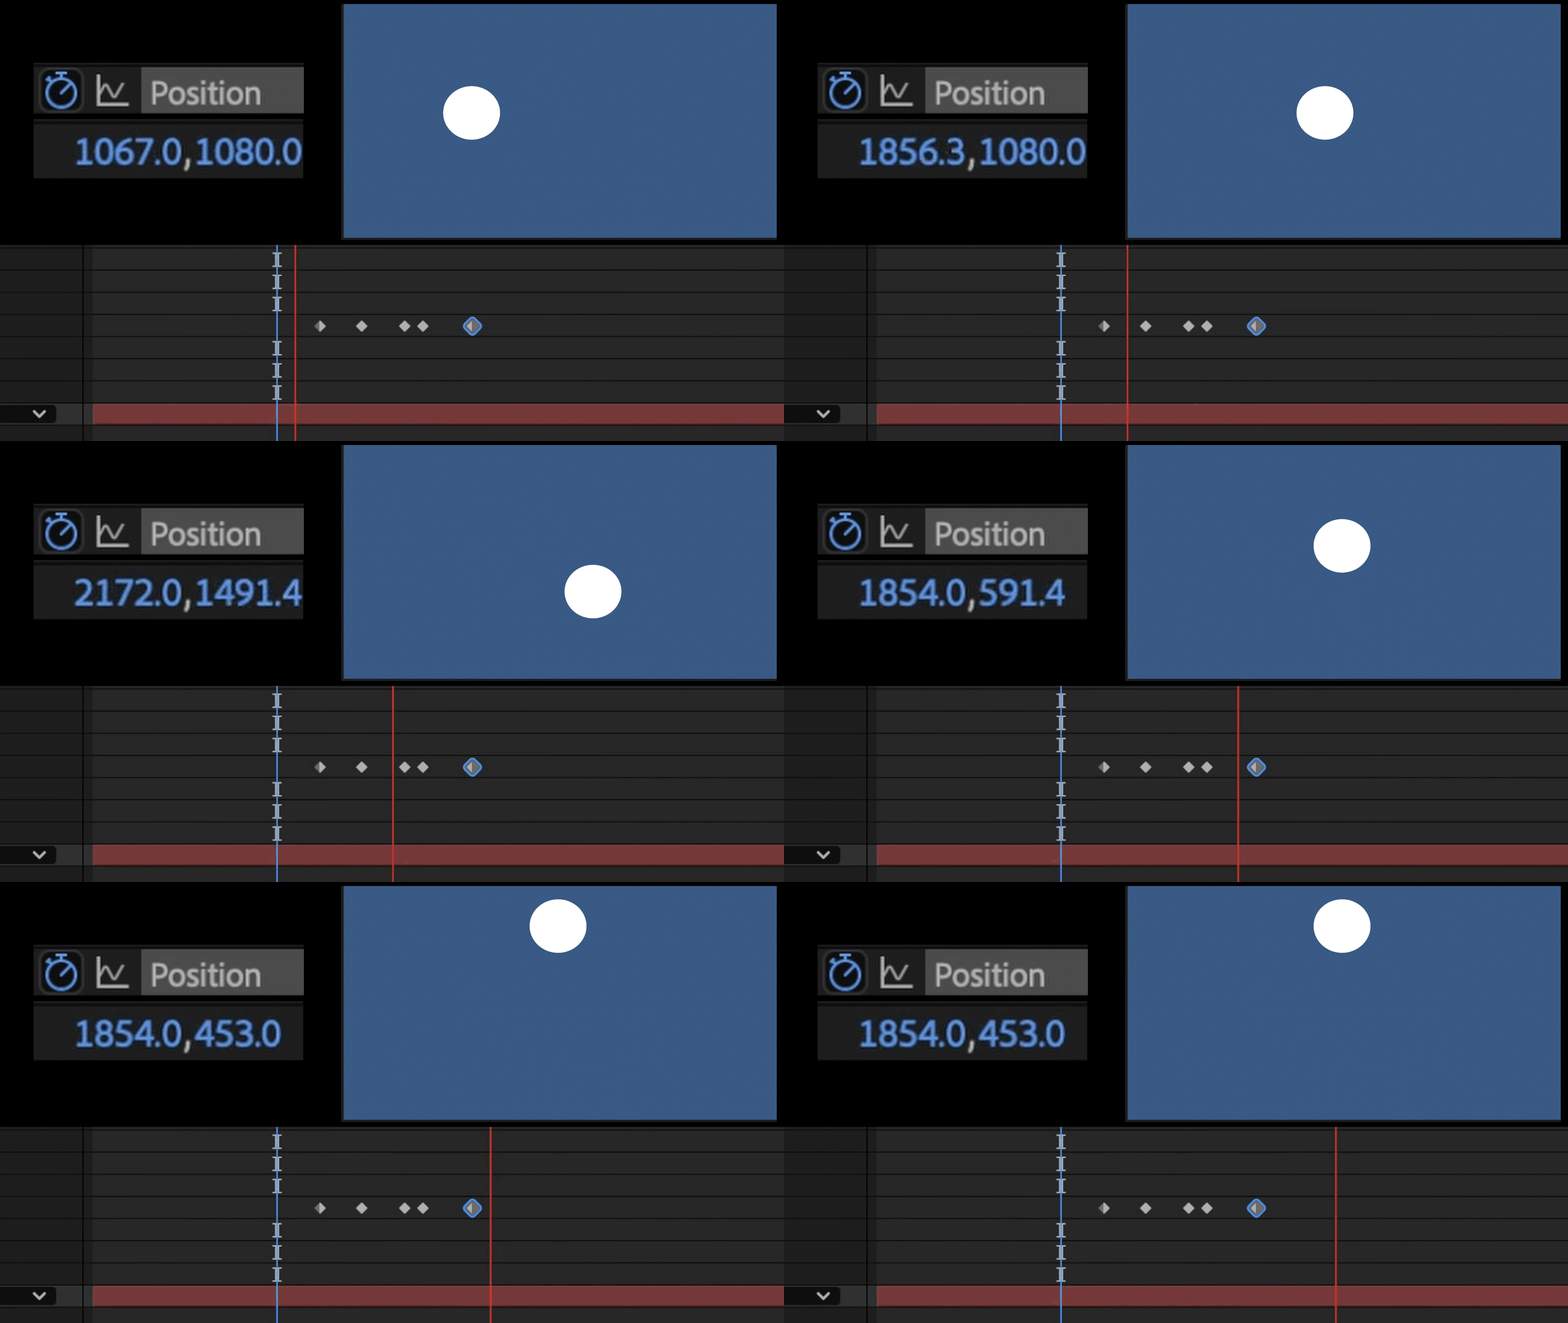
Position (P) moves the layer around your comp.
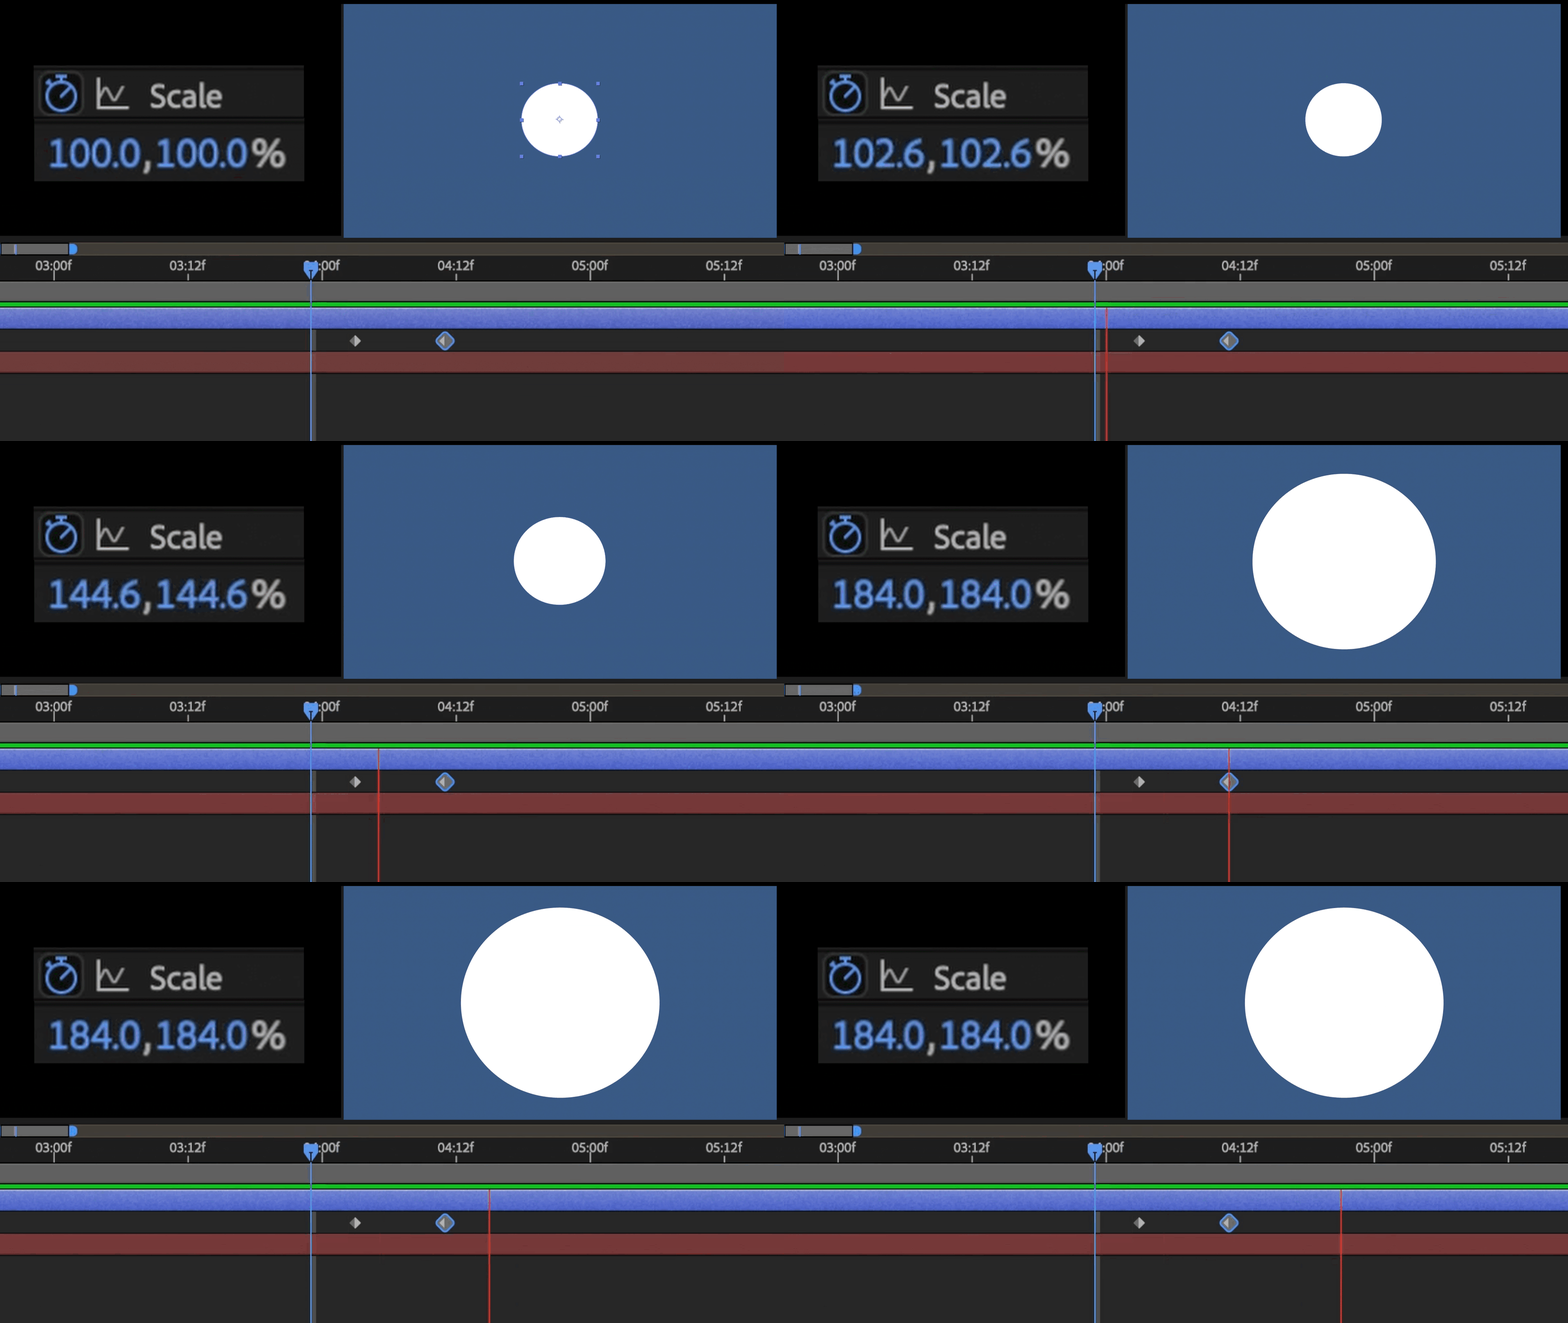
Scale (S) adjusts the size of your object.
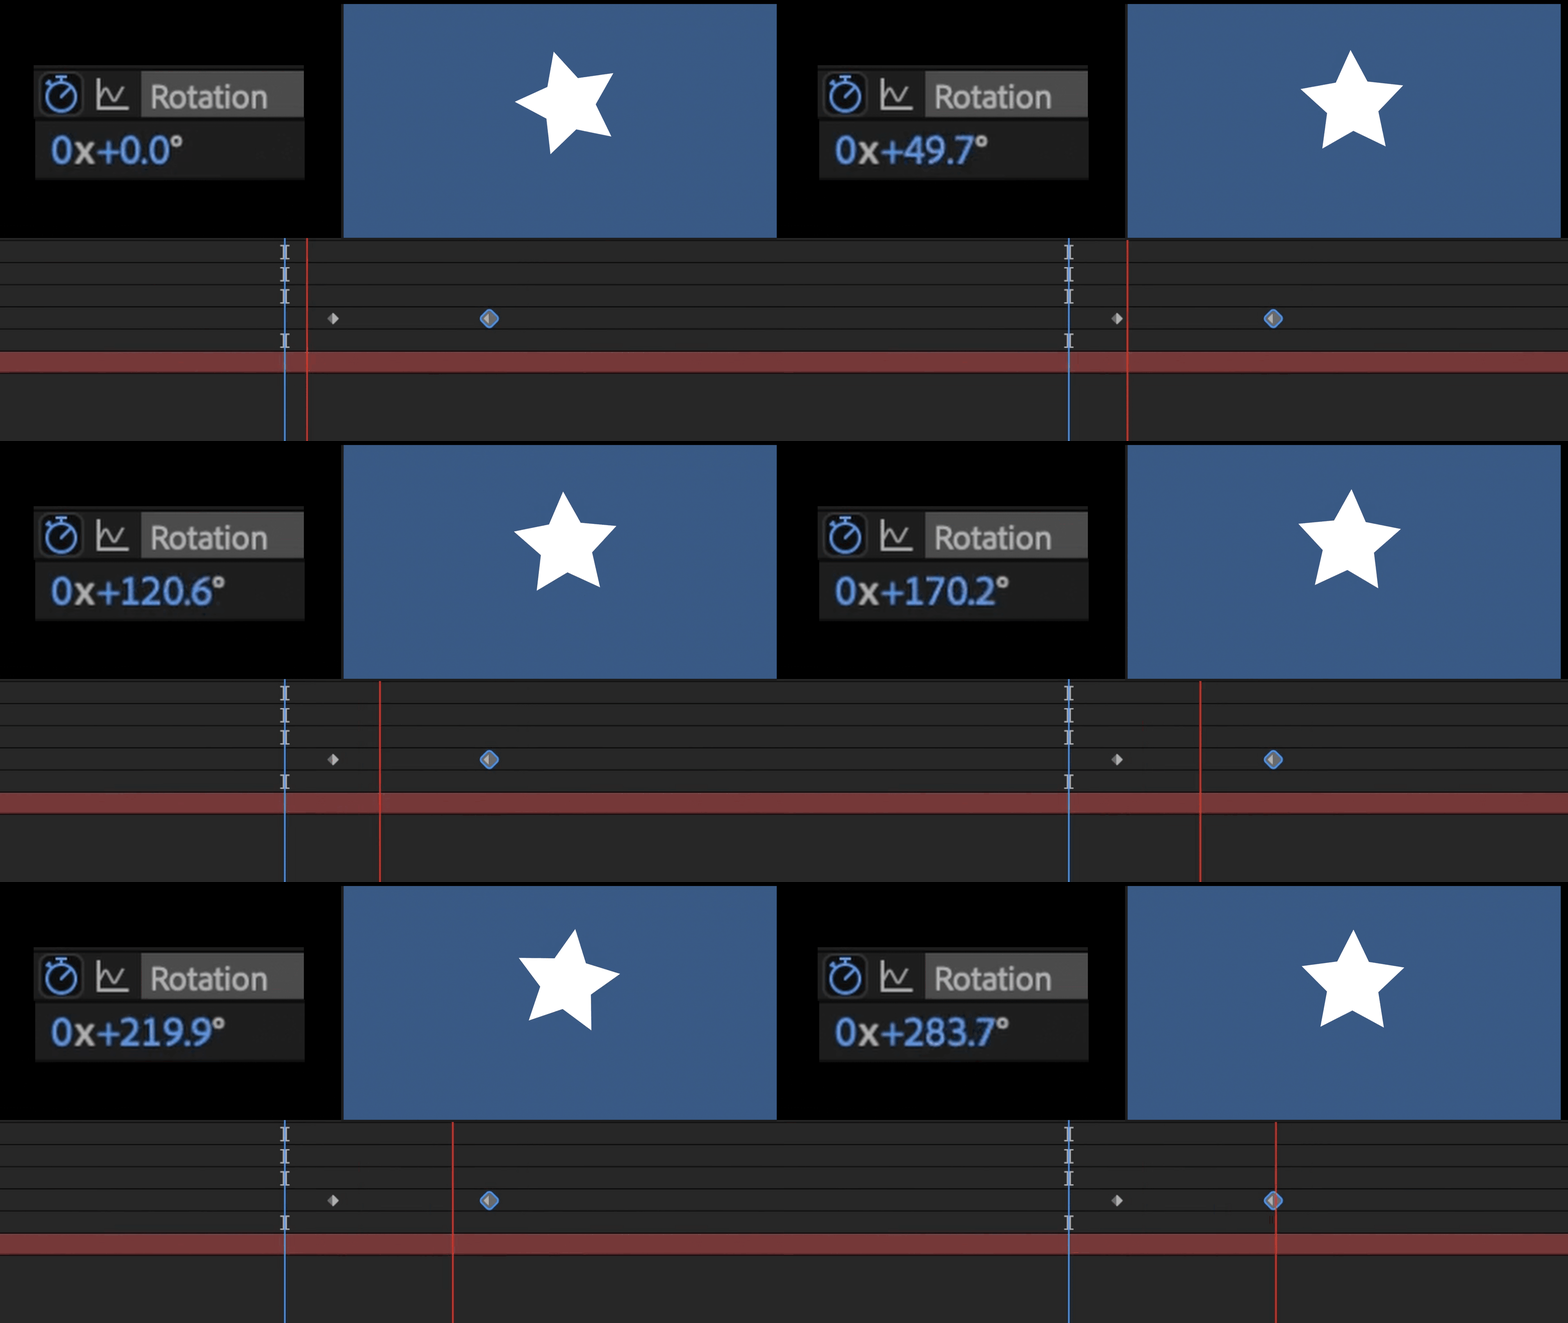
Rotation (R) spins your object and is measured in degrees.
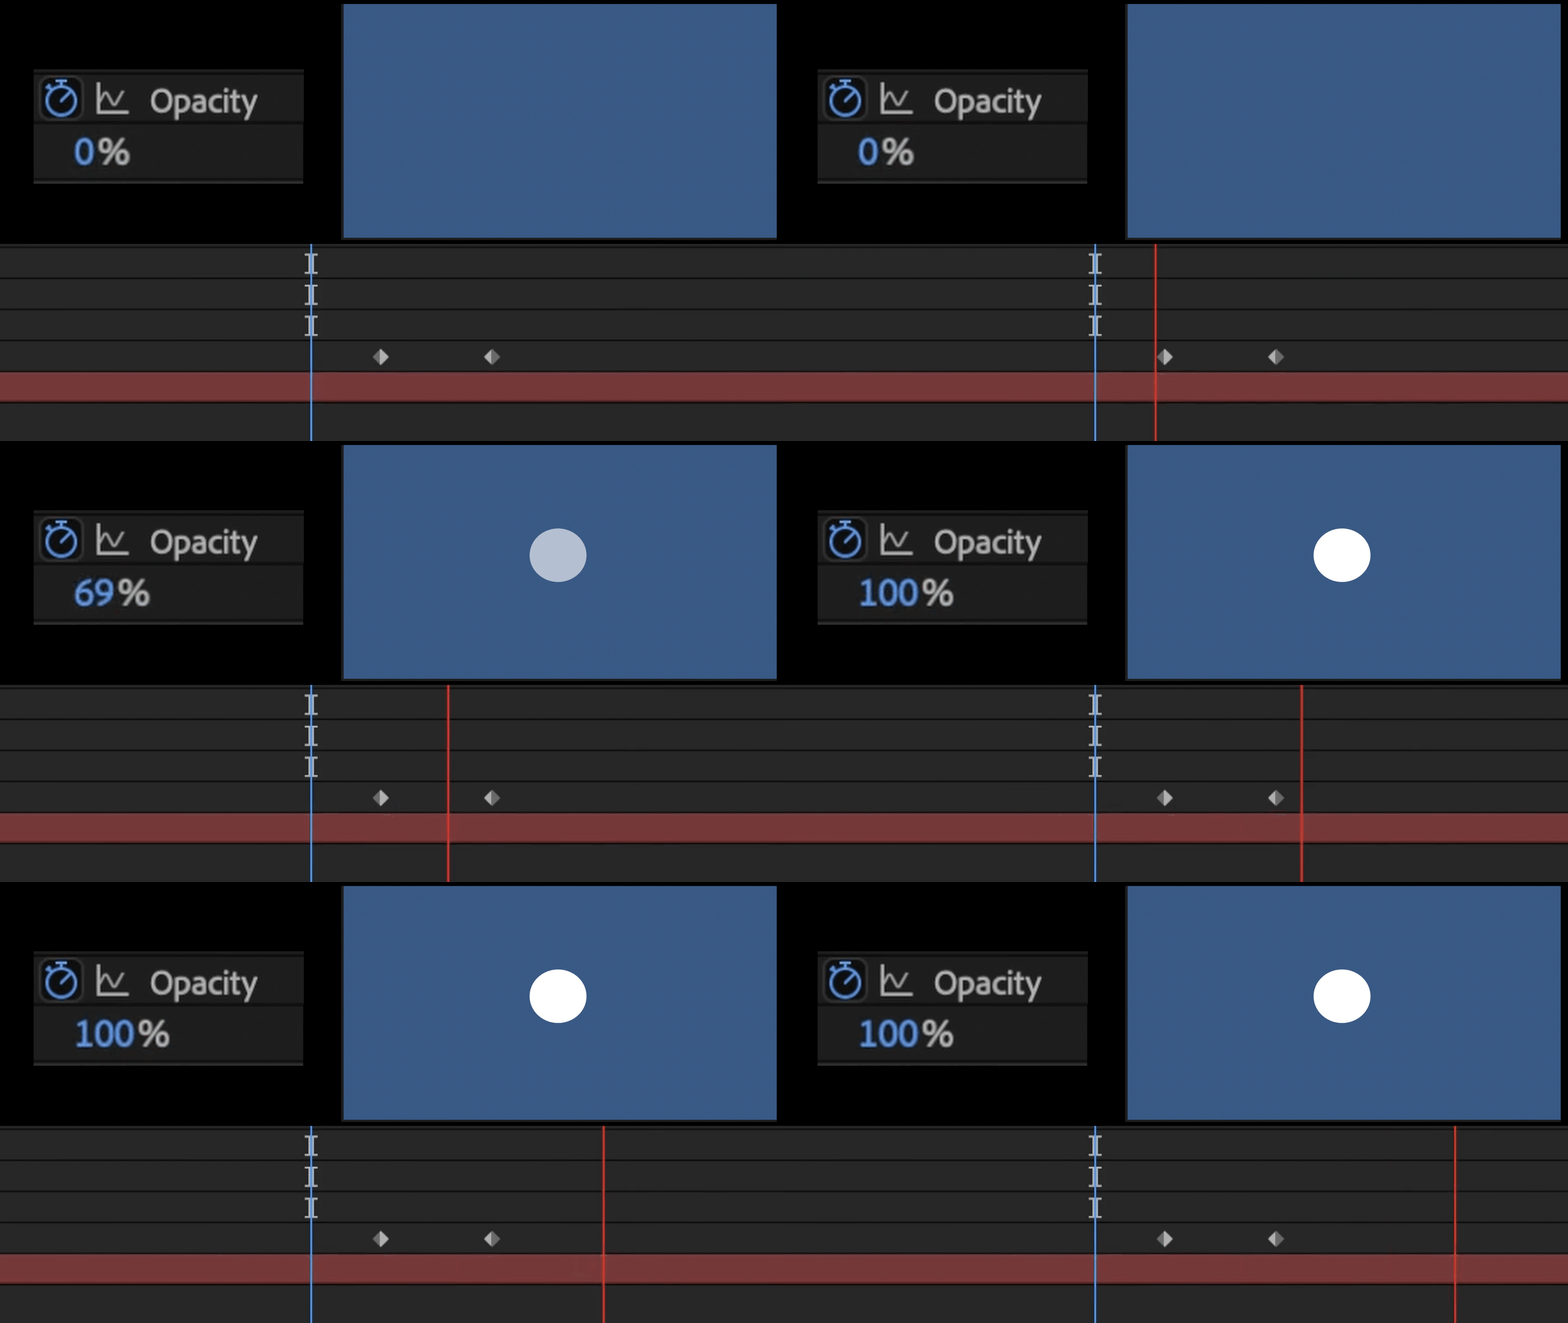
Opacity (T) controls the percentage of transparency for your object.
To learn more about adjusting anchor points in After Effects, check out our tutorial below.
Adding polish with Easy Eases
By default, motion between keyframes happens at a constant, linear pace. But real-world movement isn’t like that. It accelerates and decelerates. Options like Easy Ease helps smooth out animation, making it feel more natural and polished.
To apply it, right click on one or all keyframes by highlighting them and select Keyframe Assistant > Easy Ease. Or you can simply press F9!
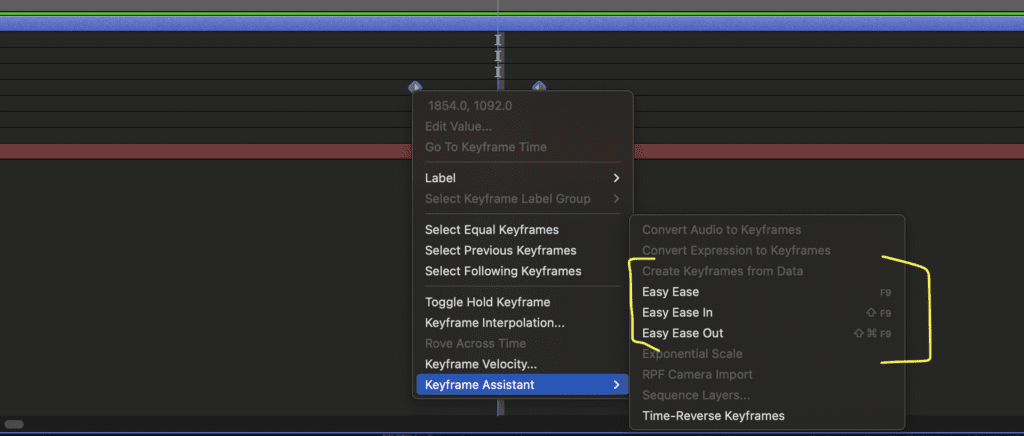
You can apply this technique to your animations by using Ease In or Ease Out to control whether the motion starts slow and speeds up, or begins fast and slows down.
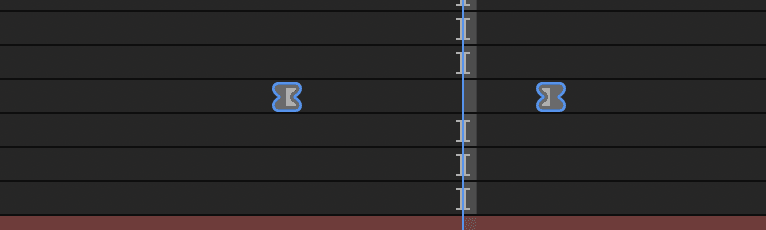
You’ll notice that when you apply the Ease Ease, the keyframe shape will change from a diamond to this hour-glass looking icon.
If you’re wanting even more control, the Graph Editor is where you can shape your animation’s speed curve directly. This lets you add personality. A bouncing ball can snap with extra oomph, or a camera pan can gently slow before stopping. While you might skip this on quick jobs, exploring the Graph Editor is how your animations go from good to great.
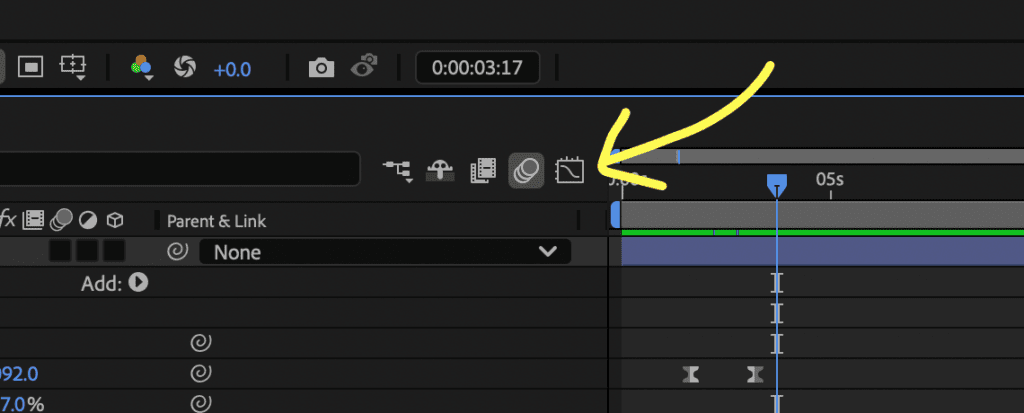
To use the Graph Editor, click on the “Graph” looking icon in your comp toolbar. To open up the Graph Editor for a specific animation, make sure your keyframes are highlighted.
Easing is one of the simplest yet most powerful ways to improve your animations. Imagine sliding an object across the screen at a steady pace, it can look robotic. But if the object accelerates smoothly, cruises, then gently slows before stopping, it feels more natural. Think of it like slamming on your brakes while driving vs slowly pushing down on the break coming to a gradual stop.
The graph editor allows us to add that slow brake. Simply clicking and dragging the Bezier handles, or “ease handles” to the left or right will create the general shape that your animation will play through. So you can see how the graph starts with a sharp incline, meaning your animation moves fast right from the start and then “gradually” slows down as it plays through.
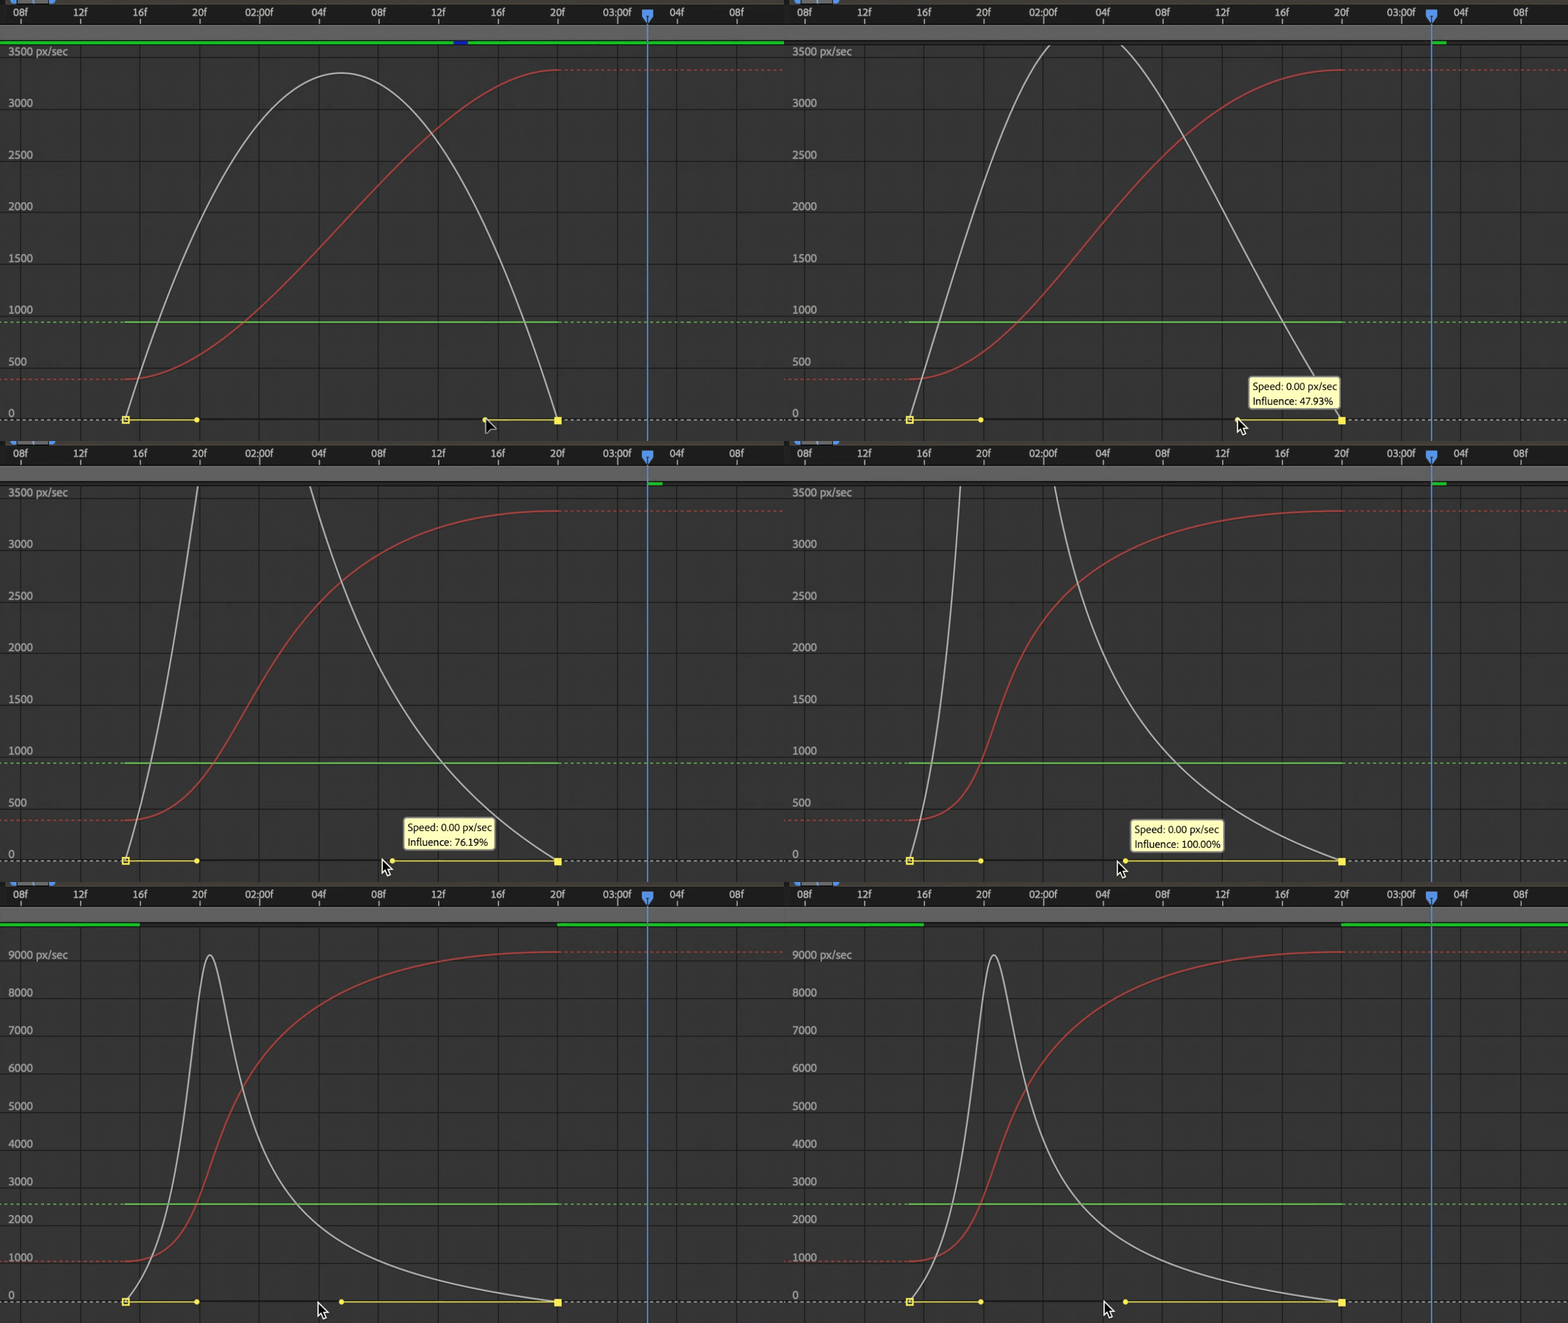
Using the Graph Editor, you can adjust the velocity handles to create your own custom speed curve. This small step can instantly elevate the professionalism of your animation.
A “normal” curve for your graph editor looks something like this:
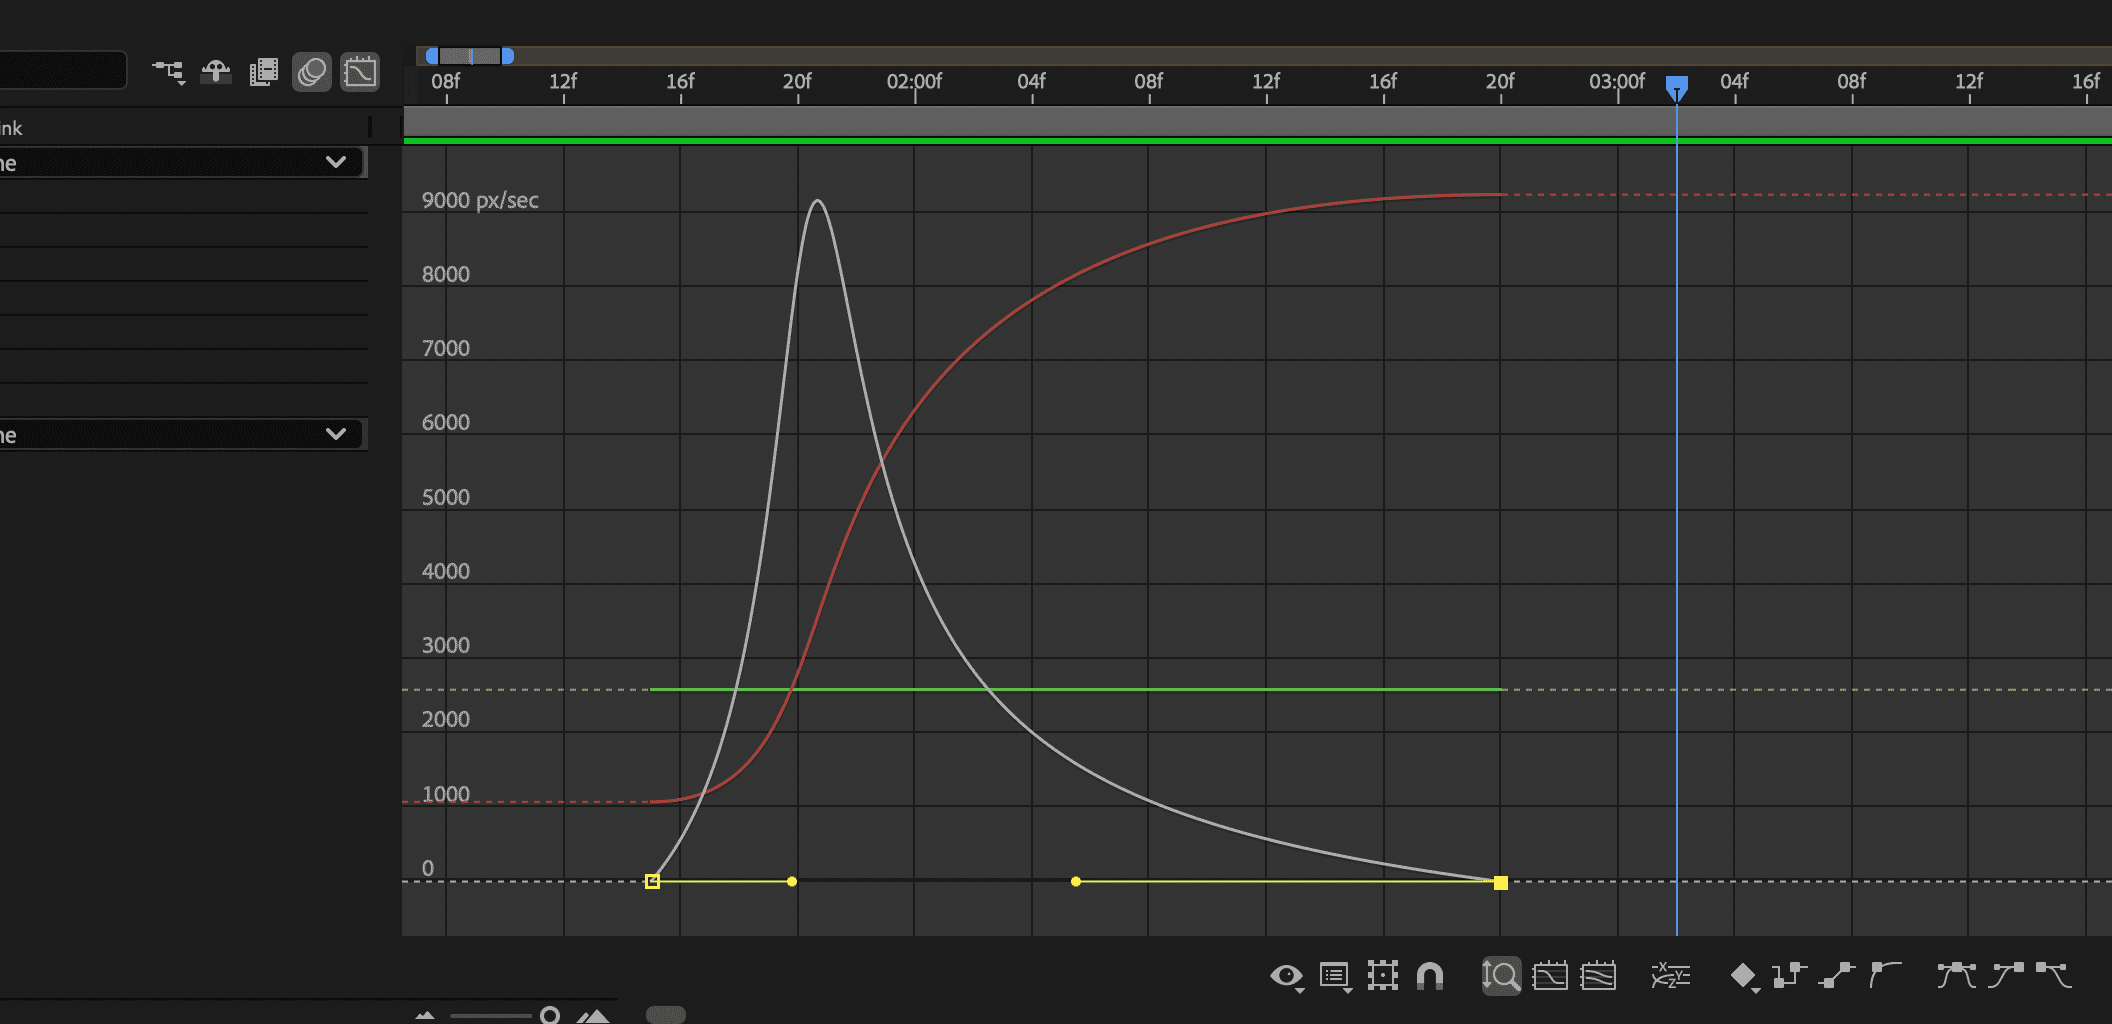
This allows the animation to start quickly then naturally come to a stop, just like the braking metaphor earlier.

Getting started with After Effects animation presets
If creating every animation from scratch feels daunting, presets are a lifesaver. Built-in animation presets are pre-designed combinations of keyframes and effects you can drag and drop onto your layers. For beginners, they offer a quick way to understand motion principles while speeding up your workflow.
How to use built-in presets
You’ll find presets in the Effects & Presets panel. You’ll see that you have the option to choose between the different assets you’ll be animating, whether it’s Text, Shapes, Transitions etc.
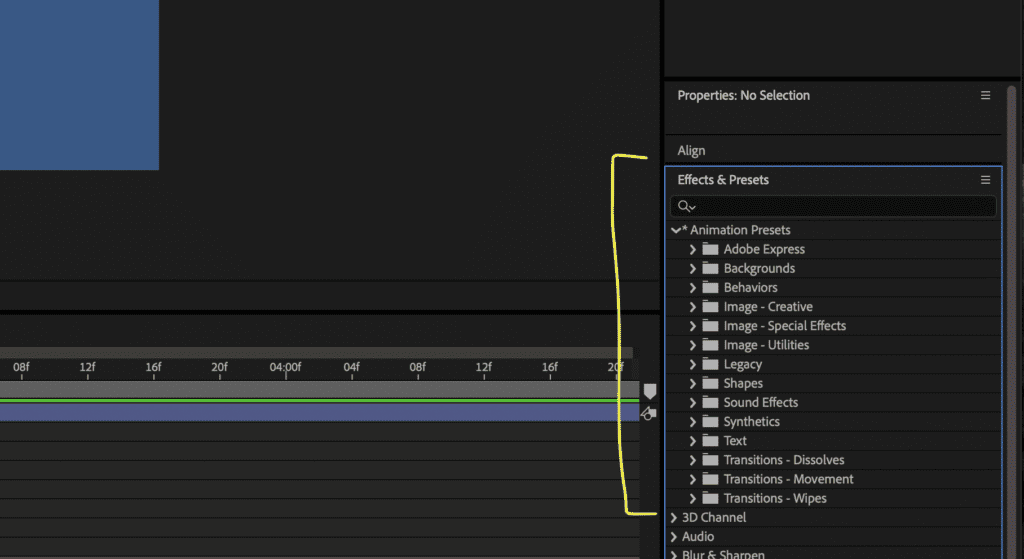
Searching for terms like “fade” or “slide” will reveal dozens of options. The effects are typically pretty self-explanatory like “Fade Up or for Text Animations you’ll find Slide Up By Word. Drag a preset onto your selected layer, then press U to see the keyframes it created.
From there, you can tweak timing or properties to make the animation your own. Without customization, presets can look generic. So try to think of them as a starting point for you to build off of rather than the finished product.
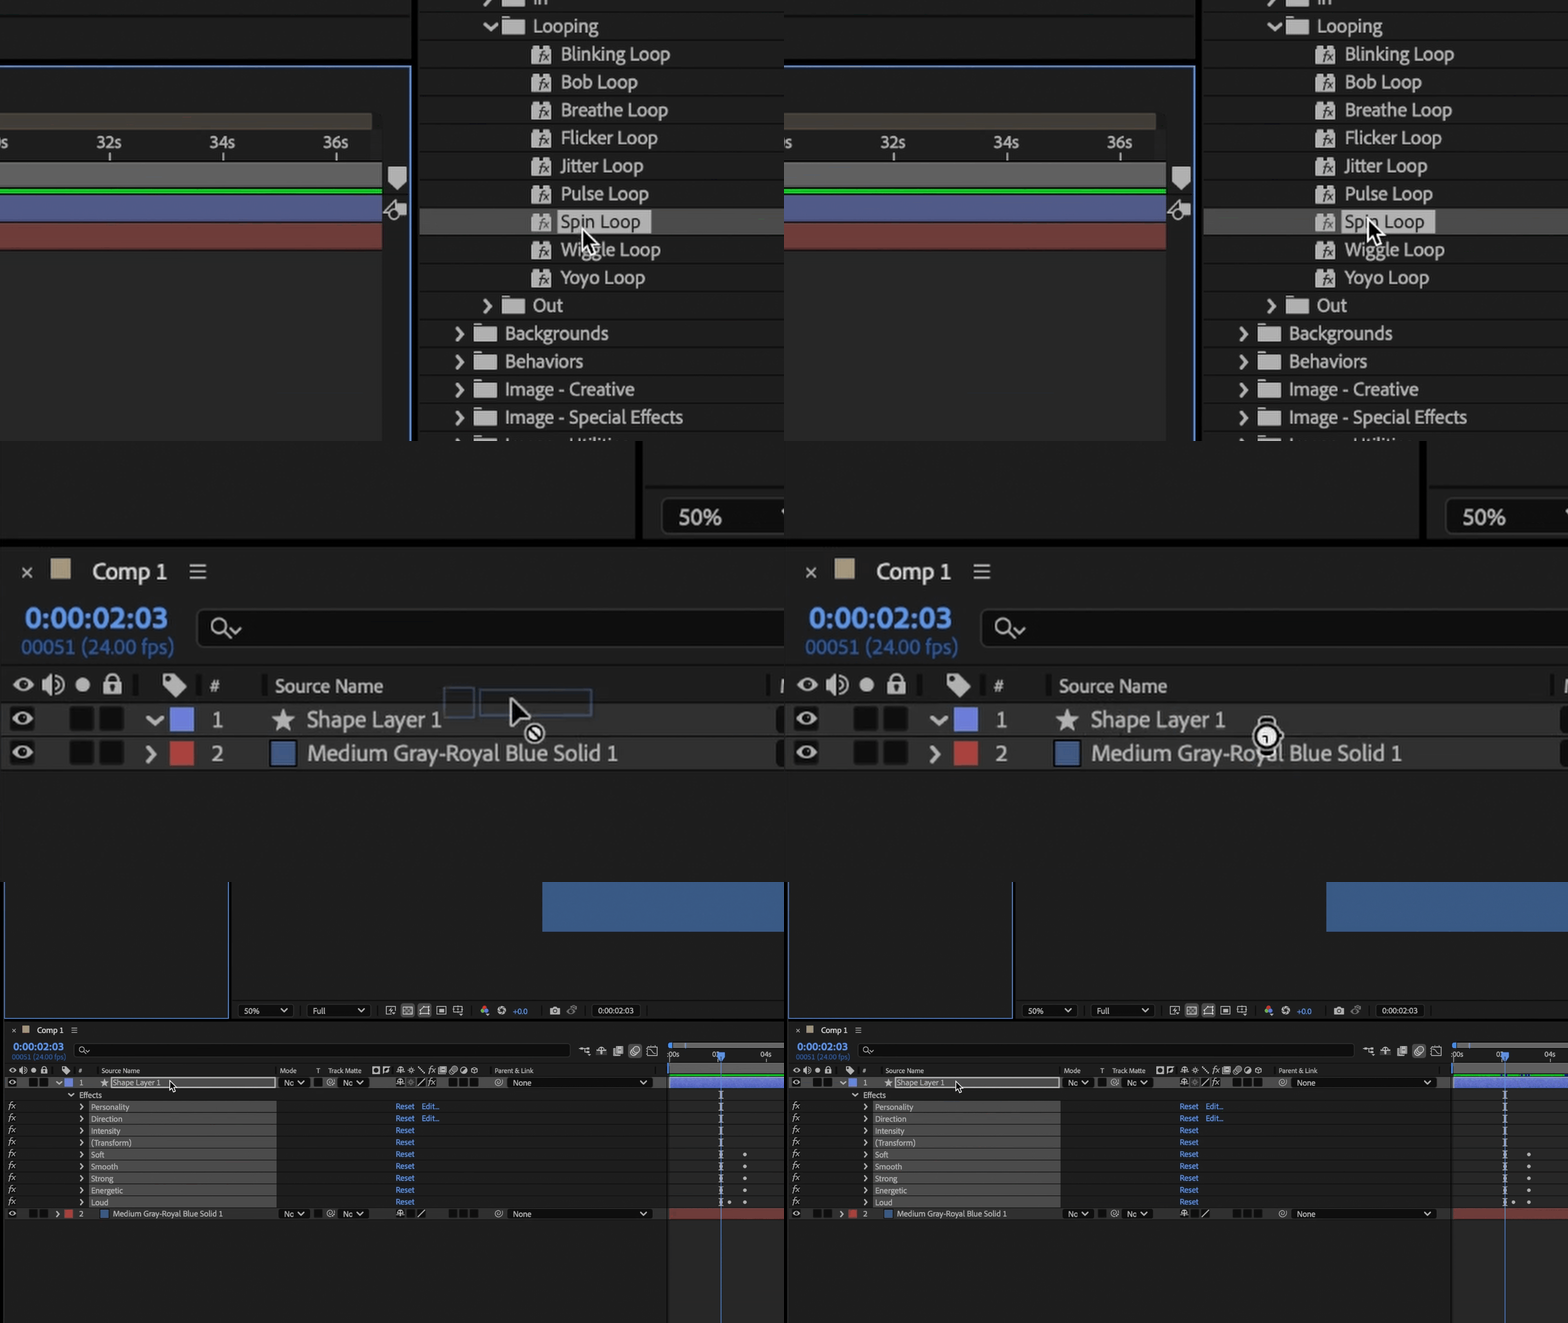
Not all of the presets are winners, but sometimes they’re just what you need if you’re in a time crunch. Or if you’ve completely run out of ideas for how to animate an element.
Creating and saving your own presets
As you animate more, you’ll likely develop styles and effects you want to reuse. After Effects lets you turn these into custom presets that can save you hours on recurring projects.
To create one, animate your layer with the size and position you want, then select those keyframes. Next, click the Animation drop-down menu in the top nav and choose Save Animation Preset.
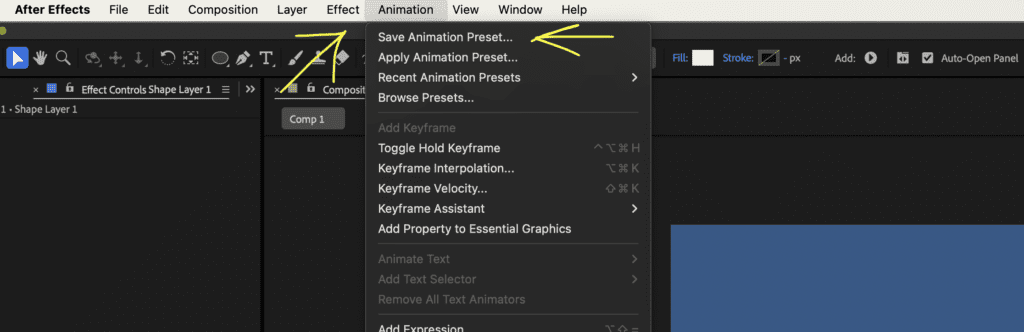
Name it clearly and save it in your presets folder or wherever you store your projects. The custom preset will then appear alongside built-in options for quick application.
This is especially handy when working with clients. One of my clients asks me for the same type of video every quarter, so having the animations saved is a huge time saver. If you have brand animations, creating reusable presets ensures consistency to the look and feel of your work. And, most importantly, speeds up your future edits.
Combining controls and presets for custom animations
Presets are just the beginning. The magic really happens when you combine them with your own animation controls.

For example, you might apply a “Slide Down by Character” text preset, then add your own scale and rotation keyframes to create a more interesting and dynamic entrance for the text. Tweaking easing curves in the Graph Editor (remember we love the Graph Editor) can give your motion some personality and make your work stand out.
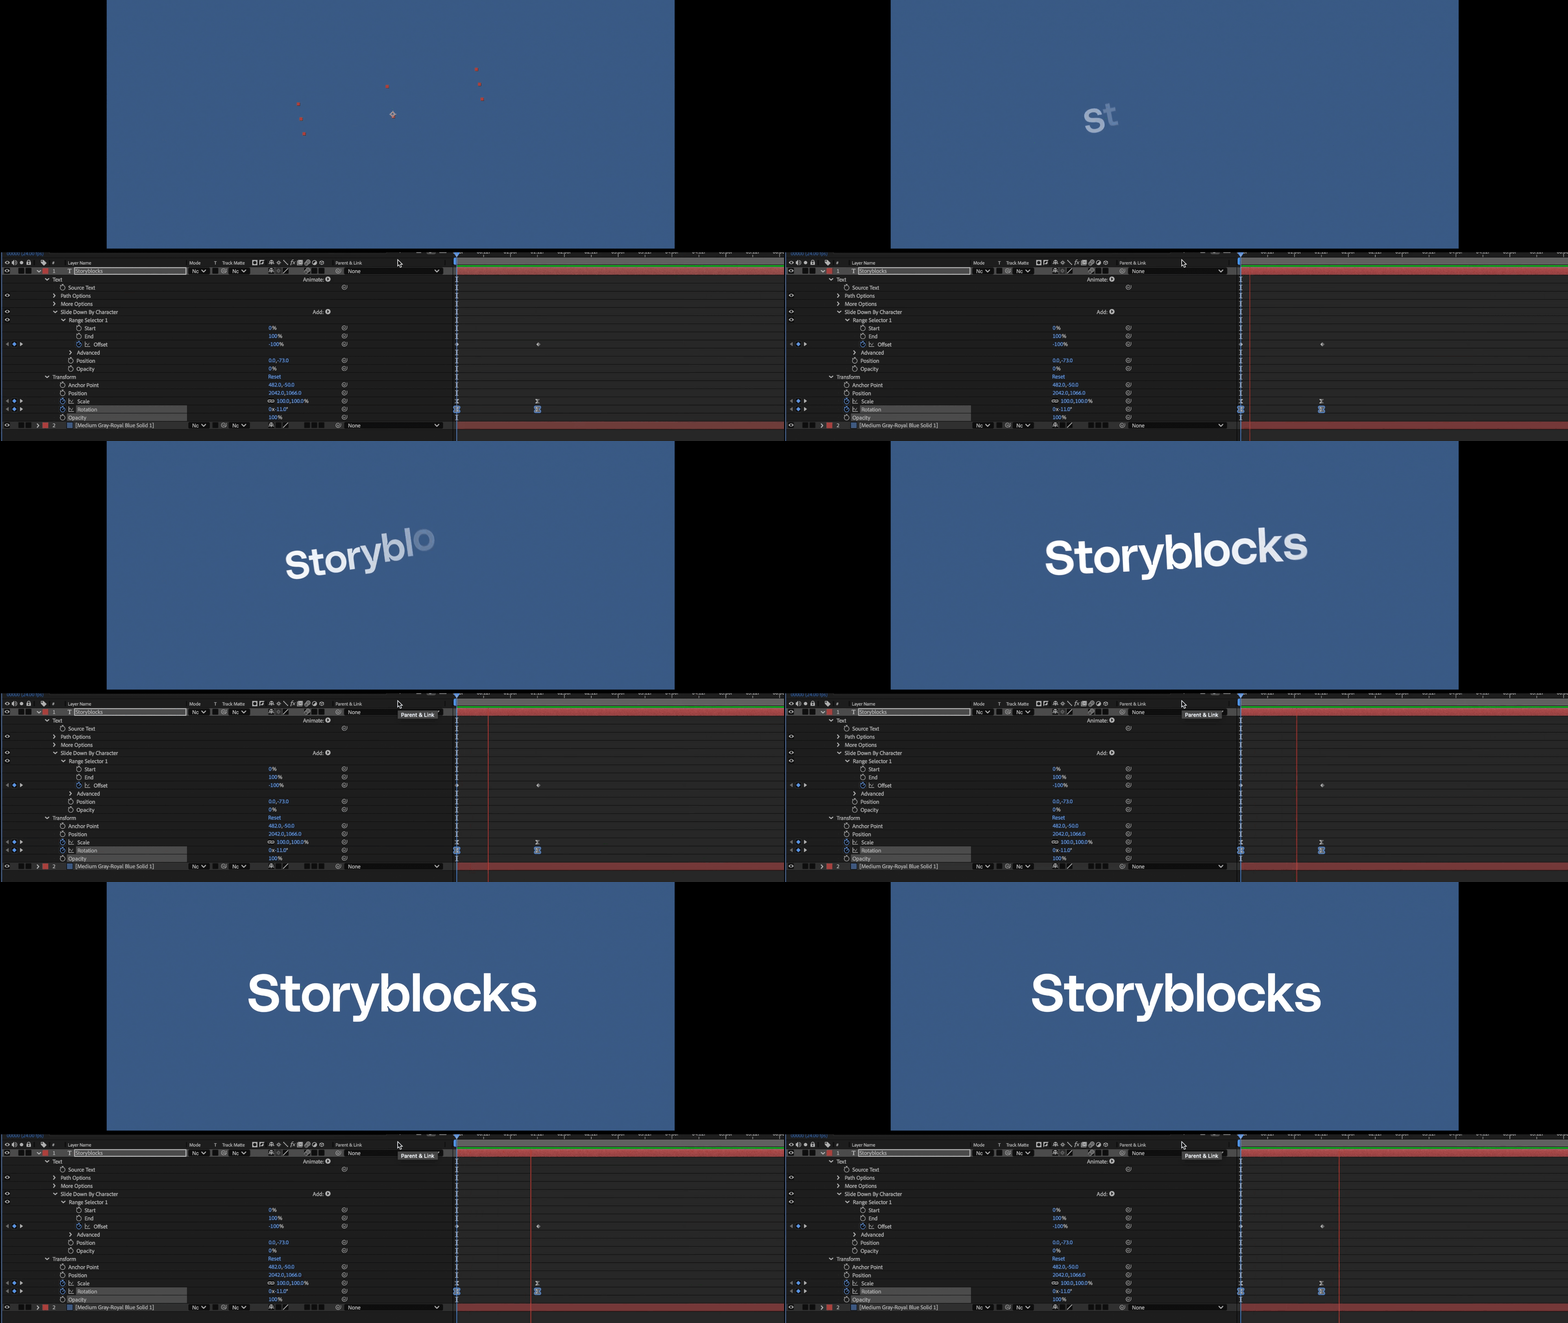
Treat presets like a foundation, not a final product. Look closely at the keyframes they create, adjust their timing, and layer in additional transformations. Even small adjustments like repositioning the anchor point before scaling can make the animation feel customized.
Customizing the motion to fit your project
After applying a preset, customization is key to fitting your project’s style.
Reveal the preset’s keyframes with U, then drag them closer to speed things up or spread them out to slow the motion. From there, adjust the values to fit your design and tone of the video. For example, choose a rotation of 15 degrees instead of 45 for subtlety.
Using Motion Blur is another great way to change the look of a preset ever so slightly. The Motion Blur icon is three small circles stacked on top of each other. You can find it next to the Parent & Link dropdown option in your Layer.
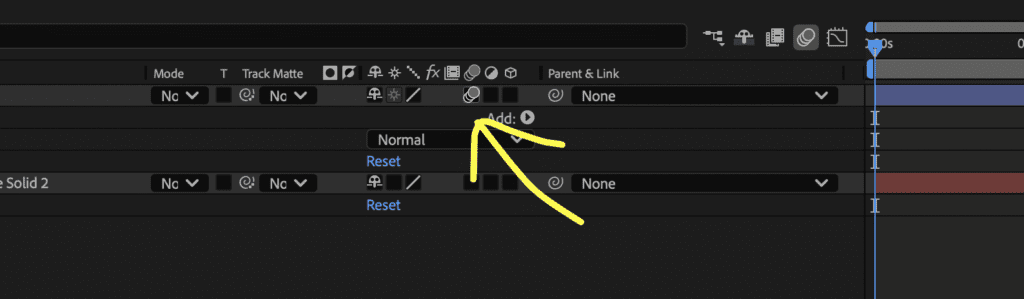
Motion blur gives your animations the look of 24 frames per second, helping make them look more natural to the human eye.
The best way to make your animation and project as a whole look professional is to use Easy Ease or the Graph Editor to polish pacing and smooth out movement. Jarring movements for animations will be an immediate red flag to potential clients, so you want to avoid that at all costs.
If you’re working with multiple animations in the same project, customizing presets helps maintain consistency while keeping each element distinct. The great part about After Effects is it lets you customize every single element you’ll work with. Even the already built ones.
Beginner animation mistakes to avoid
Even with great tools, beginners can stumble. Overusing presets without tweaks or adding your personal touch can lead to generic and boring looking animations. Let’s talk about some mistakes you might make, why it’s okay and how to learn from them.
- Ignoring the Graph Editor misses opportunities to add polish and natural flow. Animating too many properties at once can overwhelm your audience. So be sure to keep motion purposeful and focused.
- Another common pitfall is neglecting the anchor point. If your object scales or rotates oddly, check its pivot location. Obviously this isn’t a huge deal, its just about limiting the small mistakes you make while animating that can really add up by the end of your project.
- Remember to preview your animation regularly. Always watch your animation and video back, and often. Waiting until the end to play it back makes catching timing issues really hard to spot, so review often as you go. Nothing worse than getting far in an edit and having to backtrack all your animations, in some shape or form, because you were off with one of the first keyframes.
Learn how to do even more in After Effects
Once you’re comfortable with keyframes, controls, and presets, you can tackle more advanced projects like animating logos, creating intricate text reveals, or building looping motion graphics.
To boost your learning curve, Storyblocks offers a vast library of pre-made After Effects templates with built-in animations and professional graphics. A helpful tip an editor gave me once is to download a template and deconstruct the template.
All of the keyframes and effects used to make a template are right there in the composition – it’s a blueprint! Look at how it was made and recreate it one keyframe at a time. Then, be sure to customize all of the details. I’ve been called out by a client for using a template they had seen in another brand’s video. (Oops.)
They’re a great way to start fast and learn by dissecting real-world examples. Whether you’re working on a YouTube intro, creating for TikTok or Reels, a commercial, mastering the basics of animating in After Effects will give you the confidence to bring your creative ideas to life.


